Our Roofing Blog

Stay up to date on the latest roofing tips, trends, and insights from the experts at OpenBox Roofing. Our blog covers everything from seasonal maintenance to choosing the right materials for your home.

Whether you’re researching a new roof, learning about repairs, or exploring sustainability options, our articles make roofing information easy to understand.

Asset 1 7
Featured Article

3 Qualities to Look for When Hiring a James Hardie Siding Contractor

about us hoodie 150x150 1
Posted By: Openbox Roofing
Here at Open Box Roofing, we strongly believe that our customers deserve nothing less than the best. That’s why we’re proud to be a part of the James Hardie Contractor Alliance Program. James Hardie siding is on more than 8 million homes across North America because it’s the best fiber cement siding product on the market, […]
Asset 17

Dealing with roof damage can be a daunting experience, but knowing how to navigate the process of filing a roof claim with your insurance company can make all the difference.

In this comprehensive guide, we will walk you through each step of filing a roof claim, from understanding your homeowners insurance policy to receiving payment to get a roof replacement or navigate repairs.

With expert tips and insights, you’ll be better prepared to protect your most valuable asset – your home – in case of any unexpected roofing issues.

Understand Your Roof Insurance Policy

Before diving into the process of filing a roof claim, it’s crucial to fully understand your roof insurance policy. This will give you valuable insight into what types of damage are covered and any limitations or exclusions that may apply.

Homeowners should keep in mind that their insurance policies can differ substantially depending on their provider and specific terms within the contract.

Some common coverage elements found in roof insurance policies include wind, hail, fallen tree branches, and other storm-related events. However, there may be certain exclusions such as poor maintenance or improper installation that could potentially void your claim.

Additionally, each policy comes with its deductible – this is the amount you’ll need to pay out-of-pocket before your insurer starts covering repairs or replacements.

Another key factor to consider when understanding your policy is knowing whether it offers actual cash value (ACV) or replacement cost value (RCV). ACV means that depreciation will be accounted for during reimbursement – reducing how much money you receive from a payout compared to RCV which typically covers full repair costs based on current market rates without factoring in depreciation.

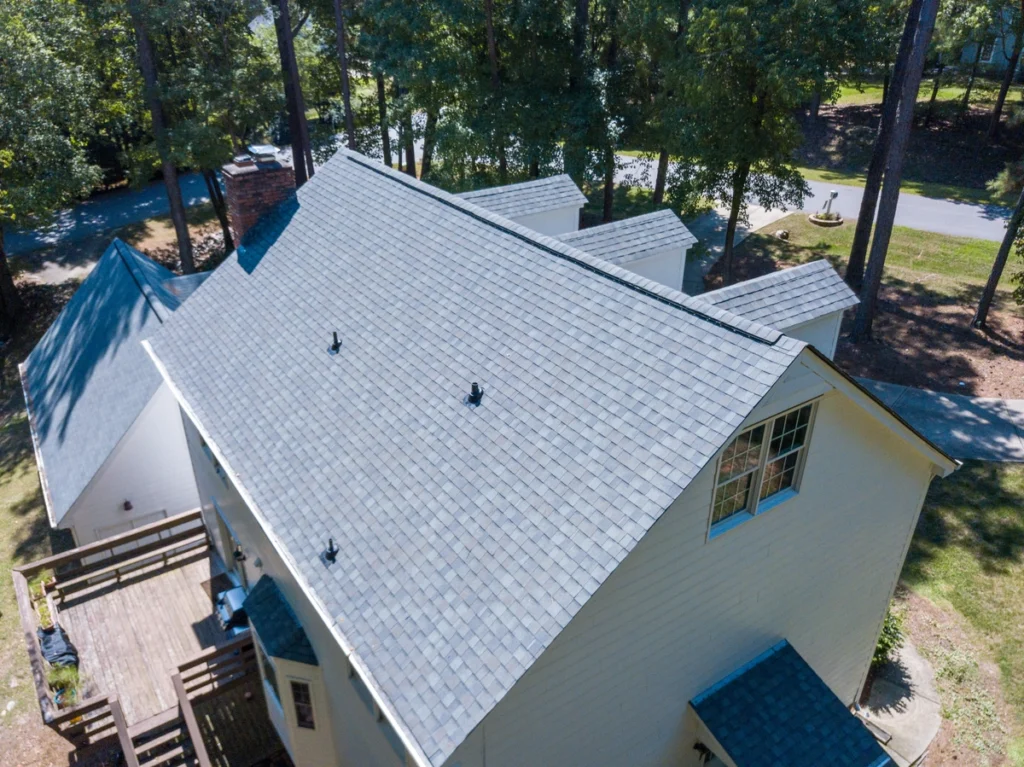
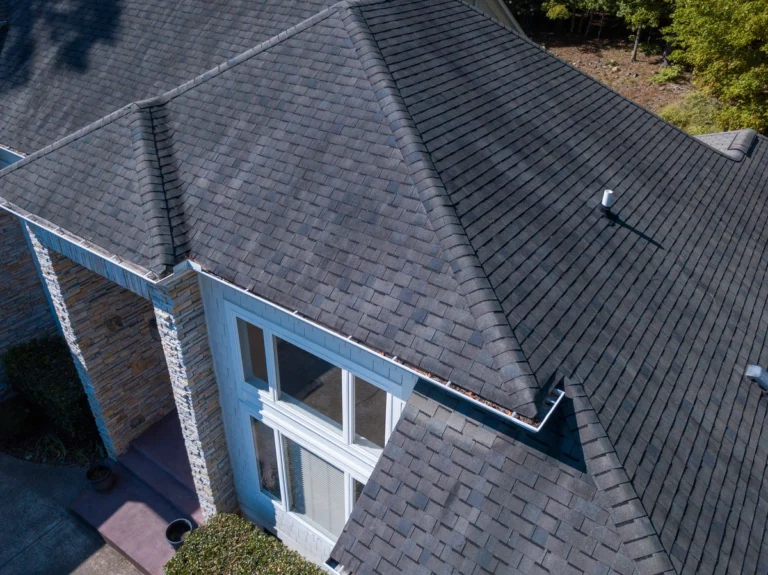
Assessing Roof Damage

contractor performs roof inspection before homeowners file roof claim

Prompt action is crucial when it comes to assessing roof damage after a severe weather event, such as a hailstorm or high winds. Begin by conducting a visual inspection of your home’s exterior and its surroundings.

Look for signs of damage like missing shingles, dented gutters, fallen tree branches, or other debris on the roof.

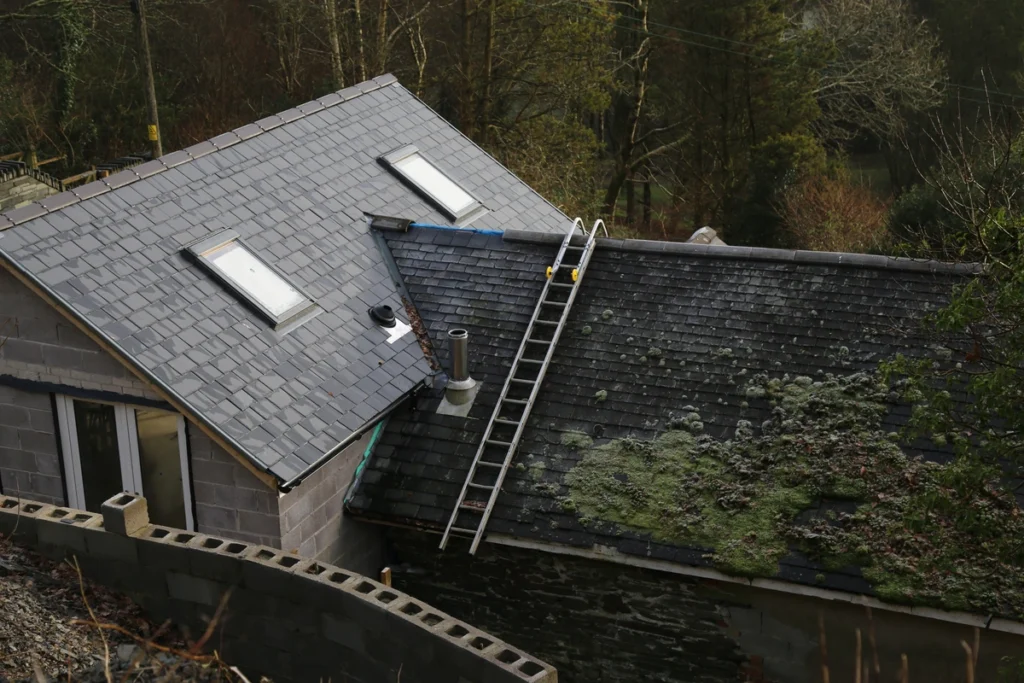
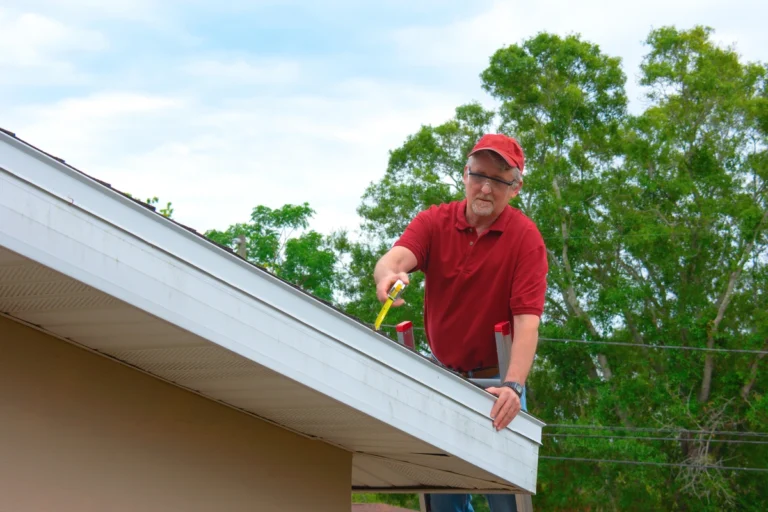
Enlisting the help of an experienced roofing contractor not only ensures accurate assessment but also helps identify less-obvious yet critical issues that may have been caused by poor maintenance or previous damages.

These specialists can provide valuable insights into the extent and severity of roof damage and help determine whether repair or complete roof replacement is necessary.

During this stage of assessment, don’t forget to check any interior signs that indicate potential leaks due to damaged roofs – such as water stains on ceilings or walls.

Documenting Damage And Preparing For Claims

One crucial aspect of filing a roof claim is accurately documenting the damage and preparing all necessary documents for your insurance company. Begin by taking clear, high-resolution photos of any damaged areas such as missing shingles or leaking spots in your attic. This will ensure you capture everything your insurance company covers.

Don’t forget to capture images of both the exterior and interior regions impacted by the damage.

In addition to photographs, write down detailed notes about any affected sections of the roof, including when you first noticed the issue and steps you took to mitigate further complications.

When possible, secure receipts or invoices from roofing contractors who provided temporary repairs or emergency services like tarping over holes until more permanent fixes could be made.

Lastly, contact multiple reputable roofing companies for estimates on repair costs before submitting documentation to your insurance provider. This helps ensure an accurate quote based on industry expectations while giving you options should one contractor’s proposal fall short of meeting the settlement offer from your homeowner’s insurance company.

Filing A Claim With Your Insurance Company

woman fils roof claim before repairs

After assessing and documenting the damage to your roof, it’s time to file a roof insurance claim with your insurance company. This can typically be done online, by phone or via mail. When contacting your insurer, have your policy number handy and provide as much information about the damages as possible.

It’s important to remember that filing a claim for roof damage doesn’t guarantee approval and coverage by your insurance provider. Depending on whether or not the damages are covered under your policy and how extensive they are, you may receive partial coverage or none at all.

To avoid any delays in processing times, make sure all necessary documentation is included when submitting your claim. Always keep copies of receipts for any temporary roof repairs made prior to the adjuster’s visit – these expenses may be covered under repair coverage if approved by the insurer.

Meeting With The Adjuster

After filing a roof insurance claim, you will have to meet with an adjuster assigned by your insurance company. The insurance adjuster will inspect your damaged roof and assess the cost of repairs or replacement.

During the meeting with the adjuster, make sure to point out all areas of damage that you previously documented. If necessary, get a contractor to do their own inspection and estimate on roof repairs needed.

Remember that while this step may seem daunting, it’s vital for receiving proper compensation from your insurance provider.

Negotiating The Settlement Offer

Once you have filed a roof insurance claim with your insurance company and an adjuster comes out to assess the damage, they will make an initial settlement offer.

Before negotiating, it’s crucial to understand the details of your policy and what kind of coverage you have. For example, some policies may only provide actual cash value rather than replacement cost coverage.

When negotiating with the insurance company, be respectful but assertive about getting a fair payout that covers all necessary repairs or replacements. Don’t be afraid to push back on lowball offers or unfair assessments made by the adjuster.

By being prepared and informed during the negotiation process, you can ensure that you receive proper compensation for any roof damage covered under your insurance policy while keeping premiums low in future years.

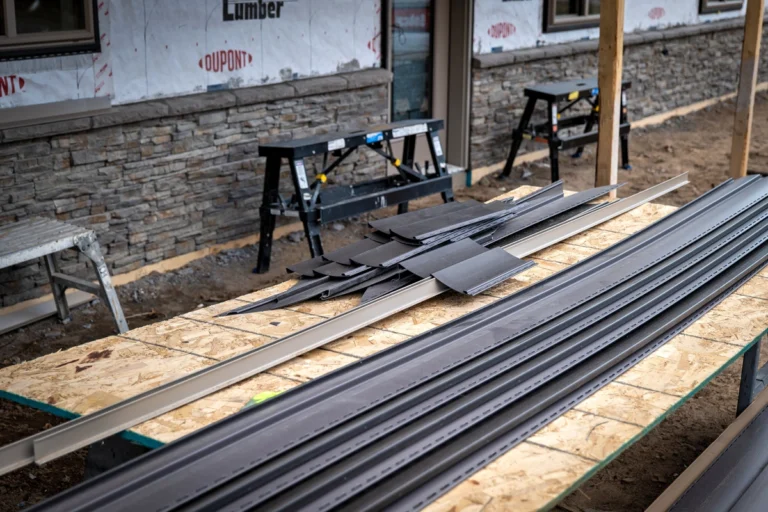
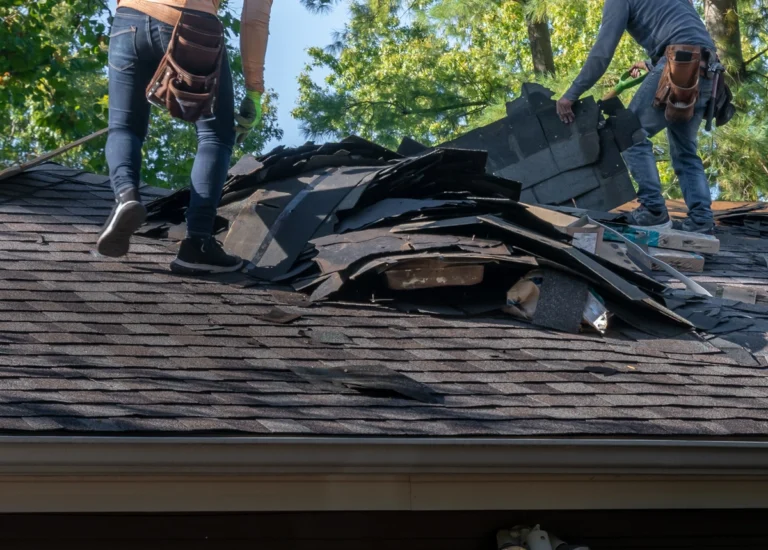
Completing Repairs And Receiving Payment

roof claim filed and shingles repaired by contractors

Once the insurance company approves your claim, it’s time to get started with the repairs. You can either hire a roofing contractor or do the repairs yourself if you have experience in roof repair.

During the repair process, keep all invoices and receipts for materials used in case your insurance provider asks for them later.

Once all repairs are done, submit a final invoice to your insurance company for payment. The amount of payment will depend on whether you choose actual cash value or replacement cost coverage in your policy.

With actual cash value coverage, the insurer pays only what the damaged item was worth at the time of loss.

Remember that completing necessary repairs quickly is essential not just for aesthetic reasons but also for safety concerns as well as avoiding further damage to both your roof and entire home caused by mold and water damage which could be expensive beyond means.

Conclusion

Filing a roof claim with insurance can be overwhelming, but following the step-by-step guide outlined above can make the process smoother. It is important to review your policy, document all damage and contact your roofing contractor before filing a claim.

Meeting with the adjuster and negotiating settlement offers are also key steps in securing proper compensation for necessary repairs or replacement. Remember to take pictures of every detail and remain vigilant throughout the claims process to ensure coverage.

Contact our roofing company today if you need help with roof repair.

Vinyl siding is a great option for homeowners looking to ramp up their home exteriors without breaking the bank. It comes in a variety of colors and finishes, it’s durable, and it’s actually very easy to install vinyl siding on your home.

Of course, if you’re the type of homeowner that prefers to tackle these types of projects on your own, there’s some essential information you’ll need before you start purchasing materials — such as how to cut vinyl siding properly.

There are three ways to cut vinyl siding:

  • Short vertical cuts
  • Long vertical cuts
  • Horizontal cuts

We’ll explain how it all works below.

How to Cut Vinyl Siding

For DIY home projects that involve cutting, precision makes all the difference. So, if you’re going to tackle vinyl siding on your own, you’re going to need the following tools:

close up of how to cut vinyl siding with pieces laid out

  • A circular saw
  • Tin snips
  • A utility knife
  • Safety goggles
  • A carpenter’s square
  • A straightedge
  • Measuring tape
  • A pencil

There are specific tools from this list you’ll need for each type of cut.

Long Vertical Cuts

Cutting tool needed: Tin snips

A long vertical cut is easiest to perform using tin snips. They’re also much safer to use and more precise, as a circular saw can be a bit too bulky to maneuver for these types of cuts, which means the finish won’t be as smooth and precise.

How to Make Long Vertical Cuts

  • Using your measuring tape, determine exactly where you’ll be cutting your vinyl siding and mark these points clearly.
  • From there, line up the point you’ll be cutting with the edge of your table and use the carpenter’s square to ensure the cut is straight and clean.
  • Hold the siding steady with one hand while using the other hand and tin snips to make long cuts along the marked areas. Be sure to only close your tin snips about ⅔ of the way — this will ensure that the cuts you make are as straight and clean as possible.
  • Snip through the length of the siding until you’ve reached the end, repeating the process on as many other pieces as necessary.

Pro tip: As you snip through the siding, be sure to leave at least two inches of overlap per tab. This will give your panels a seamless look once they’re installed and also help them to prevent drafts during the cooler months.

It’s also a good idea to keep the material that gets cut off together. This will allow you to recheck your work and make it easier to measure for replacement materials later on if needed.

Horizontal Cuts

close up of how to cut horizontal cuts on vinyl siding

Cutting tool needed: Utility knife

When you need to trim the vinyl horizontally, tin snips won’t get the job done because the cutting points will be shorter. Therefore, a utility knife is the best option for a precise cut.

How to Make Horizontal Cuts

  • Using the measuring tape, measure exactly where the siding needs to be cut so that the panels can easily slide over one another. You’ll need to make two marks on each end of the side panel — one as a starting point and the other as the endpoint.
  • Use the straightedge to align your marks and ensure a straight cut.
  • Press down on the straightedge to hold the material down firmly. Take the utility knife and score the material by dragging the blade to create a life — but don’t cut all the way through!
  • Once the material is scored, you can snap it along the line for a clean break.
  • Repeat the process as necessary.

Short Vertical Cuts

Cutting tool needed: Circular saw

Circular saws are perfect for making short, vertical cuts in vinyl siding because they can cut clean, straight lines without leaving behind frayed edges. This is important because frayed edges can cause damage during the sealing process and later on.

  • Start by using your measuring tape to calculate the right length for each piece of siding you’ll need. Mark them so you know which way they’ll be facing once installed, including additional details such as “top and “bottom.”
  • Be sure to use a fine-toothed cutting blade installed backward to get the cleanest cuts.
  • Line up the vinyl siding with the blade guides where you’ll be making the cuts — but don’t start cutting yet. This is just to ensure you’re in a position to make the cleanest cut possible.
  • Put on your safety goggles and double-check that the guides line up correctly before you start cutting.
  • Using your work table as a guide, start to swag off the excess siding. You can also use the carpenter’s square to ensure accuracy; just be sure to go slow.
  • Repeat the process as necessary.

Using this technique will ensure crisp, clean lines each and every time!

What to Do Next

Cutting vinyl siding doesn’t take very long — granted you’ve taken the right measurements. If it’s your first time tackling this kind of project, it’s a good idea to watch a few videos first and have a few practice pieces handy to get used to the tools and techniques.

Of course, once you’ve successfully cut your vinyl siding, you’ll need to install it. Installing vinyl siding is an entirely different process that involves removing your old siding, disposing of refuse material, and more. It’s a much bigger job than most homeowners think, which is why it’s always a good idea to leave it up to the professionals.

OpenBox Roofing also specializes in siding replacement. Our certified vinyl installers will ensure that you get high-quality materials cut and installed with the precision and accuracy that’ll leave your home’s exterior refreshed and beautiful. Get in touch with us today to learn more about our services and financing options!

Your roof is the superhero of your home, shielding you and your loved ones from harsh weather conditions and other external factors. So it’s crucial not to neglect the very thing that keeps you and your family warm and protected every single day.

While it’s easy to overlook this essential part of our homes, roof maintenance should be a top priority.
Ensure longer-lasting protection and schedule a roof inspection right away.

Of course, until you can get your roof inspected by a professional, keep reading for our best roof maintenance tips so that you can get started on up-keeping your roof right away. Here are nine expert roof maintenance tips to keep your roof in top shape while saving thousands of dollars on costly repairs:

1. Schedule Annual Roof Inspection

Drone view of roof inspection for roof maintenance

Scheduling seasonal roof care can ensure the longevity and functionality of your roofs. A roofing contractor can thoroughly examine your roof and identify potential problems like missing shingles, roof leaks, or structural damage that may not be visible to untrained eyes.

A roof inspection can help maintain the integrity of your home’s protective shield and save time and money by catching issues before they become costly.

For instance, identifying damaged asphalt shingles early can allow you to replace them promptly instead of waiting for significant high winds to wreak havoc on your entire roofing system, resulting in the need for a full roof replacement.

2. Keep Gutters Clean and Maintained

Clean and functional gutters are crucial for directing water and debris away from the roof, preventing potential damage to a house’s doors, ceilings, walls, and foundation.

Unfortunately, many homeowners overlook the importance of keeping their gutters free of clogs caused by fallen leaves and other debris.

close up of homeowner performing gutter cleaning and roof maintenance

By hiring a professional gutter cleaning service provider, you can easily maintain your gutters and improve the longevity of your roof. A professional can regularly clean debris, leaves or other clog-causing materials using special techniques that minimize damage to your roofing system. They can also install gutter guards that trap solid materials, thus reducing overall maintenance needs.

3. Trim Overhanging Branches

Trees in a home compound can be pleasant as they bring in a cool atmosphere, increase the home’s aesthetic beauty and provide shades for outdoor activities. However, if the branches overgrow over the roof, they can cause more harm than good.

The branches can scratch the shingles, damage the roofing material and put extra strain on it. During high winds or severe weather, these branches can easily break off and cause significant injury if they fall onto people. For this reason, it is essential to trim overhanging tree branches in your home compound regularly.

If you decide to DIY the process, consider the tree’s shape, size and location before deciding which parts need trimming or cutting down. Also, to preserve the tree’s natural beauty, ensure the cuts are as symmetrical and neat as possible.

You should also consider your safety before undertaking such a task. Ensure you have the right tools, use appropriate clothing and stand on an even surface when trimming or cutting branches.

If the tree is too tall for you to manage, it is best to call in a professional tree trimmer who can take care of the job safely.

4. Treat and Kill Moss, Lichen, and Algae

Aerial view of extreme moss growth on roof needing maintenance

If left untreated, Moss, lichen, and algae can quickly take over your roof. While they may seem harmless initially, these growths can cause significant damage to your roofing materials over time.

For instance, Moss and lichen can hold moisture against the roof, leading to rot and other damage. Algae growths can permanently discolor your roof and create a slippery surface, making walking on your roof dangerous.

Just a few issues caused by a mossy roof:

  1. Reduced Roof Lifespan: Moss and algae can retain moisture and create a damp environment on the roof’s surface. Over time, this moisture can penetrate the roofing materials, causing them to deteriorate and weaken. This can significantly reduce the lifespan of your roof, leading to the need for premature repairs or replacement.
  2. Water Damage: As moss and algae grow, they can create channels or pockets that trap rainwater. This trapped water can seep beneath roofing shingles or tiles, potentially causing leaks and water damage to the roof’s underlying structure, including the decking and insulation.
  3. Aesthetic Issues: Moss and algae growth can be unsightly, causing your roof to appear dirty and neglected. This can impact your home’s curb appeal and overall property value.

To effectively treat and kill moss, lichen and algae, you can use commercial roof cleaning treatments which are safe for roofs and can be easily applied with a garden sprayer. It is essential to rinse off the roof by flashing water over it using a garden hose to ensure the chemicals do not stick under the roofing shingles, especially if you collect rainwater.

A professional can also advise on unique roofing materials to minimize the infestation of these organisms. For example, installing metal flashing strips and algae-resistant shingles can help keep these growths off your roof and prevent any damage they may cause.

5. Inspect Shingles Regularly

close up of roof shingle inspection and maintenance

Over time, shingle roofs can crack, curl, and wear out due to weather, sunlight, and other factors. This can lead to water seeping in and causing damage to your roof decking and rafters. Regular roof maintenance can help identify potential problem areas so you repair them before any water damage occurs.

If you notice any broken shingles or loose nails, you can hire a professional roofer to repair them. They can also recommend replacing the entire roof section if the damage is too extensive.

6. Check Flashing

Flashing is a thin metal material that directs water away from vulnerable areas, such as the chimney, attic, and roof valleys, preventing water stains and leaks. Over time, however, the material can wear out due to severe weather conditions or other elements.

Homeowners should regularly inspect the caulk’s integrity around the flashing to ensure it is securely attached. If any metal appears bent or dented, you can hire a professional roofer to inspect and repair the area as soon as possible.

7. Hire a Professional When Needed

Closeup of roofer using shingle shovel to make repairs and complete roof maintenance

While it’s tempting to try DIY roof repairs, some tasks are best left to a professional. Not only do inexperienced attempts often result in more costly damages, but they can also put you and your family at risk of accidents or injuries.

Professional roofers have the know-how and experience to diagnose and repair potential problems correctly, preventing costly repairs down the line. They can also safely inspect hard-to-reach areas of your roof to identify any underlying damage you may not be able to detect from the ground.

8. Check Your Warranty

Depending on the type of roof installation you have, you may be eligible for a manufacturer warranty that can cover certain repairs or provide discounts on materials. To take advantage of these benefits, check your roofing contractor’s paperwork and understand the warranty terms before attempting DIY repairs or replacements.

If you are uncertain about the coverage or terms, you can always contact your contractor for clarification.

9. Keep Records

Keeping records of all roof repairs and replacements can help you decide when to replace the entire unit instead of making costly fixes. It is also essential to store these documents in a secure, dry place to remain safe and easy to access should any issues arise.

Conclusion: Maintain Your Roof Effectively to Avoid Costly Repairs

A healthy roof protects your home and keeps you and your family safe. However, regular maintenance can be daunting for homeowners who don’t understand the intricacies of their roofing systems.

Following roof maintenance checklist tips, you can ensure you plan for the future and properly care for your roof. It is always best to hire a professional to ensure any necessary repairs or replacements are done correctly and safely. With proper roof maintenance, your roof can last for many years!

Contact us today for professional help and ensure your roof is in good condition.

Determining the age of your roof can be vital for maintaining its integrity, planning repairs, and ensuring proper insurance coverage. It can also inform you when to replace the roof with a newer, more efficient one. However, the process can be difficult as it requires you to investigate the materials and other construction details.

Luckily, with a few steps, a reputable roofing contractor can help you determine a roof’s age without tearing it apart. This can help you salvage older roofs by properly maintaining them as you understand the shingles’ age limit.

Below are four simple ways to answer the challenging question, “How old is my roof” and help you make informed decisions about its maintenance and when to expect you’ll need to schedule a roof replacement. Let’s dive in!

4 Simple Ways to Gauge Your Roof’s Age

Whether your home had previous owners or is newly constructed, you can find it difficult to tell answer the question, “How old is my roof?” With this daunting task, it can be impossible to identify when to schedule roof replacement or roof repair.

Ways such as checking building permits and inspecting shingles for signs of wear and tear can be useful, especially if you don’t have a record of the roof installation date. You can also examine the roofing material or consult a roofing expert.

Here is a comprehensive analysis of these ways:

Check Building Permit

homeowner researches how to determine how old her roof is

A building permit is a requirement by federal and local governments for any construction or modification of existing structures. The records alongside building permits contain vital information such as when the roof was installed, the last repair date, and roof replacement activities undertaken.

If your home had previous owners, you can obtain the permit from the local authorities or online. You’ll need to provide the home address and other home details to prove ownership and easily identify the permit.

Alternatively, if you’re a new homeowner, you can check with the contractor who installed your roof. They can provide you with your building permit or roofing company receipt, indicating the exact installation activities.

Inspect Shingles

As shingles are constantly exposed to various weather conditions, their appearance can provide valuable information on your roof’s overall health and longevity. For instance, shingles with granular loss, curling edges, splits, or cracks could indicate a roof in its later stages.

During the inspection, start by inspecting the missing shingles closely. If you’re unable to climb up your roof, you may have to use binoculars and inspect from the ground. Also, check if there are any loose granules or bare spots due to UV radiation exposure.

You can also inspect other roof structures from the interior, such as the damaged roof valleys, attic, insulation, siding, and other visible components. If you notice some leaks, water stains rusting, or deterioration of the structures, this could mean the shingles above are worn out, indicating long-term exposure to severe weather conditions.

Examine Roofing Material

drone roof inspection to determine roof age and repairs

Accessing your new roof to understand the type of material used can give you a clue about its age. Whether it’s asphalt, wood, metal, or tiles, you can use the expected durability of the material to gauge when it was installed.

For instance, asphalt shingles have a lifespan of 15-30 years, while metal roofing should last around 80 years. This information can help you determine whether your roof is in its prime or approaching its expiration date.

It is important to consider external factors such as the local area weather conditions and roof insulation levels since they can variate the expected lifespan. Wood roofs, for example, can suffer less damage in dry areas rather than in humid ones where it absorbs moisture.

Consult a Professional

Having a professional roofer inspect your roof allows you to easily determine its age without climbing up and examining it yourself. A reliable roofing company can analyze the material used, the decking structure, ventilation systems, insulation levels, and other components that could indicate how old your roof is.

With their expertise and experience, they can give a more accurate analysis of the’s age and recommend any necessary repairs or replacements. This can help you avoid costly repairs and ensure your roof is top-notch.

Signs of an Old Roof

Although using the methods above can help you estimate the age of your roof accurately, there are general signs that an old roof may be showing its age. These include:

  • Shingles are brittle and soft
  • Fading or discoloration of shingles
  • Loss of granules on shingle surfaces
  • Light showing through the roof decking
  • Stains, mould, or wet spots on the ceiling of your attic
  • Moss growth or streaks of algae on the shingles

The signs can vary as per the condition of your roof, but they can help you identify whether or not your roof is nearing the end of its lifespan.

Importance of Knowing Your Roof’s Age

roof contractors repair old roof

Knowing your roof’s age is important in maintaining and repairing it properly. This can help you extend its lifespan, avoid costly repairs, and decide if it’s time for a replacement. You can also use the information if your insurance and code compliance requires proof of age before offering coverage.

Check out the primary importance of knowing your roof’s age:

  • Helps you plan and prioritize the necessary repairs – The contractor can help you identify the sections of your roof that need immediate attention or will require repairs or replacements in the near future.
  • Helps you assess if it’s time for a replacement – Understanding the lifespan and age of your roof can help you decide if it’s time to replace the roof or make some repairs.
  • Enables proper insurance coverage – Insurance companies may require proof of age before offering coverage for any damages that may occur during storms. Knowing this, you can preemptively file a claim.
  • Prevent costly repairs in the future – Repairing an old roof can be expensive and ineffective. Knowing your roof’s age can allow you to anticipate potential issues before they arise and save you money in the long run.

A professional can help you incorporate these advantages into your roof structure and help maintain its structure, integrity, and condition for years to come.

Conclusion

“How old is my roof?” is a common but difficult question to answer. It can require extensive research and investigation, especially if you purchase an existing home. However, with the right methods and inspection techniques, you can easily determine your roof’s age.

From checking building permits to inspecting shingles for signs of wear and tear or consulting a roofing contractor, you can make better-informed decisions on when to repair or replace the roofs. You can also avoid repair costs, receive proper insurance coverage and extend the life of your roof.

Contact us today to get the help you need help with your roof assessment or repair and replacement services.

Whether you’ve got an urgent roof leak, suspect you have hail damage, or simply know that your roof is getting old and needs a replacement— it can be a stressful experience. You need to find a dependable Indianapolis roofer so that you can avoid:

  • Paying inflated prices
  • Dealing with uncommunicative contractors
  • Needing the project done twice because it wasn’t done right the first time
  • Setting aside time only for the contractor to not show up

Yikes, right? But unfortunately, far too many homeowners regularly deal with unreliable or even downright shady contractors. When it comes to your property, time, and money, you need to work with a highly-rated roofing company for the most reliable roof repairs.

We’ve done the work for you and rounded up the five highest-rated roofing contractors in Indianapolis— complete with real customer reviews!

1) OpenBox Roofing

open box roofing logo indianapolis

If you want to work with an authentic, friendly, service-minded roofing company (and who doesn’t?), look no further than OpenBox Roofing. All of their services and practices are backed with integrity, so they perform detail-oriented workmanship and provide reliable communication at every step.

Whether you need a total roof replacement, insurance claim support, or even new siding and gutters, the OpenBox team performs incredible work with fair and honest pricing. You can even take advantage of their easy monthly financing options to help ease the stress of a large home improvement project.

With over 20 years in the Indianapolis roofing industry, you can’t go wrong with OpenBox Roofing!

⭐️ Google Rating: 5 stars

Address: 5680 Caito Dr Suite 190, Indianapolis, IN 46226

Real Customer Review: “Hands down the best in the city! OpenBox was on time, in budget, and super responsive. Tom went out of his way to make sure I was taken care of. I’ve already recommended them to my neighbors and they were just as pleased.” – Chris W.

2) Bone Dry Roofing

roofing company indianapolis bone dry roofing

The slogan at Bone Dry Roofing is, “Everything under one helluva good roof.” And they mean it! Beyond roof repairs and replacements, Bone Dry also offers the following services:

  • Masonry
  • Insulation
  • Solar
  • Roof maintenance
  • Painting
  • Drywall
  • HVAC
  • And more!

If you’re planning a total rehaul of your home and want to get as many home improvement projects out of the way as possible, Bone Dry Roofing is a great company to utilize. They’re highly rated and have been in business since 1989, with multiple locations in 7 states.

⭐️ Google Rating: 4.8 stars

Address: 7735 Winton Dr, Indianapolis, IN 46268

Real Customer Review: “I am very very pleased with the work Bone Dry Roofing did on my house. Everything they promised me during the tear off and installation of my new roof was great. I was concerned about my landscaping and they took the time to protect everything including my neighbors yards and houses.” – Roy S.

3) Watergate Roofing

watergate roofing logo for indianapolis company

As a woman-owned local company, Watergate Roofing sets a unique standard for its services. Their owner Millie has been a professional roofing and siding contractor since 2007, and she founded Watergate in 2013.

Watergate Roofing provides standard roof repair and replacement services as well as metal roofing, chimney flashing, and gutter services. They serve both residential and commercial properties, and all full replacements come with a 5-year workmanship warranty.

⭐️ Google Rating: 5 stars

Address: 2201 E 46th St Ste 114, Indianapolis, IN 46205

Real Customer Review: “Watergate Roofing was amazing! We had them out to replace our roof and update our gutters. Great communication, friendly staff, and quality work. Would highly recommend.” – Matt W.

4) Bryant Roofing Systems

roofing logo for bryant roofing indianapollis

Proudly serving Central Indiana, Bryant Roofing Systems is committed to providing elite roofing services for local home and business owners. Metal, asphalt shingle, and flat roofing systems are all fair game with this qualified team.

This skilled team will also work with your insurance and support your situation if you need to file a claim. All total roofing systems come with a 10-year labor warranty.

⭐️ Google Rating: 4.9 stars

Address: 5808 Bertha St, Indianapolis, IN 46241

Real Customer Review: “My home was overdue for a new roof, and Bryant was very helpful in getting a new one. They (were) very quick to respond to my call, and were out to my house shortly after I contacted them. They finished work in a timely manner, and the whole crew was incredibly polite.” – Corey M.

5) Porter Roofing & Restoration

roofing logo for porter roofing in indianapolis

Last, but certainly not least, we have Porter Roofing & Restoration. While Porter Roofing was recently started in 2019, this hard-working team quickly made a large impact in Indianapolis. They understand that roofing is often a significant investment, and since it’s so vital in protecting your home, the job needs to be done right the first time.

This family-owned business provides roof repairs, roof replacements, and siding replacements. They also offer ancillary services like attic insulation, skylights, and copper features like gutters. Porter also offers financing and insurance claim support to ensure you get the services you need within your budget.

⭐️ Google Rating: 4.8 stars

Address: 5225 Emco Dr, Indianapolis, IN 46220

Real Customer Review: “Jack and the team at Porter Roofing were great to work with. They worked with our insurance and made everything seamless for us. We would definitely use them again.” – Sarah M.

Trust Your Indianapolis Property With the Best

It’s no secret that there are some fantastic roofing companies right here in Indianapolis. While you can’t go wrong with anyone on this list, our team at OpenBox Roofing would be honored to demonstrate how we go above and beyond any service you can find elsewhere.

When you see our pink uniforms and trucks, remember that Pink Means Commitment. We’re committed to providing only the best roofing and home services to our local community, and we can’t wait to exceed your expectations.

Let’s get started with a free estimate!

Whether you’re visiting Indianapolis for the weekend or you’ve lived here for years and need something fun to do on a random Tuesday, the good news is there’s no shortage of exciting things to do in Indianapolis!

Even though Indiana isn’t the state people immediately think of when they think “exciting,” as a local business that offers Indianapolis residents quality roof repair services, we insist the city of Indianapolis often surprises people with just how beautiful, bustling, and downright fun it is.

Feeling ready to explore Indy? Try out one of these nine unique things to do!

1) Cross a Hot Air Balloon Ride Off Your Bucket List

What’s on your bucket list? Do you want to run a full marathon? Visit every state? Go sky diving?

What about riding a hot air balloon?

Hot air balloon rides are on a lot of people’s bucket lists. Whether or not it’s on yours, it’s still a unique, exciting, and often a once-in-a-lifetime experience. And you can ride one right here in Indianapolis!

At Indy Hot Air, you can schedule private rides at sunrise or sunset. You can even schedule a homestead flight and take off right from your own home! The investment is more significant than other items on this list, so many people save up to do it on a special occasion like a birthday or anniversary.

2) Unleash Your Inner Cowboy With a Horseback Ride

couple horseback riding for fun in indianapolis

Just outside of Indianapolis in Brownsburg, Indiana, lies Natural Valley Ranch. Here, you can go horseback riding on their beautiful trails, take riding lessons, or even host birthday parties.

You can choose from 30 or 60-minute guided trail rides that wind along the stunning banks of White Lick Creek. Natural Valley Ranch covers 78 acres of scenic land. This is the perfect activity for when you want to spend a nice day outside. Just remember to wear closed-toed shoes!

3) Get a Glimpse Into the Past at the Indiana Medical History Museum

If your idea of fun is looking at brains in jars, then have we got the perfect place for you. Explore the beginnings of “modern” medicine at the Indiana Medical History Museum. You’ll find lots of quirky and fascinating memorabilia at this unique museum.

You’ll learn about the development of psychiatric treatment over the years, view lots of old-school medical equipment, and leave with a new-found appreciation for today’s medical practices. This activity definitely isn’t for people with weak stomachs!

4) Check Out the Gardens and Museums at Newfields

Newfields is quite an impressive and popular place in Indianapolis. On this stunning campus, you’ll find:

  • The Indianapolis Museum of Art
  • The Virginia B. Fairbanks Art & Nature Park
  • The historic Lilly House
  • Miller House and Garden
  • Elder Greenhouse (with a beer garden)
  • A cafe
  • Performance spaces
  • Gift shop
  • And more!

Talk about a fun-filled day all in one place. Whether you want to enjoy the outdoor spaces in spring and summer or hunker down in the Museum of Art and Lilly House on a cold, rainy day, Newfields is sure to impress.

5) Be Brave and Try Ziplining at Go Ape!

woman goes zip lining at go ape in indianapolis

When you think of ziplining, you probably think of New Zealand or Costa Rica. But did you know you can go ziplining right here in Indianapolis? That’s right; Go Ape! has a location at Eagle Creek Park where you can fly through the trees like Tarzan.

While you’re at Eagle Creek Park, you can also spend time hiking, kayaking, or swimming. It’s one of the most sought-after destinations for nature lovers in Indiana!

6) Step Below the City in the Catacombs ️

What do Indianapolis and the Roman Empire have in common? Catacombs!

While catacombs traditionally serve as ancient burial places, the Indianapolis ones aren’t that. Instead, they’re the remains of Tomlinson Hall, which burned down in 1958.

During the guided tour of the City Market Catacombs, you’ll learn the stories of two historic Indianapolis buildings: City Market and Tomlinson Hall. While you won’t see any tombs, you’ll get to view an expanse of brick barrel-vaulted arches underneath the bustling city.

Note: Since the Indianapolis Catacombs have a very rough and uneven dirt floor, this tour is not considered accessible for guests with walkers, strollers, canes, or wheelchairs.

7) Eat, Shop, and Play at the Indianapolis City Market ‍

The Indianapolis City Market is home to The Original Farmers’ Market, where you can purchase fresh fruits, veggies, cheeses, meats, and more from local artisans. Their Buy 2 Give 1 program helps provide fresh, healthy foods to three downtown Indianapolis homeless missions. Thousands of pounds of fresh produce are donated to people in need each year!

At the City Market, you can also enjoy authentic international cuisine at a variety of restaurants, shop at boutiques, and play bocce ball. In fact, the City Market Catacombs are located at this site as well, so you can spend an entire day just at the City Market.

8) See a Play at the Indiana Repertory Theatre

The Indiana Repertory Theatre is one of the premier regional theatres in the entire country. You can’t go wrong with spending an evening or a weekend afternoon watching a well-produced play with world-class actors and designers. Discounted tickets are available for certain demographics, including military members, educators, and low-income families.

The theatre is located in the historic IRT Building, which is so visually stunning it constitutes a visit of its own.

9) Find the Best Restaurant on Mass Ave

quaint massachusetts ave good for walking and eating on indianapolis trip

Massachusetts Avenue, known locally as Mass Ave, is a five-block area chock full of restaurants, art galleries, and boutiques. But in our opinion, the restaurants are what you can’t miss.

From German eats and delicious tacos to Irish pubs and upscale seafood restaurants, there’s something for everyone. Make a game out of it and rank your favorites with a friend!

Support Local Indianapolis Businesses

Clearly, there’s no shortage of fun things to do in Indianapolis, and we’ve only scratched the surface. We hope you enjoy checking out these local attractions as much as we do. And if you’re looking to continue supporting local Indianapolis businesses in other areas of your life, introduce yourself to our team at OpenBox Roofing!

As a local exterior renovation company, we love helping Indianapolis home and business owners protect their properties with beautiful and high-quality roofing and siding solutions. Get in touch for a free estimate!

Asset 500
Asset 60
Don’t Think, Just Call Pink!
Request a Free Quote

Ready to get started? Contact OpenBox Roofing today to schedule your free inspection and discover how our residential roofing services can protect your home.

Name
Asset 5 2