Our Roofing Blog

Stay up to date on the latest roofing tips, trends, and insights from the experts at OpenBox Roofing. Our blog covers everything from seasonal maintenance to choosing the right materials for your home.

Whether you’re researching a new roof, learning about repairs, or exploring sustainability options, our articles make roofing information easy to understand.

Asset 1 7
Featured Article

3 Qualities to Look for When Hiring a James Hardie Siding Contractor

about us hoodie 150x150 1
Posted By: Openbox Roofing
Here at Open Box Roofing, we strongly believe that our customers deserve nothing less than the best. That’s why we’re proud to be a part of the James Hardie Contractor Alliance Program. James Hardie siding is on more than 8 million homes across North America because it’s the best fiber cement siding product on the market, […]
Asset 17

Windows are not just functional elements in our homes; they are essential components that contribute to:

  • Aesthetics
  • Energy efficiency
  • Overall comfort

Whether you’re renovating or building a new home, the importance of proper window installation cannot be overstated. A well-installed window not only enhances the visual appeal of your home but also ensures optimal energy performance and durability. That’s why today, we’re taking your deep into the intricacies of window installation, covering everything from preparation and materials to techniques and common mistakes.

Understanding the Importance of Window Installation

Before delving into the technical aspects of window installation, it’s crucial to understand why it matters. Proper installation offers numerous benefits, including:

  • Enhanced energy efficiency: Well-installed windows prevent air leakage and heat transfer, reducing energy consumption and utility bills.
  • Improved comfort: Properly sealed windows minimize drafts and noise infiltration, creating a more comfortable indoor environment.
  • Enhanced durability: Correct installation techniques ensure that windows remain structurally sound and resistant to environmental elements.
  • Aesthetic appeal: Precise installation enhances the visual appeal of your home, complementing its architectural style and design.

Preparing for Window Installation

Successful window installation begins with thorough preparation. Here’s a step-by-step guide to getting started:

  • Assess your needs: Determine the type, style, and size of windows that best suit your home’s architecture and your preferences.
  • Measure accurately: Take precise measurements of the window openings to ensure that the new windows fit perfectly.
  • Choose quality materials: Invest in high-quality windows and installation materials to ensure longevity and performance.
  • Prepare the work area: Clear the area around the windows, remove obstacles, and protect furniture and flooring from dust and debris.
  • Gather tools and equipment: Make sure you have all the necessary tools, including drills, screwdrivers, levels, and sealants, before starting the installation process.

Selecting the Right Window Installation Method

There are several methods for installing windows, each with its own advantages and considerations. The most common methods include:

Nail Fin Installation:

Ideal for new construction, this method involves securing the window frame to the rough opening using nails or screws.

Block Frame Installation:

Suitable for both new construction and replacement projects, this method involves installing the window within the existing frame.

Pocket Installation:

Commonly used for replacement windows, this method involves inserting the new window into the existing frame without disturbing the surrounding trim or siding.

Full Frame Installation:

Involves removing the existing window frame entirely and installing a new frame and window unit.

The 5 Step Installation Process

window installation

Once you’ve chosen the appropriate installation method, it’s time to proceed with the installation process. Here’s a general overview of what to expect:

1) Remove the Old Window:

Carefully remove the existing window, taking care not to damage the surrounding trim or siding.

2) Prepare the Opening:

Clean the rough opening, repair any damage, and ensure that it is level, square, and properly insulated.

3) Install the New Window:

Place the window unit into the opening, ensuring a snug fit and proper alignment. Secure the window in place according to the manufacturer’s instructions.

4) Insulate and Seal:

Apply insulation and sealant around the window perimeter to prevent air and water infiltration. Pay close attention to corners and joints to ensure a watertight seal.

5) Test for Functionality:

Operate the window to ensure smooth operation and proper sealing. Make any necessary adjustments to ensure optimal performance.

Common Mistakes to Avoid

Even experienced DIY enthusiasts can make mistakes during window installation. Here are some common pitfalls to watch out for:

  • Improper measurements: Inaccurate measurements can result in ill-fitting windows and costly rework.
  • Insufficient insulation: Neglecting to properly insulate around the window can lead to energy loss and drafts.
  • Overlooking flashing and caulking: Inadequate flashing and caulking can allow water infiltration, leading to moisture damage and mold growth.
  • Neglecting to check for squareness: Failing to ensure that the window is installed square can result in operational issues and aesthetic flaws.

Why Hire a Professional for Window Installation

While DIY projects can be rewarding, window installation is best left to the professionals for several compelling reasons:

Expertise and Experience:

Professional window installers have the necessary skills, knowledge, and experience to handle complex installations with precision and efficiency. They understand the nuances of different window types and installation methods, ensuring optimal results.

⏰ Time and Convenience:

Window installation can be a time-consuming and labor-intensive process, particularly for larger or multiple windows. Hiring professionals allows you to save time and effort, allowing you to focus on other priorities while ensuring timely completion of the project.

Quality Assurance:

Professional installers are trained to adhere to industry best practices and standards, ensuring that your windows are installed correctly the first time. Their attention to detail and commitment to quality craftsmanship result in durable, long-lasting installations.

⭐️ Warranty Protection:

Many window manufacturers offer warranties that require professional installation for validity. By hiring certified installers, you can ensure that your warranty remains intact, providing added peace of mind and protection against potential defects.

Safety Considerations:

Window installation involves working at heights and handling heavy materials, posing potential safety risks, especially for inexperienced individuals. Professional installers are equipped with the necessary safety gear and follow safety protocols to minimize accidents and injuries.

✅ Code Compliance:

Building codes and regulations govern window installations to ensure structural integrity, energy efficiency, and safety. Professional installers are familiar with local codes and ensure that your windows meet all regulatory requirements, avoiding costly fines and penalties.

In conclusion, while DIY enthusiasts may be tempted to tackle window installation themselves, hiring a professional offers numerous advantages, including expertise, convenience, quality assurance, warranty protection, safety, and code compliance. By entrusting your window installation to experienced professionals, you can enjoy peace of mind knowing that your investment is in capable hands, resulting in flawless installations and enhanced comfort and efficiency in your home.

Professional Window Replacement
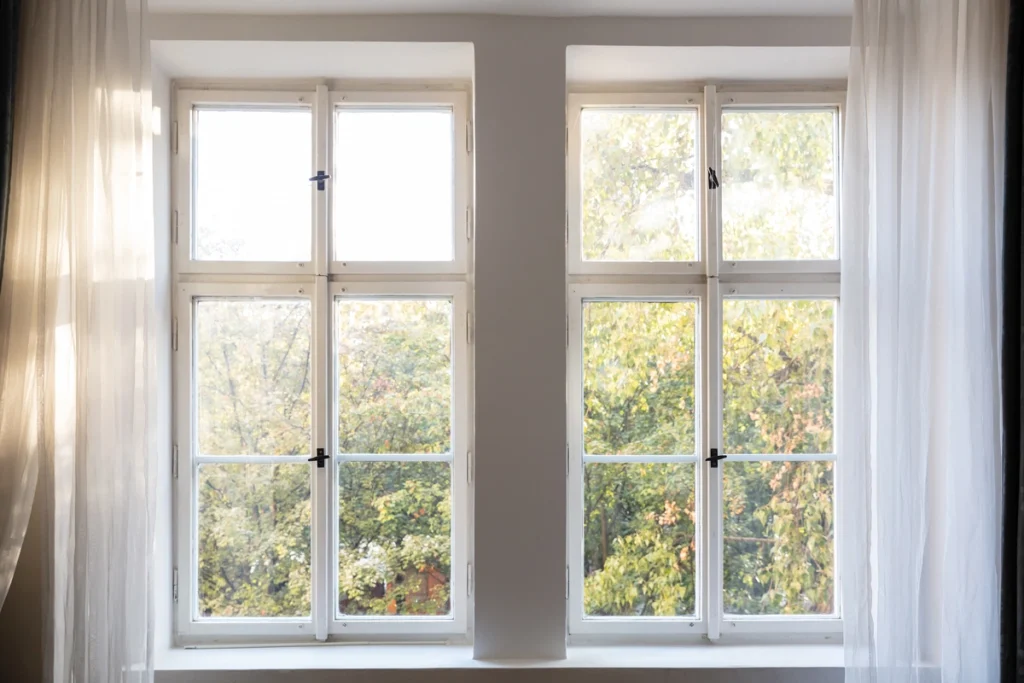
pretty windows

Window installation is a crucial aspect of home improvement that requires careful planning, precision, and attention to detail. Whether you’re embarking on a DIY project or hiring a professional contractor, investing time and effort into proper window installation will pay off in the long run, enhancing the comfort, efficiency, and value of your home.Contact Open Box Roofing today to schedule your window replacement with a team who always gets it right!
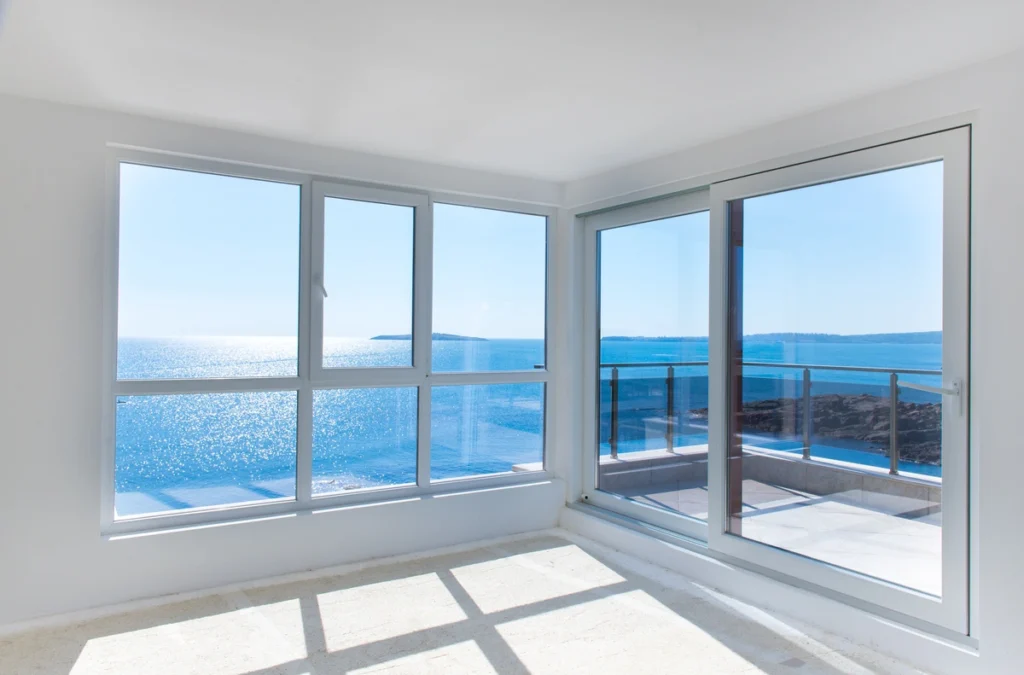
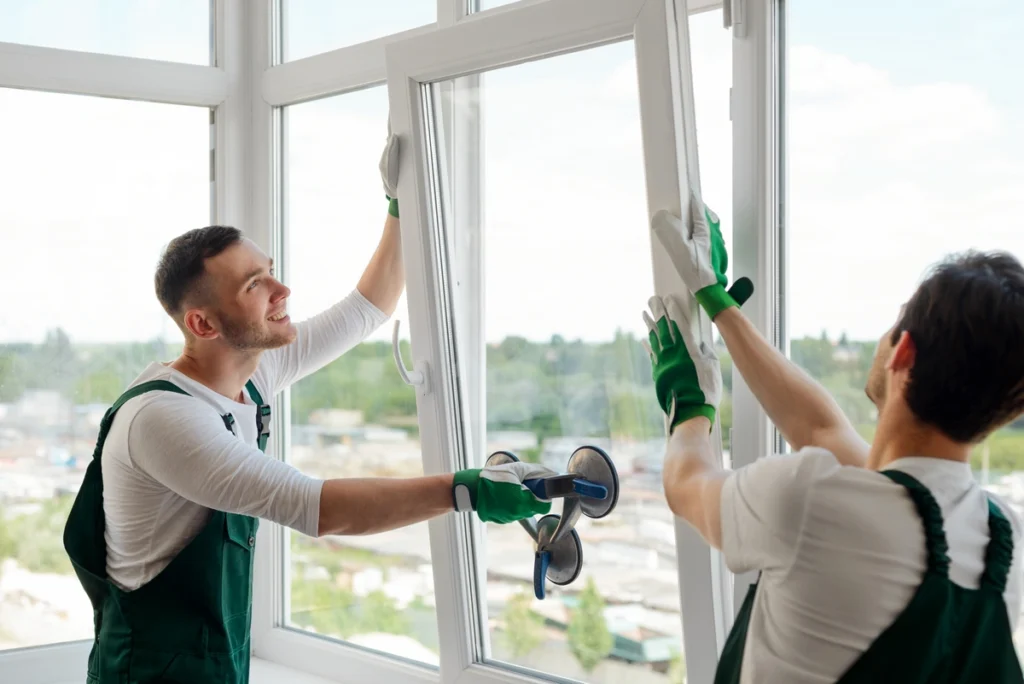
Windows are not just functional elements of a building; they also significantly contribute to its aesthetic appeal and energy efficiency. Choosing the right type of windows for your home or office can be a crucial decision, impacting both comfort and sustainability.

Today, we’ll explore various aspects of windows, including:

  • Signs indicating the need for replacement
  • Different types of windows available
  • Factors to consider when choosing
  • Installation costs
  • Affordability tips
  • The importance of professional installation
  • Maintenance guidelines for keeping your windows in top condition

Signs That You Should Replace Your Windows

Windows play a vital role in maintaining the comfort and energy efficiency of a building. Over time, they can wear out or become damaged, leading to several signs that indicate the need for replacement:

  • Drafts and Air Leaks: If you feel drafts or notice air leaks around your windows, it could indicate that the seals have deteriorated, compromising energy efficiency.
  • Increased Energy Bills: Older or inefficient windows may contribute to higher energy bills as they allow heat to escape during the winter and cool air to seep out during the summer.
  • Difficulty Opening or Closing: Windows that are hard to open or close may have warped frames or damaged mechanisms, making them less functional and potentially unsafe.
  • Visible Damage: Cracks, rot, or decay on the window frames or glass are clear indicators that replacement is necessary for both aesthetic and structural reasons.
  • Noise Reduction: If you live in a noisy area and notice that your windows offer little sound insulation, upgrading to double or triple-pane windows can significantly reduce outside noise.
  • Condensation Between Panes: Moisture buildup between the glass panes indicates seal failure, compromising the insulating properties of the window.
  • Faded or Discolored Frames: UV exposure can cause frames to fade or discolor over time, detracting from the appearance of your home and potentially indicating structural weakness.

8 Different Types of Windows

AdobeStock 58244602

When it comes to choosing new windows, there are numerous options available, each with its own unique features and benefits. Here are some of the most common types of windows:

1) Single-Hung Windows:

These windows consist of two sashes, with only the bottom sash operable by sliding vertically. The top sash is fixed and does not move.

2) Double-Hung Windows:

Similar to single-hung windows, but both the top and bottom sashes are operable, allowing for better ventilation and ease of cleaning.

3) Casement Windows:

Hinged on one side, casement windows open outward using a crank mechanism. They provide excellent ventilation and a tight seal when closed.

4) Awning Windows:

Similar to casement windows but hinged at the top, awning windows open outward from the bottom, allowing for ventilation even during light rain.

5) Sliding Windows:

Sliding windows operate horizontally on tracks, with one or both sashes sliding open. They are ideal for spaces where a projecting window could interfere with outdoor areas.

6) Picture Windows:

Fixed windows that do not open, picture windows are designed to provide unobstructed views and ample natural light.

7) Bay and Bow Windows:

These windows protrude outward from the wall, creating additional interior space and enhancing the architectural appeal of a home.

8) Skylights:

Installed in the roof, skylights allow natural light to enter a room from above, providing an open and airy atmosphere.

How to Choose the Right Type of Window for You

Choosing the right type of window involves considering several factors, including:

  • Architectural Style: Select windows that complement the architectural style of your home or building to maintain visual harmony.
  • Functionality: Consider how you want your windows to operate and whether you prioritize ventilation, ease of cleaning, or unobstructed views.
  • Energy Efficiency: Look for windows with high energy efficiency ratings, such as those with multiple panes, low-emissivity coatings, and insulated frames, to reduce heating and cooling costs.
  • Budget: Determine your budget for window replacement and explore options that offer the best combination of quality and affordability.
  • Maintenance Requirements: Consider the maintenance requirements of different window types, including cleaning, painting, and sealing, to ensure they fit your lifestyle and maintenance preferences.
  • Local Climate: Take into account the climate in your area, including temperature extremes, humidity levels, and exposure to wind and precipitation, to choose windows that can withstand environmental factors.
  • Noise Reduction: If noise is a concern, opt for windows with soundproofing features, such as double or triple-pane glass and insulated frames.

The Cost of Installing New Windows

The cost of installing new windows can vary widely depending on factors such as the type of windows, the size of the project, and the complexity of the installation. On average, homeowners can expect to pay between $300 and $1,000 per window for standard replacement windows, with prices increasing for custom or high-end options. Additional costs may include labor fees, permits, and disposal of old windows.

Tips for Affording New Window Installation

While window replacement can be a significant investment, there are several ways to make it more affordable:

Explore Financing Options:

Many window companies offer financing plans or loans with favorable terms to help homeowners spread out the cost of replacement over time.

Take Advantage of Tax Credits and Rebates:

Look for government incentives, such as tax credits or rebates, available for energy-efficient home improvements, including window replacement.

Consider DIY Installation:

If you’re handy and have the necessary skills and tools, you may be able to save money by installing the windows yourself. However, it’s essential to weigh the potential savings against the risk of improper installation and future issues.

Compare Multiple Quotes:

Shop around and obtain quotes from multiple window companies to ensure you’re getting the best value for your money. Be sure to compare not only the price but also the quality of materials, warranty coverage, and reputation of the installer.

Prioritize Energy Efficiency:

Investing in energy-efficient windows may cost more upfront but can lead to long-term savings on heating and cooling costs, making them a worthwhile investment in the long run.

Why You Should Always Hire a Professional

window installers

While some homeowners may consider DIY window installation to save money, hiring a professional installer offers several benefits:

  • Expertise and Experience: Professional installers have the knowledge, skills, and experience to ensure that windows are installed correctly and according to industry best practices.
  • Warranty Coverage: Many window manufacturers require professional installation to validate warranty coverage, protecting you against defects and issues that may arise after installation.
  • Time and Convenience: Professional installers can complete the job quickly and efficiently, minimizing disruption to your daily routine and ensuring that the project is completed to your satisfaction.
  • Safety: Installing windows can be physically demanding and potentially dangerous work, particularly for windows located on upper floors or in hard-to-reach areas. Professional installers have the training and equipment to perform the job safely.
  • Code Compliance: Professional installers are familiar with local building codes and regulations governing window installation, ensuring that the work is done correctly and up to code.

How to Take Care of Your New Windows

Once your new windows are installed, proper maintenance is essential to ensure they remain in optimal condition for years to come. Here are some tips for taking care of your windows:

  • Regular Cleaning: Clean your windows regularly using a mild detergent and water solution to remove dirt, dust, and grime. Avoid using abrasive cleaners or tools that could scratch the glass or damage the frames.
  • Inspect for Damage: Periodically inspect your windows for signs of damage, such as cracks, leaks, or rotting wood. Address any issues promptly to prevent further damage and maintain the integrity of the windows.
  • Lubricate Moving Parts: If you have windows with moving parts, such as casement or sliding windows, lubricate hinges, tracks, and other mechanisms annually to ensure smooth operation.
  • Seal Gaps and Cracks: Check the seals around your windows regularly and reseal any gaps or cracks to prevent air leaks and moisture infiltration.
  • Trim Vegetation: Keep vegetation trimmed away from your windows to prevent damage from branches, leaves, and pests.
  • Protect from Harsh Weather: Install storm windows or shutters to protect your windows from extreme weather conditions, such as hurricanes or severe storms.
  • Schedule Professional Inspections: Consider scheduling annual inspections by a professional window installer to identify any issues early and ensure that your windows are well-maintained.

By following these maintenance tips and investing in professional installation when needed, you can enjoy the benefits of beautiful, functional windows that enhance the comfort, energy efficiency, and value of your home for years to come.

Get Your New Windows Installed Perfectly!

Windows are more than just openings in a wall—they are essential components of a building’s design, functionality, and energy performance. With proper care and attention, your windows will continue to provide comfort, beauty, and efficiency for years to come. But if they need a helping hand? Call on Open Box Roofing for expert window installation and consultations that will help your house feel like a home.

Your home’s entry door is not just a functional component; it’s a statement piece that can:

  • Enhance curb appeal
  • Improve energy efficiency
  • Bolster security

When it comes to choosing the right material for your brand new door, fiberglass and steel are two popular options that offer distinct advantages. In this comparison between a fiberglass vs. steel door, we’ll explore the pros and cons of each type and much more!

Why Update Your Door?

front door

Before diving into the specifics of fiberglass and steel doors, let’s first understand why updating your door is a worthwhile investment:

  • Enhanced Curb Appeal: Your entry door is one of the first things visitors notice about your home. Upgrading to a stylish, modern door can instantly boost curb appeal and make a positive impression.
  • Improved Energy Efficiency: Older doors may lack proper insulation, leading to energy loss and higher utility bills. A new, energy-efficient door can help maintain indoor temperatures and reduce heating and cooling costs.
  • Enhanced Security: A sturdy, well-installed door is your first line of defense against intruders. Updating to a high-quality door with advanced locking mechanisms can enhance your home’s security and provide peace of mind.
  • Increased Home Value: Upgrading key elements of your home, such as the entry door, can increase its resale value. Potential buyers are often willing to pay more for a home with attractive, secure, and energy-efficient features.

Now that we understand the benefits of updating your door, let’s compare fiberglass and steel doors to determine which option best suits your needs.

Comparison of Fiberglass and Steel Doors

Both fiberglass and steel doors offer unique advantages, but they also have their own set of drawbacks. Here’s a detailed comparison of the pros and cons of each material:

Fiberglass Doors:

✅ Pros:

  • Versatility: Fiberglass doors come in a wide range of styles, colors, and finishes, allowing you to find the perfect match for your home’s aesthetic.
  • Durability: Fiberglass doors are highly resistant to dents, scratches, and warping, making them an ideal choice for high-traffic areas.
  • Low Maintenance: Unlike wood doors that require regular painting or staining, fiberglass doors are virtually maintenance-free. They won’t rot, rust, or deteriorate over time.
  • Energy Efficiency: Many fiberglass doors feature a foam core insulation, which helps prevent heat transfer and improve energy efficiency.
  • Realistic Appearance: Modern fiberglass doors can mimic the look and texture of real wood, providing the warmth and elegance of wood without the maintenance drawbacks.

❌ Cons:

  • Cost: Fiberglass doors tend to be more expensive upfront compared to steel doors, although they offer long-term savings in terms of durability and energy efficiency.
  • Vulnerability to UV Exposure: Prolonged exposure to sunlight can cause fiberglass doors to fade or discolor over time, especially if they are not properly finished or protected.

Steel Doors:

Pros:

  • Security: Steel doors are incredibly strong and resistant to forced entry, making them an excellent choice for homeowners prioritizing security.
  • Affordability: Steel doors are typically more budget-friendly than fiberglass doors, making them a cost-effective option for homeowners on a tight budget.
  • Low Maintenance: Like fiberglass doors, steel doors require minimal maintenance and are resistant to rot, rust, and warping.
  • Energy Efficiency: Many steel doors come with a core of polyurethane foam insulation, which provides excellent thermal performance and helps reduce energy costs.
  • Fire Resistance: Steel doors offer superior fire resistance compared to fiberglass doors, providing an added layer of safety for your home.

Cons:

  • Susceptibility to Dents and Scratches: While steel doors are highly durable, they can be prone to dents and scratches, especially in areas with heavy foot traffic.
  • Limited Design Options: Steel doors may not offer the same level of customization and aesthetic appeal as fiberglass doors, as they are often limited to simple, utilitarian designs.
  • Prone to Rust: Although modern steel doors are typically treated with anti-corrosion coatings, they can still rust over time, especially if exposed to moisture or harsh weather conditions.

Cost of a New Door:

The cost of a new entry door can vary depending on several factors, including the material, size, design, and installation requirements. On average, fiberglass doors tend to be slightly more expensive than steel doors, with prices ranging from $500 to $2,500 or more. Steel doors, on the other hand, are more budget-friendly, with prices typically ranging from $200 to $1,500.

It’s important to consider the long-term value and durability of the door when comparing costs. While fiberglass doors may have a higher upfront cost, they often offer better durability, energy efficiency, and aesthetic appeal, which can result in savings over time.

How Often Should You Change Out Your Doors?

The lifespan of an entry door can vary depending on factors such as material quality, climate conditions, and maintenance practices. Generally, a well-maintained fiberglass or steel door can last for decades before needing replacement.

However, there are certain signs that indicate it may be time to replace your door:

Visible Damage:

If your door is cracked, warped, or showing signs of extensive wear and tear, it’s time to consider a replacement.

Poor Energy Efficiency:

If you notice drafts, air leaks, or condensation around your door, it may be due to inadequate insulation or sealing, indicating the need for an upgrade.

Security Concerns:

If your door is outdated or lacks proper locking mechanisms, it may compromise the security of your home, necessitating a replacement.

Aesthetic Considerations:

If you’re renovating your home or updating its exterior, a new door can enhance curb appeal and give your home a fresh, modern look.

Ultimately, the decision to replace your door will depend on your specific circumstances and priorities. If your current door is outdated, damaged, or no longer meeting your needs, it may be worth investing in a new, high-quality replacement.

4 Reasons to Hire a Professional for Door Installation

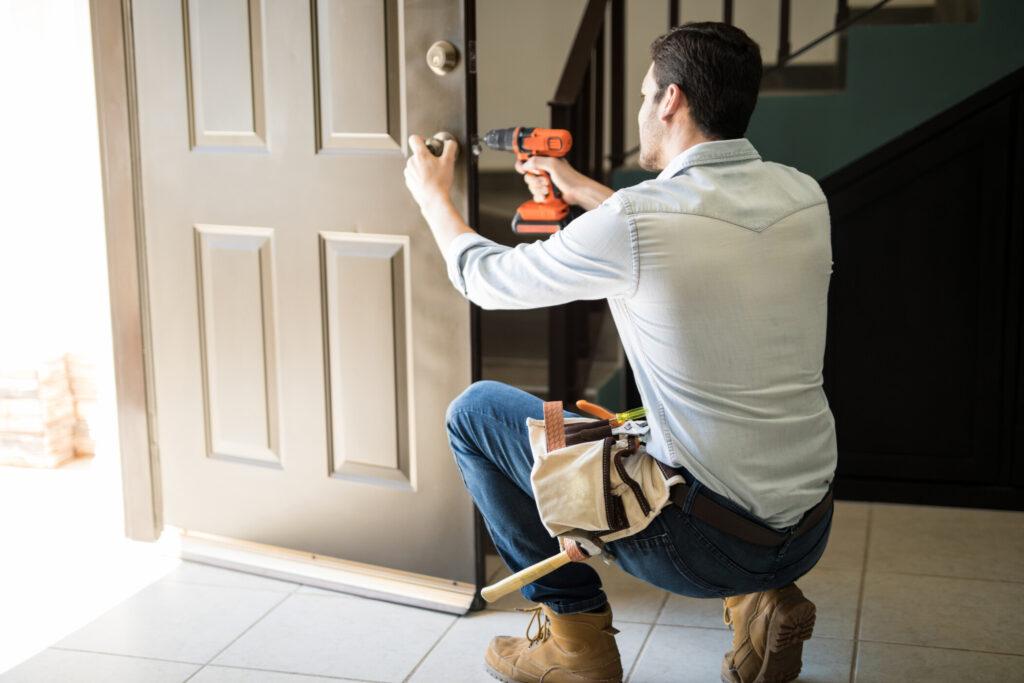
installing a door
Rear view of a good looking man working as handyman and fixing a door lock in a house entrance

While some homeowners may attempt to install a new door themselves, hiring a professional contractor or installer is highly recommended. Here’s why:

1) Expertise:

Professional installers have the skills, knowledge, and experience to ensure proper installation, minimizing the risk of errors or complications.

2) Warranty Protection:

Many door manufacturers offer warranties that may be voided if the door is not installed correctly. Hiring a professional installer ensures that your warranty remains valid and provides recourse in case of issues.

3) Time and Convenience:

Door installation can be a time-consuming and labor-intensive process, especially for those with limited experience. Hiring a professional allows you to sit back and relax while the experts handle the job efficiently.

4) Safety:

Installing a door involves handling heavy materials and using specialized tools, which can pose safety risks for untrained individuals. Professional installers are equipped to prioritize safety and minimize accidents or injuries.

How to Choose the Right Door Material for You

Selecting the ideal door material requires careful consideration of your priorities, budget, and preferences. Here are some factors to keep in mind when choosing between fiberglass and steel doors:

  • Prioritize Your Needs: Determine your primary concerns, whether it’s security, energy efficiency, durability, or aesthetics. Choose a door material that best addresses your specific requirements.
  • Consider Long-Term Value: While upfront costs are important, it’s essential to consider the long-term value and benefits of each material. Factor in durability, maintenance requirements, and energy efficiency when making your decision.
  • Evaluate Design Options: Assess the available design options for both fiberglass and steel doors, including styles, colors, finishes, and decorative features. Choose a door that complements your home’s architectural style and enhances its curb appeal.
  • Consult with Professionals: Seek advice from door experts, contractors, or designers who can provide personalized recommendations based on your home’s unique characteristics and your preferences.
  • Review Warranty Coverage: Look into the warranty coverage offered by door manufacturers, including terms and conditions related to installation, maintenance, and repairs. Choose a door with a comprehensive warranty that provides peace of mind.

Your Go-To Door Replacement Experts!

Choosing between fiberglass and steel doors involves weighing the benefits, drawbacks, and costs associated with each material. While fiberglass doors offer versatility, durability, and aesthetic appeal, steel doors excel in security, affordability, and fire resistance.When it’s time to switch out your exterior door, you options when it comes to materials might be confusing, but your choice of contractor isn’t! Reach out to Open Box Roofing today for premium door installation services!

Windows are often described as the eyes of a home, offering a glimpse into its soul and connecting its interior with the outside world. Among the myriad options available in the realm of windows, large windows stand out for their ability to transform a space, flooding it with natural light and framing picturesque views. In this guide, we’ll help you decide if large windows are right for you by exploring their:

Understanding Window Sizes: What Constitutes a Large Window?

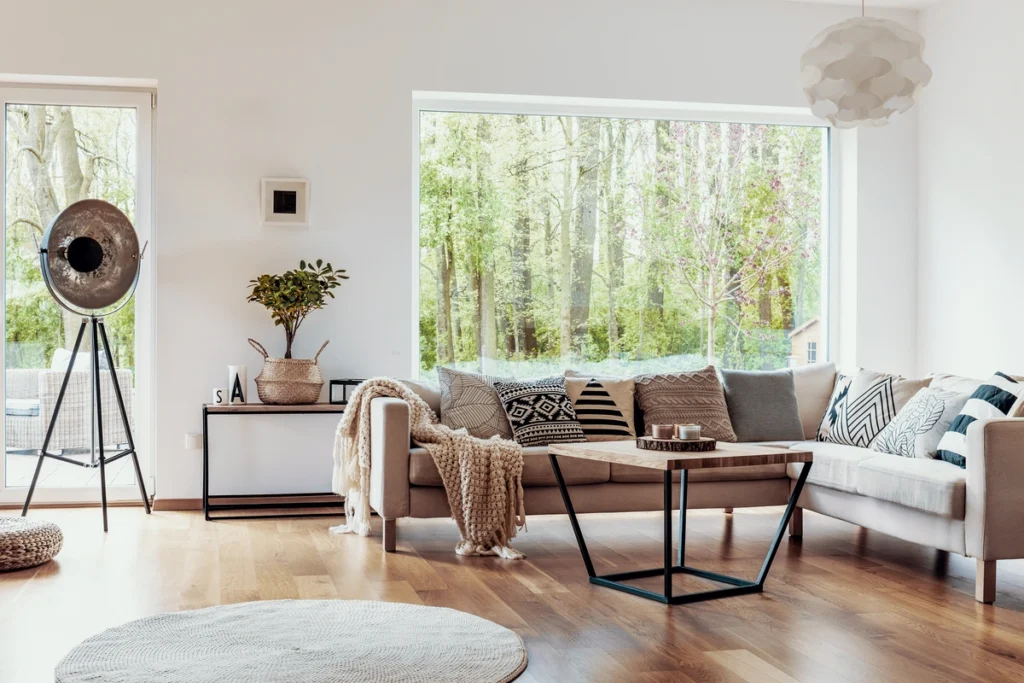
large window boho house

Windows come in various sizes, each serving different aesthetic and functional purposes. Standard window sizes typically range from small to medium, catering to traditional architectural norms. However, large windows, by definition, transcend these norms, boasting expansive dimensions that significantly enhance a room’s ambiance and visual appeal.

While there’s no universal definition of a large window, they generally exceed the dimensions of standard windows, spanning from floor to ceiling or covering a considerable portion of a wall. These windows often incorporate sliding, picture, or bay configurations, maximizing natural light penetration and offering panoramic views of the surroundings.

4 Benefits of Installing Large Windows

There are lots of reasons why homeowners choose to install larger windows in their homes. Here are just a few:

1) Abundant Natural Light:

Large windows serve as conduits for sunlight, illuminating interiors and reducing the need for artificial lighting during the day. This not only enhances the visual appeal of a space but also contributes to energy savings.

2) Expansive Views:

One of the most significant advantages of large windows is their ability to frame breathtaking vistas, seamlessly integrating the outdoors with indoor living spaces. Whether overlooking a lush garden, sprawling cityscape, or serene waterfront, these windows elevate the aesthetic charm of any room.

3) Enhanced Ventilation:

In addition to light, large windows facilitate better airflow, promoting natural ventilation and creating a more comfortable living environment. This is particularly beneficial during the warmer months, allowing residents to enjoy fresh air without compromising security.

4) Architectural Statement:

Large windows serve as focal points within a room, adding a touch of drama and sophistication to its design. Whether incorporated into modern, minimalist spaces or traditional dwellings, these windows make a bold architectural statement, elevating the overall aesthetic appeal.

Reasons to Avoid Large Windows

Even windows can have downsides! Here are a few that tend to accompany the installation of a large window:

  • Higher Cost: Installing large windows typically entails higher upfront costs compared to standard-sized alternatives. Factors such as custom sizing, specialized materials, and additional structural support can contribute to increased expenses.
  • Privacy Concerns: While large windows offer unparalleled views, they also raise privacy concerns, especially in densely populated areas or urban settings. Strategic placement, along with the use of curtains, blinds, or frosted glass, can mitigate these concerns to some extent.
  • Heat Gain/Cold Drafts: Improperly insulated large windows may lead to heat gain in summer and heat loss in winter, resulting in increased energy consumption for heating and cooling. Opting for energy-efficient glazing and proper insulation can mitigate these issues.
  • Maintenance Challenges: Cleaning and maintaining large windows can be more labor-intensive compared to smaller counterparts, especially for windows located in hard-to-reach areas or at higher elevations.

Cost Considerations: How Much Does It Cost to Install Large Windows?

large city window

The cost of installing large windows varies depending on several factors, including size, materials, installation complexity, and geographical location. On average, homeowners can expect to pay anywhere from $800 to $2,500 per window for standard-sized installations. However, large windows may command higher price tags, ranging from $1,500 to $5,000 or more per window.

Factors influencing the cost of large window installation include:

  • Size and Configuration: Larger windows typically require more materials and labor, resulting in higher overall costs. Additionally, complex configurations such as floor-to-ceiling or custom-shaped windows may incur additional expenses.
  • Materials: The choice of materials significantly impacts installation costs. While vinyl and aluminum windows tend to be more affordable, options like wood or fiberglass may come with a higher price tag but offer superior aesthetics and durability.
  • Labor Costs: Professional installation is crucial for ensuring proper fit, sealing, and weatherproofing of large windows. Labor costs vary based on factors such as contractor expertise, project scope, and local labor rates.
  • Structural Modifications: Installing large windows may require structural modifications to accommodate their weight and size. This can include reinforcing walls, headers, or foundations, adding to the overall project cost.
  • Energy Efficiency Upgrades: Opting for energy-efficient glazing, such as double or triple-pane windows, Low-E coatings, or gas fills, can increase upfront costs but lead to long-term energy savings.

Why Professional Installation Is Essential

While DIY enthusiasts may be tempted to tackle window installation themselves, entrusting the task to a professional window installer offers numerous benefits:

Expertise and Experience:

Professional installers possess the requisite knowledge, skills, and experience to ensure proper installation, minimizing the risk of errors or structural damage.

Customization and Precision:

Professional installers can tailor solutions to meet specific design requirements, ensuring precise fitting and alignment of large windows for optimal performance and aesthetics.

Compliance with Building Codes:

Professional installers are well-versed in local building codes and regulations, ensuring compliance with safety standards and permitting requirements.

Warranty Coverage:

Many window manufacturers offer warranties that may be voided if windows are improperly installed. Professional installation ensures that warranties remain valid, providing peace of mind for homeowners.

Longevity of Large Windows

The lifespan of large windows varies depending on factors such as material quality, maintenance, and environmental conditions. Generally, well-maintained windows can last anywhere from 20 to 40 years or more. However, certain materials may offer superior durability and longevity:

  • Vinyl Windows: Vinyl windows are prized for their durability, resistance to rot, corrosion, and pests, making them an ideal choice for long-lasting performance with minimal maintenance.
  • Fiberglass Windows: Fiberglass windows boast exceptional strength and durability, outperforming other materials in terms of longevity and resistance to warping, cracking, and fading.
  • Aluminum Clad Wood Windows: Combining the natural beauty of wood with the durability of aluminum cladding, these windows offer superior longevity and weather resistance, albeit at a higher price point.

Proper maintenance, including regular cleaning, inspection, and lubrication of moving parts, can extend the lifespan of large windows and ensure optimal performance over the years.

The Importance of Energy Star Rated Windows

In an era of growing environmental awareness and rising energy costs, choosing energy-efficient windows is paramount. The Energy Star program, administered by the U.S. Environmental Protection Agency (EPA), certifies windows that meet stringent criteria for energy efficiency, helping homeowners reduce energy consumption, lower utility bills, and minimize environmental impact.

Energy Star rated windows offer several benefits:

  • Improved Thermal Performance: Energy Star rated windows feature advanced glazing technologies and insulated frames that minimize heat transfer, reducing energy loss and enhancing indoor comfort year-round.
  • Lower Utility Bills: By reducing heating and cooling loads, energy-efficient windows help homeowners save money on utility bills, offsetting the initial investment over time.
  • Environmental Sustainability: Energy-efficient windows contribute to lower greenhouse gas emissions by reducing energy consumption, thereby mitigating environmental impact and promoting sustainability.
  • Enhanced Comfort and Durability: Energy-efficient windows help maintain consistent indoor temperatures, eliminating cold drafts in winter and hot spots in summer, while also reducing condensation and moisture buildup, which can contribute to mold and mildew growth.

Transform Your Home Home With New Windows

Large windows offer a myriad of benefits, from abundant natural light and expansive views to architectural elegance and enhanced ventilation. While they may entail higher upfront costs and maintenance requirements, the long-term advantages, including energy savings and aesthetic appeal, make them a worthwhile investment.By working with professional installers and opting for energy-efficient solutions, homeowners can enjoy the beauty and functionality of large windows while minimizing environmental impact and maximizing comfort and savings. Ready to get started? Reach out to the Open Box team today!

Siding is like the skin of your house, protecting it from the elements while also contributing to its aesthetic appeal. However, over time, siding can wear out, becoming less effective and detracting from your home’s appearance.

When it’s time to replace your siding, it’s essential to understand:

  • The costs involved
  • The different materials available
  • The best practices for installation and maintenance

In this guide, we’ll delve into all aspects of siding installation cost, helping you make informed decisions for your home.

Signs That You Need to Replace Your Siding

Before discussing costs, it’s crucial to recognize the signs that your siding may need replacing:

  • Visible Damage: Look for cracks, warping, or holes in your siding. These issues can allow moisture to penetrate, leading to further damage and potentially mold growth.
  • Increased Energy Bills: Old or damaged siding can compromise your home’s insulation, resulting in higher energy bills as your HVAC system works harder to maintain a comfortable temperature.
  • Fading or Peeling Paint: If you notice your paint is peeling or fading unevenly, it could be a sign of moisture getting trapped beneath the siding, causing it to deteriorate.
  • Rot or Mold: Inspect your siding for signs of rot or mold growth, especially in areas prone to moisture buildup, such as around windows, doors, or in shaded areas.
  • Bubbling or Blistering: These abnormalities on your siding’s surface are often indicative of water infiltration, potentially causing significant damage to the underlying structure.

5 Different Siding Materials

When it comes to siding materials, there’s no shortage of options, each with its own advantages and price points. Here are some of the most common siding materials:

1) Vinyl Siding:

Vinyl is a popular choice due to its affordability, low maintenance requirements, and versatility in terms of colors and styles. It’s relatively easy to install, making it a cost-effective option for many homeowners.

2) Wood Siding:

Wood siding offers a timeless, natural look that can enhance the curb appeal of your home. While it tends to be more expensive than vinyl, wood siding can last for decades with proper maintenance.

3) Fiber Cement Siding:

Made from a blend of cement, sand, and cellulose fibers, fiber cement siding is durable, fire-resistant, and resistant to rot and pests. It’s available in various textures and can mimic the look of wood or stucco at a fraction of the cost.

4) Metal Siding:

Metal siding, such as aluminum or steel, is known for its durability and low maintenance requirements. It’s particularly well-suited for areas prone to extreme weather conditions and offers excellent protection against fire and pests.

5) Brick and Stone Veneer:

While more expensive than other options, brick and stone veneer siding can add a touch of elegance and sophistication to your home. It’s exceptionally durable and requires minimal maintenance but comes with a higher upfront cost.

The Cost of Installing New Siding

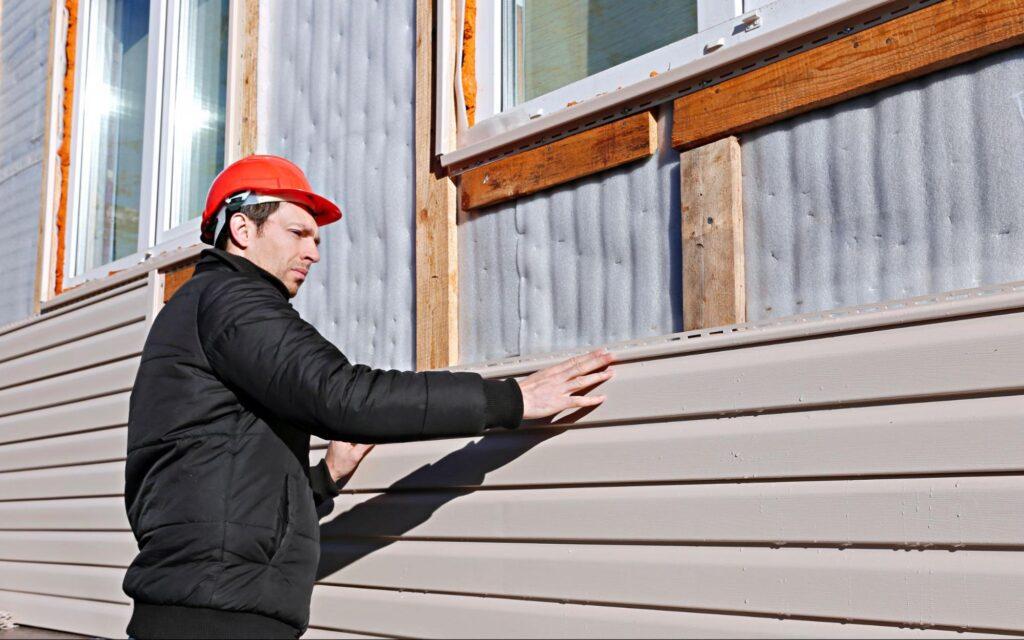
professional siding expert inspecting a project

The cost of installing new siding can vary significantly depending on several factors, including the size of your home, the chosen material, labor costs in your area, and any additional features or customization. On average, however, you can expect to pay anywhere from $6,000 to $15,000 for a typical single-story home, with prices increasing for larger or more complex projects.

Here’s a breakdown of average costs per square foot for each siding material:

  • Vinyl: $3 – $8 per square foot
  • Wood: $6 – $12 per square foot
  • Fiber Cement: $5 – $10 per square foot
  • Metal: $7 – $12 per square foot
  • Brick and Stone Veneer: $10 – $20+ per square foot

It’s essential to obtain quotes from multiple contractors and compare them carefully to ensure you’re getting a fair price for the quality of workmanship and materials.

5 Factors That Affect the Cost of Your Siding Installation

While the average cost of siding installation provides a helpful starting point, several factors can cause your project’s final cost to vary. Understanding these factors can help you anticipate potential expenses and make informed decisions about your siding installation:

1) Size and Complexity of Your Home:

The size, shape, and architectural complexity of your home will impact the amount of siding material needed and the labor required for installation. Larger homes or those with intricate designs, such as multiple stories, gables, or dormers, will typically incur higher costs due to the additional time and effort involved.

2) Siding Material and Quality:

The type of siding material you choose and its quality will have a significant impact on the overall cost of your installation. While vinyl siding tends to be the most affordable option, premium materials such as wood, fiber cement, or brick and stone veneer can come with a higher price tag but offer greater durability and aesthetic appeal.

3) Preparation Work:

Before installing new siding, any existing siding must be removed, and the underlying surface inspected and prepared for the new material. Additional preparation work, such as repairing damaged sheathing or addressing moisture issues, can add to the overall cost of the project.

4) Labor Costs:

Labor costs can vary depending on factors such as the contractor’s experience, location, and current demand for services. Highly skilled contractors may command higher rates, but their expertise can ensure a high-quality installation that lasts for years to come.

5) Customization and Extras:

If you opt for custom features or extras such as trim details, decorative accents, or insulation upgrades, these additions will increase the overall cost of your siding installation. However, they can also enhance the visual appeal and energy efficiency of your home, making them worthwhile investments in the long run.

6) Permitting and Regulations:

Depending on your local building codes and regulations, you may need to obtain permits for your siding installation project. Permitting fees and compliance with code requirements can add to the overall cost, so be sure to factor these expenses into your budget.

By considering these factors and consulting with a qualified siding contractor, you can develop a realistic budget for your installation project and ensure that you get the best value for your investment. While the initial cost of siding installation may seem daunting, choosing high-quality materials and professional installation can provide long-term benefits in terms of durability, energy efficiency, and curb appeal for your home.

DIY vs. Professional Installation

a siding expert installing siding

While some homeowners may opt to tackle siding installation themselves to save money, it’s crucial to consider the complexity of the project and the potential risks involved. Here are some factors to weigh when deciding between DIY and professional installation:

  • Skill Level: Siding installation requires precise measurements, cutting, and fitting, as well as knowledge of proper sealing and flashing techniques. If you’re not confident in your abilities, it’s best to leave it to the professionals.
  • Time and Effort: Installing siding can be a time-consuming and physically demanding task, especially for larger homes or more intricate designs. A professional crew can complete the job much more quickly and efficiently, minimizing disruption to your daily life.
  • Warranty and Insurance: Most reputable contractors offer warranties on their workmanship and may be insured against any accidents or damages that occur during the installation process. Attempting DIY installation could void any warranty on the siding material and leave you liable for any mishaps.
  • Tools and Equipment: Siding installation requires specialized tools and equipment, which can be expensive to purchase or rent for a one-time project. Professional contractors come equipped with everything they need to get the job done right the first time.

How to Maintain Your Siding

Once your new siding is installed, proper maintenance is essential to ensure it remains in optimal condition for years to come. Here are some tips for maintaining your siding:

Regular Cleaning:

Use a soft brush or sponge and a mild detergent to remove dirt, grime, and mildew buildup from your siding. Avoid using abrasive cleaners or pressure washers, as they can damage the surface.

Inspect for Damage:

Periodically inspect your siding for signs of damage, such as cracks, holes, or loose panels. Address any issues promptly to prevent further deterioration.

✂️ Trim Vegetation:

Keep trees, bushes, and other vegetation trimmed back from your siding to prevent moisture buildup and reduce the risk of pests infiltrating your home.

Repaint or Seal as Needed:

If you have wood siding, keep an eye on the paint or stain finish and reapply as necessary to protect against weathering and moisture damage. Similarly, seal any cracks or gaps in your siding to maintain its integrity.

Professional Inspections:

Consider scheduling annual inspections with a qualified siding contractor to identify any potential issues early on and address them before they become costly problems.

What to Look for in a Contractor

Choosing the right contractor is crucial to the success of your siding installation project. Here are some factors to consider when selecting a contractor:

  • Experience and Reputation: Look for a contractor with a proven track record of successful siding installations and positive reviews from satisfied customers. Ask for references and check online reviews to gauge their reputation.
  • Licensing and Insurance: Ensure that the contractor is properly licensed and insured to perform the work in your area. This protects you from liability in case of accidents or damages during the installation process.
  • Quality of Workmanship: Insist on seeing examples of the contractor’s previous work to assess the quality of their craftsmanship. Pay attention to details such as clean seams, straight lines, and proper flashing and sealing.
  • Communication and Transparency: Choose a contractor who communicates openly and transparently throughout the process, providing clear timelines, cost estimates, and explanations of the work involved.
  • Warranty and Guarantees: Inquire about the contractor’s warranty on both materials and workmanship, and make sure you understand what is covered and for how long. A reputable contractor should stand behind their work and be willing to address any issues that arise after the installation.

Replace Your Existing Siding With Open Box!

Replacing your siding is a significant investment in your home’s value, appearance, and protection. By understanding the signs that it’s time for replacement, the different materials available, the costs involved, and the importance of proper installation and maintenance, you can make informed decisions that will benefit you for years to come.

Whether you choose vinyl, wood, fiber cement, metal, or brick and stone veneer siding, selecting the right contractor and ensuring high-quality workmanship are essential steps toward achieving the results you desire.

Contact Open Box Roofing today to start your siding replacement!

A ceiling leak can be a homeowner’s worst nightmare, signaling potential damage to your property and the need for immediate attention. From ominous water stains to the dreaded drip-drip-drip, the signs of a ceiling leak are unmistakable.

We’re here to help! In this guide, we’ll explore everything you need to know about identifying, addressing, and repairing a ceiling leak, including:

Signs That Your Ceiling is Leaking

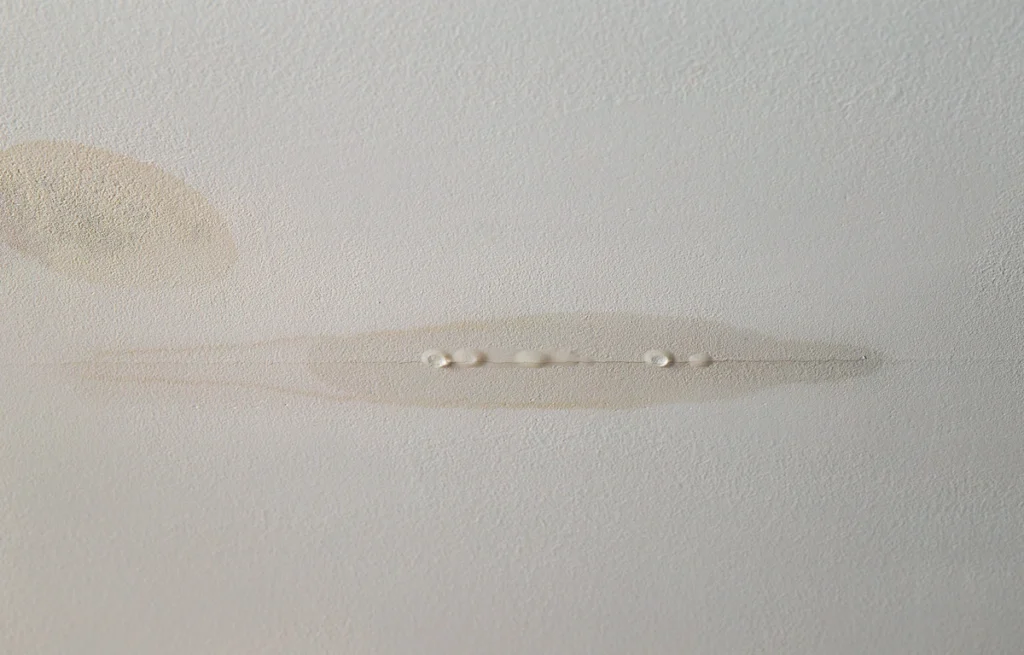
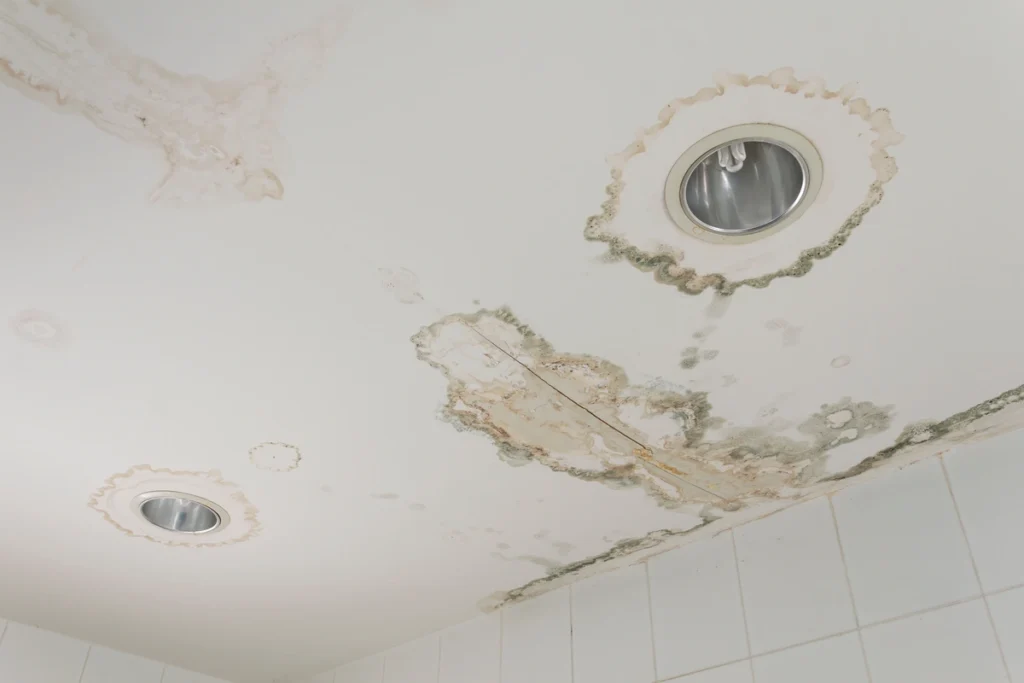
up close ceiling leak

Not sure if your ceiling is actually leaking? Here are some signs to look out for:

  • Water Stains: Water stains on your ceiling are perhaps the most obvious sign of a leak. They often appear as discolored patches or streaks and may spread over time if left untreated.
  • Dripping Water: If you notice water dripping from your ceiling, it’s a clear indication of an active leak. This can range from a steady drip to a more sporadic trickle, depending on the severity of the leak.
  • Bubbling or Peeling Paint: Moisture from a ceiling leak can cause paint to bubble or peel away from the surface. Keep an eye out for any unusual changes in the appearance of your ceiling.
  • Sagging Ceiling: In severe cases, prolonged exposure to water can cause the ceiling to sag or bulge. This is a sign of significant water damage and should be addressed immediately to prevent further structural issues.

Common Causes of a Leaking Ceiling

Ceiling leaks can be caused by a variety of factors, including:

  • Roof Damage: A damaged or aging roof is one of the most common causes of ceiling leaks. Missing shingles, cracked flashing, or deteriorating sealant can allow water to seep into your home.
  • Plumbing Issues: Leaking pipes or fixtures located above the ceiling can also lead to water damage. This can be particularly problematic if the leak goes unnoticed for an extended period, causing widespread damage.
  • Condensation: In areas with high humidity, condensation can form on the ceiling and eventually lead to leaks. Poor ventilation exacerbates this issue, making it essential to address any ventilation problems promptly.
  • Ice Dams: In colder climates, ice dams can form on the roof, preventing melting snow from properly draining away. This trapped water can then seep into the home, causing leaks and water damage.

How to Find the Source of the Leak

water damaged ceiling

If you suspect you have a ceiling leak, finding the source of the leak is key. Here are some tips for finding the damage….fast!

1) Inspect the Attic:

Start by examining the attic for any signs of water intrusion. Look for wet insulation, water stains on rafters or joists, and visible holes or gaps where water could be entering.

2) Check Roofing Materials:

Carefully inspect the roof for missing or damaged shingles, cracked flashing, or gaps around vents and chimneys. These areas are common entry points for water and should be addressed promptly.

3) Examine Plumbing Fixtures:

If the leak is suspected to be plumbing-related, check for signs of moisture around pipes, fittings, and fixtures. Pay close attention to areas where pipes penetrate the ceiling or walls.

4) Use a Hose Test:

If the source of the leak is not immediately apparent, consider conducting a hose test. Have someone spray water on different sections of the roof while you monitor the ceiling for signs of leakage indoors.

What to Do When You Discover a Ceiling Leak

So, you have a leaking ceiling. What steps should you take next? Here’s what the pros do:

  • Contain the Leak: Place buckets or containers beneath the leak to catch dripping water and prevent further damage to your home. You may also need to use towels or tarps to protect furniture and flooring.
  • Address Immediate Concerns: If the leak is severe or posing a safety hazard, such as electrical issues or structural damage, evacuate the affected area and contact emergency services if necessary.
  • Document the Damage: Take photographs or videos of the leak and any resulting damage for insurance purposes. This documentation will be valuable when filing a claim and seeking reimbursement for repairs.
  • Contact a Professional: While you may be tempted to tackle the repair yourself, it’s often best to enlist the help of a qualified contractor. They can assess the extent of the damage and recommend the appropriate course of action.

How a Ceiling Leak is Repaired: 4 Key Steps

Are you curious about how your roofing contractor will handle your roof leaks? We’ve compiled all of the steps that they will take, for you!

1) Identify and Address the Source:

The first step in repairing a ceiling leak is to identify and address the source of the problem. Whether it’s patching a hole in the roof or fixing a leaking pipe, addressing the root cause is essential to prevent future leaks.

2) Dry Out Affected Areas:

Once the source of the leak has been fixed, it’s crucial to dry out any affected areas to prevent mold and mildew growth. This may involve using fans, dehumidifiers, or professional drying equipment.

3) Repair Water Damage:

Depending on the extent of the damage, repairs may be needed to restore the ceiling to its original condition. This can include replacing damaged drywall, insulation, or ceiling tiles.

4) Paint and Finish:

Once repairs are complete, the ceiling may need to be repainted or finished to blend seamlessly with the surrounding area. This final step not only restores the aesthetic appeal of the ceiling but also helps protect against future damage.

The Cost of Roof Leak Repairs

The cost of repairing a ceiling leak can vary widely depending on several factors, including the extent of the damage, the materials needed for repairs, and the contractor’s rates. In general, minor repairs such as patching a small roof leak or fixing a leaking pipe may cost a few hundred dollars. However, more extensive repairs, such as replacing damaged drywall or addressing structural issues, can cost several thousand dollars or more.

Whether or Not Insurance Will Cover Repairs

Whether or not your homeowners insurance will cover the cost of ceiling leak repairs depends on the specific circumstances of the leak and your insurance policy. In most cases, sudden and accidental leaks caused by events such as storms or burst pipes are covered by standard homeowners insurance policies. However, gradual leaks or those resulting from neglect or lack of maintenance may not be covered. It’s essential to review your policy carefully and contact your insurance provider to determine coverage and file a claim if necessary.

How to Find a Quality Contractor to Help

Your roof deserves the best! Here are some ways to find a roofing contractor who you can rely on:

  • Ask for Recommendations: Start by asking friends, family, or neighbors for recommendations. Word-of-mouth referrals are often a reliable way to find a trustworthy contractor with a proven track record of quality work.
  • Check Credentials: Before hiring a contractor, be sure to check their credentials, including licenses, certifications, and insurance coverage. This helps ensure that you’re working with a reputable professional who meets industry standards.
  • Request References: Don’t hesitate to request references from past clients or examples of previous work. This allows you to assess the contractor’s workmanship and customer satisfaction before making a decision.
  • Get Multiple Quotes: Obtain quotes from multiple contractors to compare prices and services. Keep in mind that the lowest bid isn’t always the best option; consider factors such as experience, reputation, and warranty offerings when making your decision.

Emergency Repairs For Your Home

Dealing with a ceiling leak can be a stressful and challenging experience, but with the right knowledge and assistance, you can address the issue effectively and prevent further damage to your home.Don’t let the problem get worse! Instead, call Open Box Roofing today for speedy and reliable repairs for your home.

Asset 500
Asset 60
Don’t Think, Just Call Pink!
Request a Free Quote

Ready to get started? Contact OpenBox Roofing today to schedule your free inspection and discover how our residential roofing services can protect your home.

Name
Asset 5 2