Our Roofing Blog

Stay up to date on the latest roofing tips, trends, and insights from the experts at OpenBox Roofing. Our blog covers everything from seasonal maintenance to choosing the right materials for your home.

Whether you’re researching a new roof, learning about repairs, or exploring sustainability options, our articles make roofing information easy to understand.

Asset 1 7
Featured Article

3 Qualities to Look for When Hiring a James Hardie Siding Contractor

about us hoodie 150x150 1
Posted By: Openbox Roofing
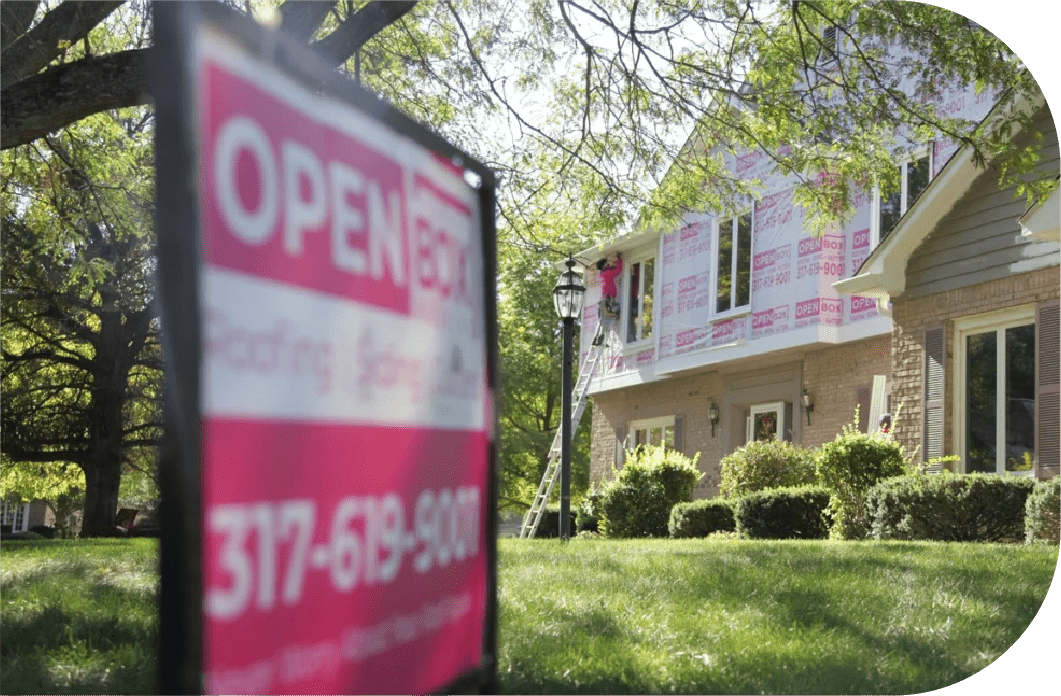
Here at Open Box Roofing, we strongly believe that our customers deserve nothing less than the best. That’s why we’re proud to be a part of the James Hardie Contractor Alliance Program. James Hardie siding is on more than 8 million homes across North America because it’s the best fiber cement siding product on the market, […]
Asset 17

Gutters are often overlooked when it comes to home maintenance, but they play a crucial role in protecting your property from water damage.

Properly functioning gutters divert rainwater away from your home’s foundation, preventing costly issues like:

  • Basement flooding
  • Mold growth
  • Structural damage

However, if your gutters are old, damaged, or inefficient, it might be time to consider installing new gutters.

In this comprehensive guide, we’ll discuss the different styles of gutters, the cost of new gutter installation, when you should invest in new gutters and essential gutter maintenance tips.

Exploring 5 Different Gutter Styles

aluminum gutter system

Before diving into the cost of installing gutters, it’s essential to understand the various gutter styles available. The style you choose can significantly impact the overall cost, as different materials and designs have varying price points. Here are the most common gutter styles:

1) K-Style Gutters

K-style gutters are the most popular choice for residential properties. They have a flat bottom and a decorative crown molding on the front, mimicking the appearance of crown molding. K-style gutters come in various sizes and materials, including aluminum, vinyl, and copper.

2) Half-Round Gutters

Half-round gutters are rounded on the bottom and have a more traditional, elegant appearance. They are often made of materials like aluminum, copper, or steel and are a great choice for homes with a classic aesthetic.

3) Box Gutters

Box gutters, also known as square gutters, have a rectangular shape and are typically custom-made to fit the specific dimensions of a building. They are commonly used in commercial and historical properties due to their capacity and durability.

4) Fascia Gutters

Fascia gutters are attached directly to the roof’s fascia board and are designed to blend seamlessly with the roofline. They offer a clean, streamlined look and are available in various materials.

5) Seamless Gutters

Seamless gutters are custom-made on-site to fit your home’s exact dimensions, reducing the risk of leaks and improving efficiency. They are available in both K-style and half-round styles.

Each gutter style has its unique advantages and price points. Consider your home’s architectural style, climate, and budget when choosing the right gutter style for your needs.

The Cost of New Gutter Installation

The cost of installing gutters can vary significantly based on several factors, including the type of gutter, material, labor, and the complexity of the installation. Here’s a breakdown of the average costs associated with new gutter installation:

Material Costs:

  • Vinyl Gutters: Vinyl is the most budget-friendly option, with prices ranging from $3 to $5 per linear foot. While affordable, vinyl gutters may not be as durable as other materials and can fade over time.
  • Aluminum Gutters: Aluminum gutters are a popular choice due to their affordability and durability. They typically cost between $4 and $9 per linear foot.
  • Copper Gutters: Copper gutters are the most expensive option, but they offer a timeless, elegant appearance and excellent longevity. Expect to pay between $15 and $25 per linear foot for copper gutters.
  • Steel Gutters: Steel gutters fall in the mid-price range, ranging from $6 to $12 per linear foot. They are durable and can withstand harsh weather conditions.
  • Galvanized Gutters: Galvanized steel gutters are treated with a layer of zinc to prevent rust, making them a cost-effective alternative to copper. Prices range from $4 to $8 per linear foot.

Labor Costs:

Labor costs can vary depending on your location and the complexity of the installation. On average, labor expenses for gutter installation can range from $1,000 to $2,500, with additional costs for features like gutter guards or downspout extensions.

Additional Costs:

Gutter Guards: Gutter guards are optional but can significantly reduce maintenance needs by preventing debris from clogging your gutters. Expect to pay an additional $2 to $10 per linear foot for gutter guards.

Total Cost:

To estimate the total cost of new gutter installation for your home, multiply the linear footage of gutters needed by the cost per linear foot for your chosen material. Then, add labor and any additional expenses, such as gutter guards.

When to Invest in New Gutters
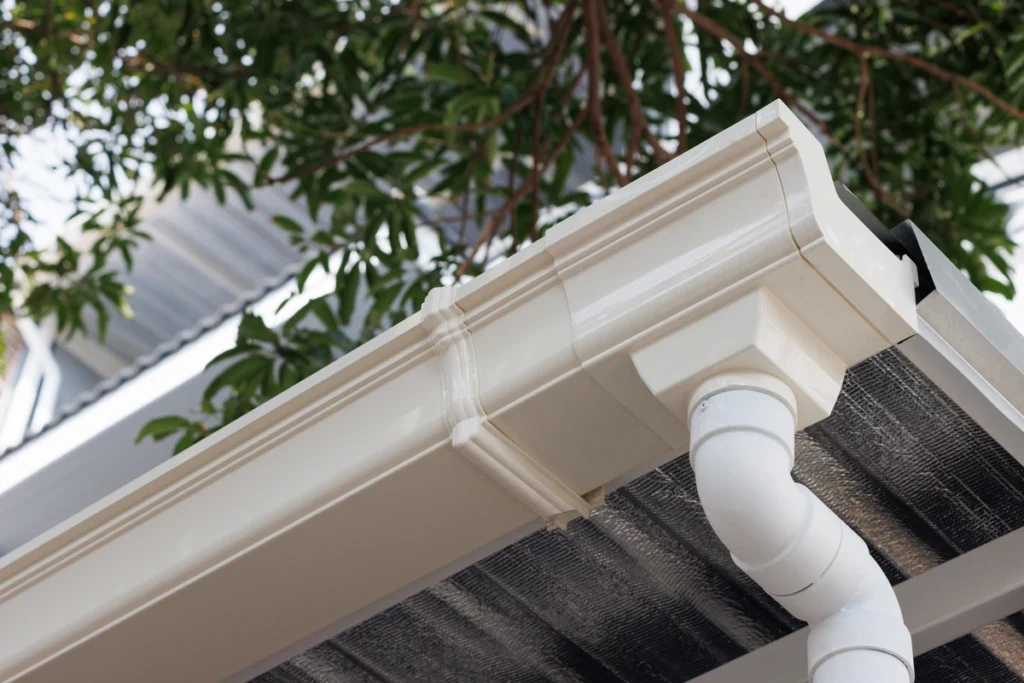
close up to house gutters

Determining when to invest in new gutters is crucial for maintaining your home’s integrity and preventing water damage. Here are some signs that it’s time to consider gutter replacement:

Frequent Clogs and Overflow:

If your gutters frequently clog, causing water to overflow or spill over the sides, it may be a sign that they are no longer functioning correctly. This can lead to water damage and foundation issues.

Visible Damage:

Cracks, rust, holes, or sagging sections in your gutters are clear indicators that they need replacement. These issues can result from years of wear and tear or severe weather events.

Peeling Paint or Stains:

If you notice paint peeling or stains on your home’s siding, it could be a sign that your gutters are leaking or overflowing, allowing water to damage the exterior.

Foundation Problems:

If your home’s foundation shows signs of settling, cracking, or water damage, it may be due to improper water drainage from faulty gutters.

Mold or Mildew Growth:

Excessive moisture from overflowing or leaking gutters can create ideal conditions for mold and mildew growth, which can be harmful to your health and your home’s structure.

Age:

Gutters have a lifespan, typically ranging from 20 to 50 years, depending on the material and maintenance. If your gutters are nearing the end of their expected lifespan, it’s wise to consider replacement before major issues arise.

Investing in new gutters when needed can save you money in the long run by preventing costly repairs and water damage to your home.

Gutter Maintenance Tips

Proper maintenance is key to ensuring the longevity and functionality of your gutters. Here are some essential gutter maintenance tips to keep in mind:

  • Regular Cleaning: Clean your gutters at least twice a year, in the spring and fall, to remove leaves, twigs, and debris. Clogged gutters can lead to water overflow and damage.
  • Inspect for Damage: Regularly inspect your gutters for signs of damage, such as cracks, rust, or loose connections. Address any issues promptly to prevent further damage.
  • Trim Overhanging Branches: Trim tree branches that hang over your roof to minimize the amount of debris that falls into your gutters.
  • Install Gutter Guards: Consider installing gutter guards to prevent leaves and debris from entering your gutters. This can significantly reduce the need for cleaning.
  • Ensure Proper Slope: Gutters should slope slightly downward toward the downspouts to ensure proper water flow. Check for any sagging sections and adjust as needed.
  • Test Downspouts: Ensure that downspouts are clear of obstructions and direct water away from your home’s foundation to prevent flooding and erosion.
  • Repair Leaks Promptly: If you notice any leaks or holes in your gutters, repair them promptly to prevent water damage to your home.

Get Info About Your Gutter Installation Costs

If you’re hoping to install gutters on your home, you deserve to work with a team of gutter experts! At Open Box Roofing, we’ll help protect your roof with quality gutter installations. Curious about what your installation costs will be? Contact us today for an estimate!
No matter how strong your roof is, it is inevitable that it will need repairs at some point or another. Whether it’s a minor leak or extensive damage, prompt roof repairs are essential for maintaining the overall health of your roof and home. If you’re a homeowner dealing with roof damage, there are a lot of things you need to manage, including:

  • Understanding the signs that indicate the need for roof repair
  • The associated cost
  • Choosing between a DIY approach or hiring a professional roofing contractor

Ready to better maintain the health of your roof?

We’re here to help you get on the right track, answering all of your questions from “How much does a roof repair cost?” to “How do I know my roof is damaged?”

Keep reading to become an expert!

Signs You May Need a Roof Repair

old shingle roofs

Before diving into the cost aspect, it’s crucial to recognize the signs that may indicate your roof requires attention. Identifying problems early can prevent further damage and potentially reduce repair expenses. Here are some common signs that you may need a roof repair:

  • Leakage: One of the most apparent signs of roof issues is water leaks. If you notice water stains on your ceiling or walls, it’s essential to address the problem promptly to prevent structural damage and mold growth.
  • Damaged Shingles: Inspect your roof for missing, cracked, or curling shingles. Damaged shingles can expose your roof’s underlying structure to moisture and cause leaks.
  • Aging: Roofs have a finite lifespan, and as they age, they become more susceptible to damage. If your roof is approaching or has exceeded its expected lifespan, it’s wise to consider repairs or a full replacement.
  • Moss and Algae Growth: The growth of moss, algae, or lichen on your roof can indicate moisture retention, which can lead to deterioration over time.
  • Sagging or Drooping Roof Deck: A sagging roof deck suggests structural problems that require immediate attention. This issue can be particularly dangerous, so don’t delay in seeking professional help.
  • Granule Loss: Check your gutters for an excess buildup of granules from asphalt shingles. Granule loss can indicate shingle wear and a potential need for repair.
  • Flashing Damage: Damaged or deteriorated flashing around chimneys, vents, and skylights can allow water to enter your home. Regularly inspect these areas for signs of wear and tear.

How Much Does Roof Repair Cost?

The cost of roof repair can vary significantly based on several factors, including the extent of damage, the roofing materials used, and your location. While it’s challenging to provide an exact figure without an inspection, we can provide a rough estimate for common repair scenarios:

Small Repairs:

Minor issues like a few missing or damaged shingles can cost between $100 and $500 to repair. These are typically the least expensive repairs.

Moderate Repairs:

If your roof requires more extensive work, such as repairing a section of damaged decking or addressing multiple damaged shingles, you can expect to pay anywhere from $500 to $1,500.

Major Repairs:

Extensive damage, such as widespread leaks or structural issues, can escalate the cost to $2,000 or more. In some cases, major repairs may even approach the cost of a roof replacement.

Roof Replacement:

If your roof is in such poor condition that repairs are not cost-effective or if it has reached the end of its lifespan, a full roof replacement may be necessary. Roof replacement costs vary widely but can range from $5,000 to $15,000 or more, depending on materials and size.

It’s crucial to remember that these are rough estimates, and actual costs can vary widely. Additionally, labor costs, material prices, and local factors can influence the final bill. To get an accurate assessment of your roof repair costs, it’s best to obtain quotes from reputable roofing contractors.

Is It Worth It to DIY Your Roof Repair?

While some homeowners are skilled and confident enough to tackle minor roof repairs themselves, it’s essential to consider the risks and benefits before deciding to DIY. Here are some factors to keep in mind:

Benefits of DIY Roof Repair:

  • Cost Savings: DIY roof repair can save you money on labor costs if you have the necessary skills and tools.
  • Immediate Action: You can address minor issues promptly, preventing them from worsening and potentially saving on future repair costs.
  • Control: You have full control over the repair process and can ensure that it meets your standards.

Risks and Challenges of DIY Roof Repair:

  • Safety: Roof work can be dangerous, and falling from a height can result in severe injuries or even fatalities. Professional roofers are trained to work safely on roofs.
  • Inadequate Repairs: If you lack experience, you may not correctly identify or address the underlying issue, leading to a temporary fix that doesn’t solve the problem.
  • Warranty Concerns: DIY repairs may void any existing roofing warranties, which could leave you responsible for future issues.
  • Time and Effort: Roof repairs can be time-consuming and physically demanding, especially for larger projects.

Given these factors, it’s generally advisable to consult with a professional roofing contractor for any significant repairs or if you’re unsure of your DIY skills. Safety should always be the top priority, and professionals have the training and expertise to ensure a durable and long-lasting repair.

How to Find a Qualified Roofing Contractor

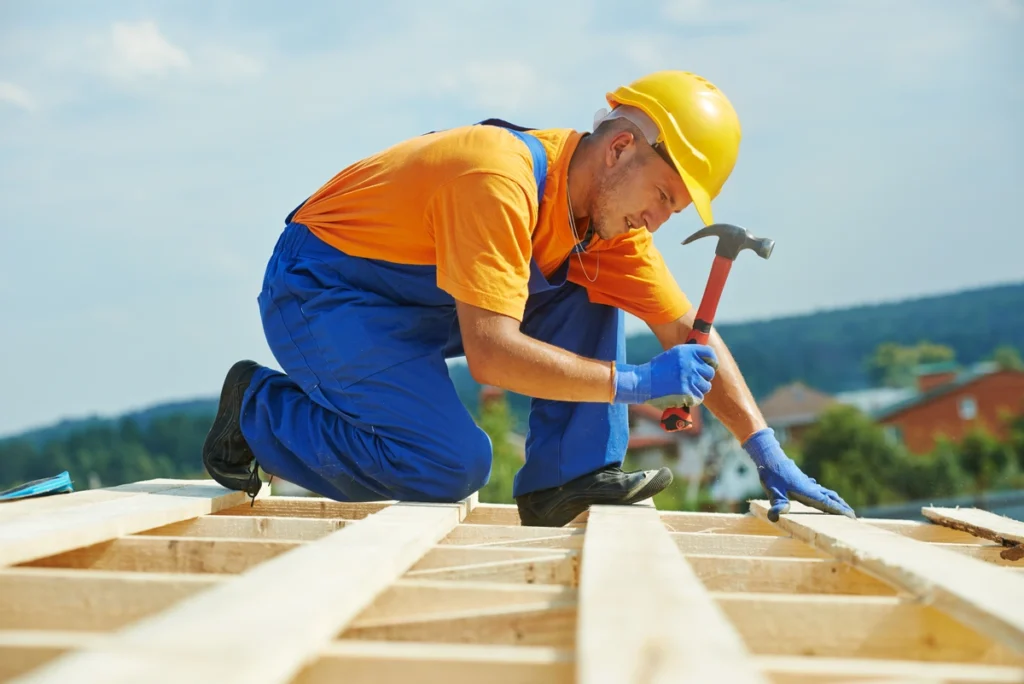
man wearing helmet on roof

When it comes to roof repairs, hiring the right roofing contractor is crucial to ensure the job is done correctly and at a fair price. Here are steps to help you find a qualified roofing contractor:

  • Ask for Recommendations: Start by asking friends, family, neighbors, or coworkers for recommendations. Personal referrals can provide valuable insights into the quality of a contractor’s work.
  • Research Online: Use online resources, such as review websites and social media platforms, to research local roofing contractors. Look for positive reviews and check for any complaints or red flags.
  • Check Credentials: Verify that the contractor is licensed, bonded, and insured. This provides you with protection in case of accidents or subpar workmanship.
  • Request Multiple Quotes: Contact several roofing contractors to provide estimates for your repair project. This will help you compare prices and assess the scope of the work required.
  • Ask for References: Request references from the contractor and follow up by contacting past clients to inquire about their experiences with the company.
  • Review the Contract: Carefully review the contract provided by the contractor. Ensure that all details, including materials, labor costs, and timelines, are clearly outlined.
  • Warranty and Guarantee: Inquire about the warranty or guarantee offered on the repair work. A reputable contractor should stand behind their workmanship.
  • Communication: Choose a contractor who communicates effectively and is willing to address your questions and concerns throughout the project.
  • Local Experience: Select a roofing contractor with local experience and knowledge of regional weather conditions and building codes.
  • Payment Terms: Avoid contractors who demand full payment upfront. A reasonable payment schedule should be established in the contract.

Get a Professional Roof Inspection

Solving your roofing issues starts with a thorough roof inspection from a qualified contractor. At Open Box Roofing, we have the expertise you need to get your roof back to where you want it to be. Contact our team today to get started! 

When it comes to asphalt shingles, one of the most critical decisions homeowners face is choosing between architectural shingles and 3-tab shingles. Both options have their own unique characteristics, advantages, and disadvantages. Doing a little research can help you determine which style is best suited for your needs.

We’re here to help you explore:

  • The differences between these two roofing styles
  • The pros and cons of each
  • Insights into their respective costs

By the end, you’ll have a better understanding of which type of shingle is the best fit for your roofing needs.

Architectural shingles vs. 3 Tab shingles….which style will you choose?

Understanding Architectural and 3-Tab Shingles

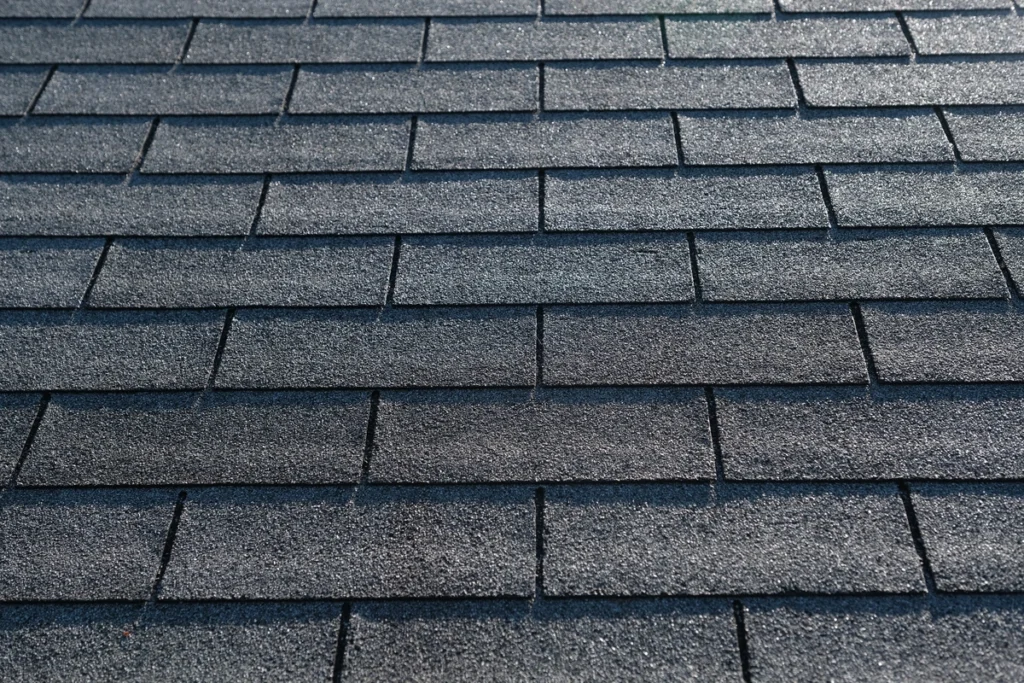
3 tab shingles

Before diving into the pros and cons, let’s start by understanding the fundamental differences between architectural and 3-tab shingles.

Architectural Shingles:

Architectural shingles, also known as dimensional shingles, are a premium roofing option known for their enhanced aesthetics and durability. These shingles are constructed using multiple layers of asphalt, which are fused together to create a three-dimensional appearance. This layering creates a textured and layered look that resembles wood or slate.

3-Tab Shingles:

3-tab shingles, on the other hand, are a more traditional and budget-friendly roofing material. They consist of a single layer of asphalt, with two cutouts or tabs along the bottom edge of each shingle. These tabs are designed to give the appearance of three separate shingles when installed.

The Pros and Cons of Architectural Shingles

✅ Pros of Architectural Shingles:

  • Enhanced Aesthetics: Architectural shingles are known for their striking appearance. Their three-dimensional design adds depth and texture to your roof, mimicking the look of high-end roofing materials like wood or slate.
  • Durability: These shingles are built to last. The multiple layers of asphalt provide better protection against harsh weather conditions, including wind, rain, and hail. Most architectural shingles come with extended warranties, often ranging from 25 to 50 years.
  • Variety of Styles and Colors: Architectural shingles offer a wide range of styles and color options, allowing homeowners to choose a look that complements their home’s architecture and personal taste.
  • Energy Efficiency: Some architectural shingles come with reflective coatings that can help reduce heat absorption, making your home more energy-efficient.

✅ Cons of Architectural Shingles:

  • Higher Cost: The premium features and enhanced aesthetics of architectural shingles come at a price. They are generally more expensive than 3-tab shingles, both in terms of material cost and installation.
  • Heavier Weight: Architectural shingles are heavier than 3-tab shingles, which can require additional support and could lead to more extensive roofing work during installation.
  • Complex Installation: The installation of architectural shingles can be more intricate due to their layered design, which may increase labor costs.

The Pros and Cons of 3-Tab Shingles

✅ Pros of 3-Tab Shingles:

  • Affordability: One of the most significant advantages of 3-tab shingles is their affordability. They are a budget-friendly roofing option that provides decent protection for your home.
  • Lighter Weight: 3-tab shingles are lighter than architectural shingles, which may reduce the need for structural modifications during installation.
  • Simpler Installation: Installing 3-tab shingles is generally simpler and quicker, which can lead to lower labor costs.

❌ Cons of 3-Tab Shingles:

  • Limited Aesthetics: While 3-tab shingles serve their purpose, they lack the dimensional look and aesthetic appeal of architectural shingles. They tend to have a flatter appearance and may not enhance the curb appeal of your home as much.
  • Shorter Lifespan: 3-tab shingles typically have a shorter lifespan compared to architectural shingles, often ranging from 15 to 30 years. This means you may need to replace them sooner, which can offset their initial cost savings.
  • Less Durability: Due to their single-layer design, 3-tab shingles may be more susceptible to damage from severe weather conditions, such as strong winds and hail.

Cost Comparison

brown architectural shingle roof with chimney

The cost of roofing materials and installation can vary significantly depending on various factors, including your location, the complexity of the job, and the materials chosen. Here’s a general cost comparison between architectural shingles and 3-tab shingles:

Architectural Shingles:

  • Material Cost: On average, architectural shingles cost between $100 to $150 per square (100 square feet) of roofing material.
  • Installation Cost: Installation costs for architectural shingles typically range from $250 to $450 per square.
  • Total Cost: When you factor in both materials and installation, the total cost for architectural shingles can range from $350 to $600 per square.

3-Tab Shingles:

  • Material Cost: 3-tab shingles are more budget-friendly, costing between $60 to $100 per square.
  • Installation Cost: Installation costs for 3-tab shingles generally range from $200 to $350 per square.
  • Total Cost: Taking both materials and installation into account, the total cost for 3-tab shingles can range from $260 to $450 per square.

It’s important to note that while 3-tab shingles may seem more affordable upfront, architectural shingles offer better longevity and aesthetics, which can make them a more cost-effective choice in the long run.

Get an Accurate Estimate

Is your roofing project getting you down? We’re here to help! At Open Box Roofing, we are proud to be roof replacement experts and can advise you every step of the way. Contact our knowledgeable team today to learn more about roofing materials for your home!

A leaky roof is a homeowner’s worst nightmare. Not only can it cause significant damage to your property, but it can also lead to costly repairs if left unattended. Today, we will explain:

  • Common reasons your roof may be leaking
  • How to locate a roof leak
  • DIY roof leak repair tips
  • When to call a professional roofer

By the end of this post, you’ll be equipped with the knowledge and confidence to tackle roof leaks head-on and protect your home.

Get your roof leak repaired today!

Common Reasons Your Roof May Be Leaking

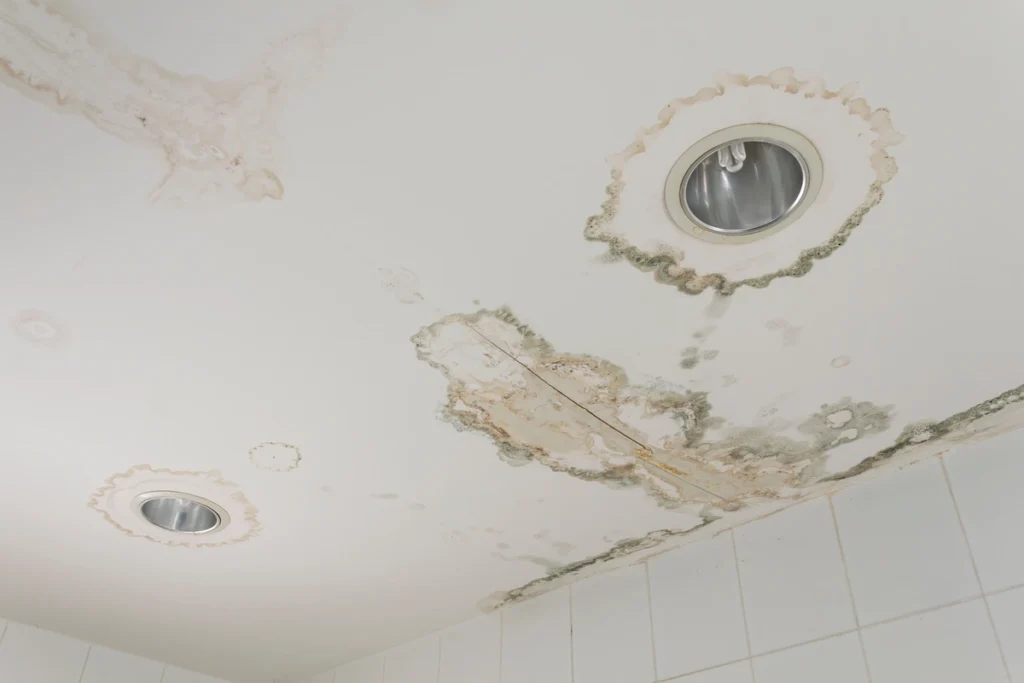
water stains from roof leakage

Before we dive into the specifics of repairing roof leaks, it’s essential to understand the common causes behind them. By identifying the root cause, you can take steps to prevent future leaks. Here are some common reasons your roof may be leaking:

  • Damaged or Missing Shingles: Over time, exposure to harsh weather conditions can cause shingles to crack, curl, or go missing altogether. This leaves your roof vulnerable to water infiltration.
  • Aging Roof: Roofs have a limited lifespan, and as they age, they become more susceptible to leaks. The wear and tear from years of exposure to the elements can compromise their integrity.
  • Flashing Issues: Flashing is the material used to seal the joints and transitions in your roof, such as around chimneys, vents, and skylights. If the flashing is damaged or improperly installed, it can allow water to seep through.
  • Clogged Gutters: When your gutters are clogged with leaves, debris, or dirt, water can overflow and find its way beneath your roofing materials. This can lead to leaks and water damage.
  • Ice Dams: In colder climates, ice dams can form on your roof’s edges, preventing proper drainage. As a result, water can accumulate and penetrate your roof.
  • Poorly Ventilated Attic: A poorly ventilated attic can lead to moisture buildup, which can eventually damage your roofing materials and cause leaks.
  • Hail or Storm Damage: Severe weather events like hailstorms or heavy rains can cause immediate damage to your roof, leading to leaks.

How to Locate a Roof Leak

Locating a roof leak can be a challenging task, as water can travel along various paths before finally making its way into your home. However, with patience and a systematic approach, you can pinpoint the source of the leak. Here’s a step-by-step guide:

Check the Interior

Begin by inspecting your interior spaces for signs of a leak. Look for water stains on your ceiling or walls, blistered paint, or peeling wallpaper. Follow these signs to the highest point on your ceiling, as water tends to travel downhill.

Inspect the Attic

If you have an attic, head up there with a flashlight on a sunny day. Look for any signs of water staining, mold, or dampness on the insulation or wooden rafters. This can help you narrow down the area of the leak.

Trace the Water Path

Once you’ve identified the general area of the leak, trace the path of the water. Keep in mind that water can travel horizontally along beams or rafters before dripping down, so follow any wet or discolored materials to their source.

Check Roof Penetrations

Roof penetrations, such as vents, chimneys, and skylights, are common areas for leaks to occur. Inspect the flashing around these features for damage or gaps.

Examine Shingles and Roofing Materials

Carefully inspect the roof’s surface for damaged or missing shingles, cracked tiles, or worn-out roofing materials. Pay close attention to areas where water might pool or collect.

5 DIY Roof Leak Repair Tips

If you’ve identified the source of the leak and feel comfortable tackling the repair yourself, here are some DIY tips to help you get started:

1) Gather the Necessary Materials

You’ll need roofing cement, roofing nails, a caulking gun, a putty knife, replacement shingles or flashing (if necessary), and a ladder.

2) Dry the Area

Ensure that the area around the leak is dry before starting the repair. Use towels or a heat gun to speed up the drying process.

3) Seal the Leak

Apply roofing cement to the damaged area using a putty knife. Press the cement firmly into any cracks or gaps. If you’re dealing with damaged flashing, remove the old material and replace it with a new piece before applying roofing cement.

4) Replace Missing Shingles

If the leak is due to missing shingles, carefully remove the damaged ones and replace them with new shingles. Secure them in place with roofing nails and seal the edges with roofing cement.

5) Check for Additional Issues

While you’re on the roof, take the opportunity to inspect the surrounding areas for any other potential issues. Address any problems you discover to prevent future leaks.

When to Call a Professional Roofer

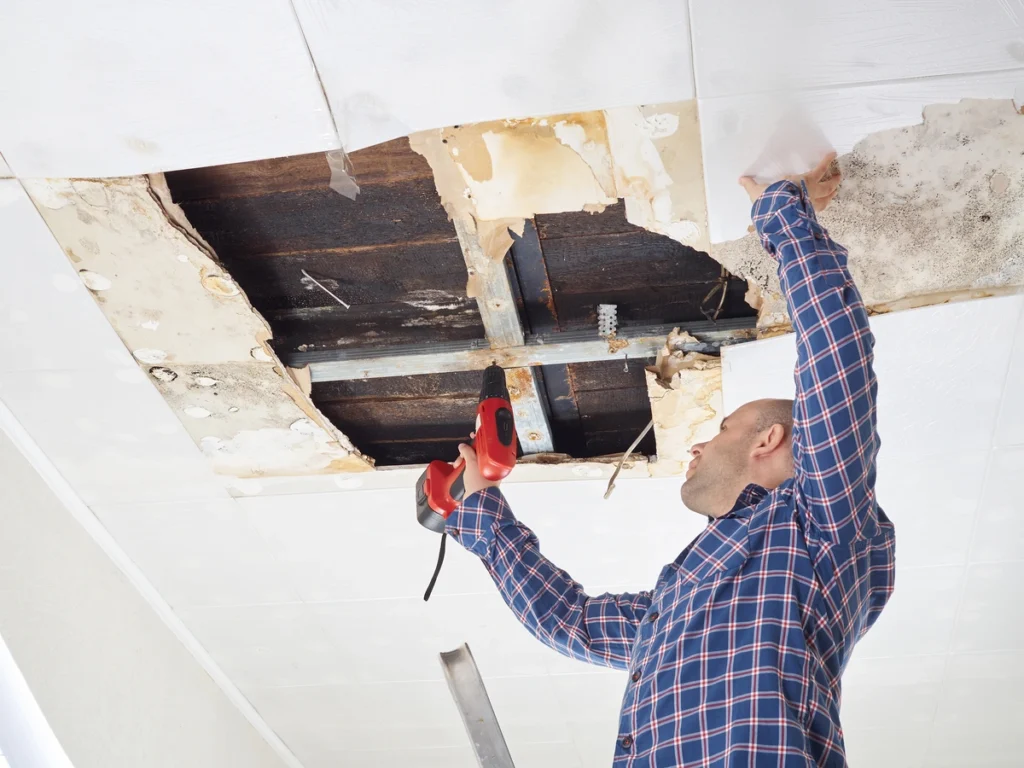
man repairing water leaked ceiling

While DIY repairs can be effective for minor roof leaks, there are situations where it’s best to call in professional roofing contractors. Here are some scenarios when professional assistance is warranted:

  • Extensive Damage: If the roof leak is extensive, involves multiple areas, or has caused significant structural damage, it’s best to leave the repair to professionals. They have the experience and tools to handle complex jobs safely.
  • Safety Concerns: Roof work can be dangerous, especially if you’re not experienced with heights or working on steep slopes. If you’re uncomfortable with the idea of climbing a ladder or walking on your roof, hire a professional to ensure your safety.
  • Warranty Considerations: If your roof is still under warranty, attempting DIY repairs may void the warranty. Professional roofers can perform repairs while preserving your warranty coverage.
  • Uncertain Diagnosis: If you’re unsure about the source of the leak or suspect multiple issues, it’s wise to consult a professional roofer. They can conduct a thorough inspection to identify all problems accurately.
  • Time Constraints: Roof leak repairs can be time-consuming, especially for inexperienced individuals. If you need a quick and effective solution, professionals can get the job done efficiently.

Solutions for Your Leaking Roof 

When it is time to hire someone to complete your roofing repair, you need a roofing contractor who knows how to work efficiently and effectively. At Open Box Roofing, we have the experience you need to put your shingle roof back in order. Contact us today to set up your repair!

We all know you should waterproof your leather shoes. A waterproof jacket is a must-have for those rainy hiking trips. But roof waterproofing? Not exactly common knowledge.

Waterproofing your roof not only safeguards your property but also ensures its longevity and structural integrity. But is it really necessary? We’re bringing you all of the facts you need to know, including:

  • The reasons why you should waterproof your roof,
  • The dangers of water damage to your roof
  • How roof waterproofing works
  • The cost involved
  • How to find a reputable roofing contractor

Looking for more ways to protect the health of your roof?

Let’s start with the importance of roof waterproofing.

5 Reasons Why You Should Waterproof Your Roof

green waterproofed asphalt shingle roof on building

Roofs are designed to be outdoors. Shouldn’t they be able to stand up to a little water?

The truth is that water damage is very common in roofs, and should be taken seriously. Here are 5 reasons why you should consider waterproofing your roof:

1) Prevent Water Infiltration

The primary purpose of waterproofing your roof is to prevent water infiltration. A well-maintained and waterproofed roof keeps rainwater, snow, and moisture from seeping into your home, which can cause extensive damage.

2) Extend Roof Lifespan

Roof replacement is a costly endeavor. Waterproofing your roof can significantly extend its lifespan by protecting it from the damaging effects of moisture. This means fewer repairs and replacements in the long run.

3) Maintain Energy Efficiency

Water infiltration can compromise your home’s insulation, leading to heat or cool air loss. By keeping your roof watertight, you can maintain your home’s energy efficiency, reducing heating and cooling costs.

4) Prevent Mold and Mildew Growth

Moisture in your attic or ceiling can create the perfect breeding ground for mold and mildew. Waterproofing prevents these potentially harmful growths from developing, preserving your indoor air quality.

5) Preserve Interior and Personal Property

Water damage can wreak havoc on your interior walls, ceilings, and personal belongings. Waterproofing your roof safeguards your home’s interior, protecting your valuable possessions.

The Dangers of Water Damage to Your Roof

Understanding the potential risks associated with water damage to your roof is crucial in realizing the importance of proactive waterproofing measures.

  • Structural Damage: Over time, water infiltration can lead to structural damage. The moisture can weaken the roof’s supporting beams, trusses, and decking, compromising the overall stability of your home.
  • Health Hazards: As mentioned earlier, water damage can promote mold and mildew growth. These fungi release airborne spores that can lead to various health issues, especially in individuals with allergies or respiratory conditions.
  • Aesthetic Degradation: Water stains and leaks can damage the aesthetics of your home’s interior, causing unsightly blemishes on your walls and ceilings.
  • Reduced Property Value: Water damage can significantly diminish the value of your property. If you plan to sell your home in the future, a well-maintained and waterproofed roof will be an attractive selling point.

How Roof Waterproofing Works

Roof waterproofing is a systematic process that involves applying various materials and coatings to create a barrier against moisture. The specific method used may vary depending on the type of roof and its condition. Here are some common roof waterproofing techniques:

Roof Membranes

Membrane systems are one of the most popular choices for waterproofing flat and low-slope roofs. These membranes, made of materials like EPDM rubber, PVC, or TPO, are installed over the existing roof structure and provide a seamless waterproof barrier.

Roof Coatings

Roof coatings are applied directly to the existing roof surface, creating a waterproof layer. These coatings can be elastomeric, acrylic, or silicone-based, and they are particularly effective for extending the life of aging roofs.

Asphalt Shingles

Asphalt shingles can be waterproofed with the addition of an underlayment material. Proper installation and sealing of the shingles are essential for ensuring a watertight barrier.

Tile and Metal Roofs

Roof waterproofing for tile and metal roofs typically involves flashing and sealing around protrusions and seams to prevent water from infiltrating.

Maintenance and Repairs

Regular roof inspections and maintenance play a crucial role in waterproofing. Identifying and addressing minor issues, such as damaged shingles or seams, can prevent water from causing more extensive damage.

The Cost to Waterproof Your Roof

couple planning roof repair cost

The cost of waterproofing your roof can vary widely depending on several factors, including the type of roofing material, the size and complexity of your roof, and the chosen waterproofing method. On average, you can expect to pay anywhere from $1,000 to $10,000 or more for roof waterproofing.

It’s essential to consider the long-term benefits when assessing the cost. While waterproofing may seem like a significant upfront investment, it can save you money in the long run by preventing expensive repairs and premature roof replacement.

Factors That Influence the Cost

  • Roof Type: Flat or low-slope roofs typically require more extensive waterproofing measures than pitched roofs, which can affect the cost.
  • Roof Size: The larger the roof, the more materials and labor will be required, increasing the overall cost.
  • Waterproofing Material: Different waterproofing materials and methods have varying costs. Membrane systems tend to be more expensive than coatings or underlayment.
  • Roof Condition: If your roof has pre-existing damage or issues, repairs may be necessary before waterproofing, adding to the overall cost.
  • Labor Costs: Labor costs can vary by location, so it’s essential to obtain multiple quotes from reputable contractors in your area.

How to Find a Reputable Roofing Contractor

Choosing the right roofing contractor is critical to the success of your roof waterproofing project. Here are some steps to help you find a reputable contractor:

  • Research and Recommendations: Start by asking friends, family, and neighbors for recommendations. You can also search online for local roofing contractors with positive reviews and a solid reputation.
  • Licensing and Insurance: Verify that the contractor is licensed and insured. A valid license demonstrates that they meet the necessary requirements and adhere to industry standards. Insurance coverage protects you and the contractor in case of accidents or property damage during the project.
  • Experience and Expertise: Look for contractors with extensive experience in roof waterproofing. Ask for references and examples of their previous work.
  • Written Estimates: Obtain written estimates from multiple contractors. Compare the scope of work, materials, labor costs, and project timelines to make an informed decision.
  • Warranty: Inquire about the warranty offered on both materials and labor. A reputable contractor should stand behind their work and offer a reasonable warranty.
  • Contract Agreement: Ensure that all project details, including costs, timelines, and warranties, are documented in a clear and comprehensive contract. Never rely solely on verbal agreements.
  • Check References: Contact the contractor’s references and ask about their experience with the company. Were they satisfied with the work? Did the project meet their expectations?
  • Better Business Bureau (BBB): Check the contractor’s BBB rating and any complaints filed against them. A high rating and a clean history indicate a reliable contractor.
  • Local Building Codes: Make sure the contractor is familiar with local building codes and obtains the necessary permits for your project.

Quality Waterproofing Solutions

Roof waterproofing isn’t for everyone, but it can make a huge difference in the overall safety of your property. Got questions? We’ve got answered. Contact Open Box Roofing to learn more about the benefits of waterproofing for your home. 

When it comes to maintaining and improving our homes, the roof is one of the most vital components. A well-maintained roof not only enhances curb appeal but also protects us from the elements. However, the cost of repairing or replacing a roof can be significant, often leading homeowners to seek financing options.

If this is the first time you’ve had to deal with a roof replacement, your head might be swimming with information. We’re here to help you! In this article, we’ll delve into the world of roof financing, exploring:

Keep reading to learn all of that and more!

Understanding Roof Financing: What Is It?

Bituminous tile roof of house

Roof financing refers to the various methods and options available for homeowners to fund the repair or replacement of their roofing systems. These financing options enable homeowners to spread out the cost of roof projects over time, making them more manageable and accessible. Roof financing can help you address roofing issues promptly, preventing further damage to your home and saving you money in the long run.

7 Roof Financing Options

Knowing the financing options that are available to you can help you to tackle your roof replacement costs without breaking the bank. The good news is that there are plenty of different routes that you can take! Here are seven of the most popular options when it comes to financing a new roof:

1) Personal Savings

If you have a robust emergency fund or savings earmarked for home maintenance, using your personal funds can be the simplest financing option. This approach eliminates interest payments and the need for credit checks.

2) Credit Cards

For smaller roofing projects, using a credit card with a low-interest rate can be a viable option. However, this approach is recommended only if you can repay the balance within a short period to avoid accumulating high-interest debt.

3) Home Equity Loans

Homeowners with substantial equity in their homes can consider a home equity loan. These loans offer competitive interest rates, and the interest paid may be tax-deductible. However, remember that your home is used as collateral, so timely repayments are crucial.

4) Personal Loans

woman using calculator

Unsecured personal loans are another option for financing your roof project. These loans don’t require collateral but may have higher interest rates compared to secured loans.

5) Roofing Company Financing

Many reputable roofing companies offer financing options directly to their customers. These plans can include low or even zero-interest promotions for a limited time, making them an attractive choice.

6) Government Programs

Some local or federal programs offer incentives for energy-efficient roofing upgrades. These programs can provide financial assistance or tax incentives to homeowners who opt for environmentally friendly roofing materials and systems.

7) Insurance Claims

If your roof damage is caused by covered perils, your homeowner’s insurance might cover part or all of the repair or replacement costs. Check your policy and consult with your insurance provider to determine eligibility.

The Average Cost of a Roof Replacement

The cost of a roof replacement can vary significantly based on factors such as the size of your home, the roofing material chosen, the complexity of the design, and the region you live in. On average, a roof replacement can range from $5,000 to $15,000 or more. Here’s a breakdown of the costs by roofing material:

  • Asphalt Shingles: The most common roofing material, asphalt shingles, are relatively affordable, with costs ranging from $3 to $7 per square foot.
  • Metal Roofing: Metal roofing offers durability and a modern aesthetic. Costs typically range from $7 to $12 per square foot.
  • Wood Shakes: Wood shakes provide a classic look but tend to be more expensive due to their labor-intensive installation. Costs can range from $8 to $14 per square foot.
  • Slate or Tile: These premium materials offer exceptional longevity and beauty but come with a higher price tag, ranging from $10 to $30 or more per square foot.

How to Find a Reputable Roofing Contractor

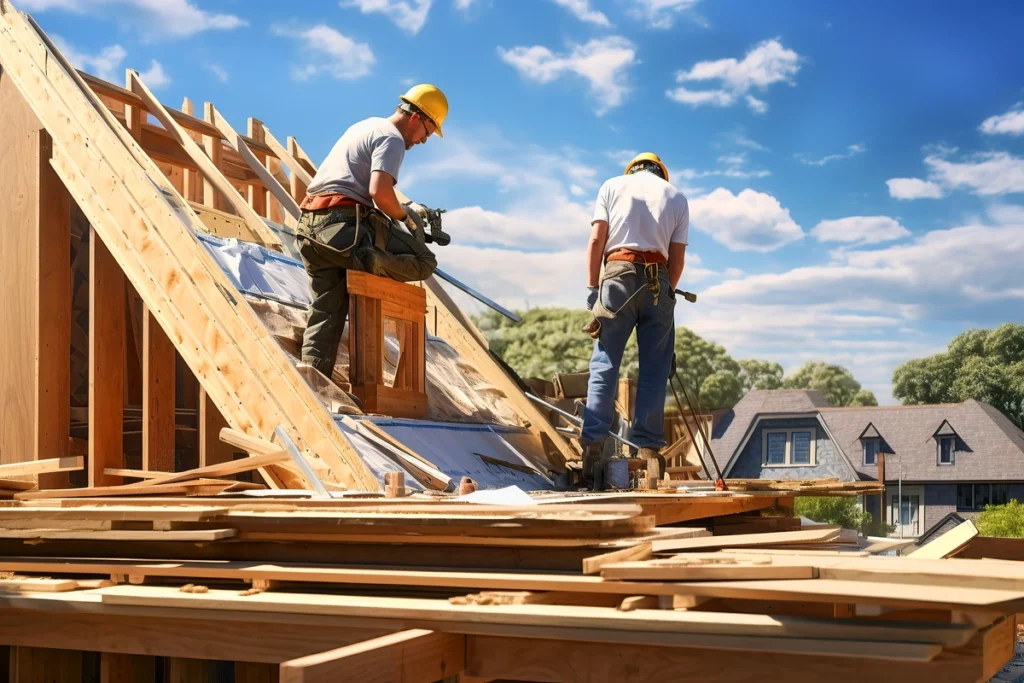
roofing contractors working

Selecting the right contractor is as crucial as choosing the right financing option. Here are some steps to help you find a reputable roofing contractor:

  • Research: Start by researching local roofing contractors. Look for established companies with positive reviews and a good reputation in your community.
  • Ask for Recommendations: Seek recommendations from friends, family, neighbors, and colleagues who have had roof work done recently. Personal experiences and referrals can be invaluable.
  • Check Credentials: Ensure the contractor is licensed, insured, and bonded. This protects you from liability in case of accidents or damages during the project.
  • Get Multiple Quotes: Obtain detailed quotes from multiple contractors. This not only helps you compare costs but also gives you insights into the scope of work and materials each contractor plans to use.
  • Ask Questions: Don’t hesitate to ask questions about the project timeline, materials, warranties, and any concerns you might have.
  • Review Contracts: Carefully review the contract before signing. Make sure it includes project details, payment terms, and warranties.
  • Visit Past Projects: If possible, visit some of the contractor’s past projects to assess the quality of their work firsthand.
  • Check References: Ask the contractor for references from previous clients. Contact these references to inquire about their experiences working with the contractor.

The Best Contractor for the Job

Your home deserves the best possible care. When you work with OpenBox Roofing, that is exactly what you will get. At OpenBox, we work with you to help you create a roofing system that works with your specific needs and budget. Ready to get started? Contact us today to discuss your options.

Asset 500
Asset 60
Don’t Think, Just Call Pink!
Request a Free Quote

Ready to get started? Contact OpenBox Roofing today to schedule your free inspection and discover how our residential roofing services can protect your home.

Name
Asset 5 2