Our Roofing Blog

Stay up to date on the latest roofing tips, trends, and insights from the experts at OpenBox Roofing. Our blog covers everything from seasonal maintenance to choosing the right materials for your home.

Whether you’re researching a new roof, learning about repairs, or exploring sustainability options, our articles make roofing information easy to understand.

Asset 1 7
Featured Article

3 Qualities to Look for When Hiring a James Hardie Siding Contractor

about us hoodie 150x150 1
Posted By: Openbox Roofing
Here at Open Box Roofing, we strongly believe that our customers deserve nothing less than the best. That’s why we’re proud to be a part of the James Hardie Contractor Alliance Program. James Hardie siding is on more than 8 million homes across North America because it’s the best fiber cement siding product on the market, […]
Asset 17

Roof sheathing, often overlooked but crucial to the structural integrity of any building, serves as the foundation for the roof covering. It provides support, stability, and a base for weatherproofing materials.

One of the critical factors in ensuring a sturdy roof is choosing the appropriate thickness for the sheathing. In this guide, we’ll help you understand:

  • What roof sheathing is
  • The various thickness options available
  • How to select the right roof sheathing thickness for your home
  • Signs indicatingthe need for replacement
  • The associated costs

What is Roof Sheathing?
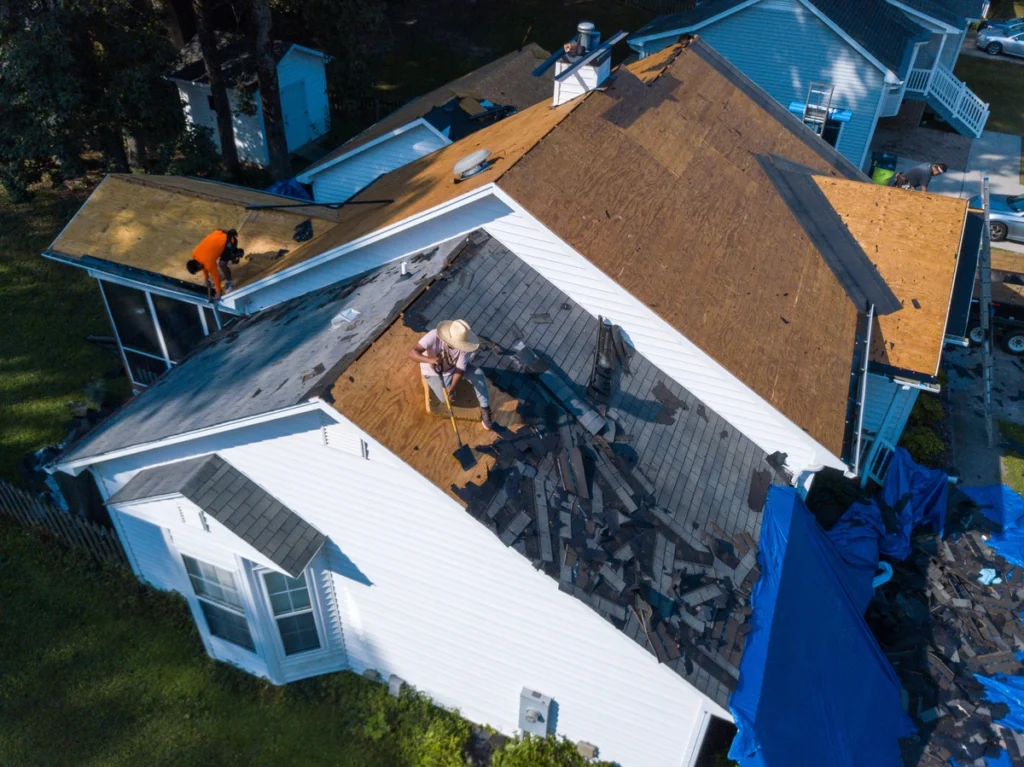
roof sheathing

Roof sheathing, also known as roof decking, is the layer of material installed over the roof rafters or trusses. It forms the base to which roofing materials such as shingles, tiles, or metal panels are attached. Typically, roof sheathing is made from plywood or oriented strand board (OSB), although other materials like metal decking or composite panels may be used in specific applications.

Different Thicknesses

Roof sheathing comes in various thicknesses, typically ranging from 3/8 inch to 1 inch or more. The most common thicknesses for residential construction are 1/2 inch and 5/8 inch.

The choice of thickness depends on factors such as:

  • The local building codes
  • The type of roofing material to be installed
  • The spacing of roof rafters or trusses
  • The anticipated loads, including snow, wind, and the weight of workers during installation

How to Choose the Right Thickness for Your Home

When selecting the appropriate thickness for your roof sheathing, it’s essential to consider several factors:

Building Codes:

Local building codes often specify the minimum required thickness for roof sheathing based on factors like climate and expected loads. Adhering to these codes is crucial for ensuring structural integrity and safety.

Roofing Material:

Different roofing materials have varying weight requirements. Heavier materials such as clay tiles or slate may necessitate thicker sheathing to provide adequate support and prevent sagging or damage.

Rafter Spacing:

The spacing between roof rafters or trusses influences the strength of the roof structure. Wider spacing may require thicker sheathing to compensate for reduced support.

Climate:

Areas prone to high winds, heavy snow loads, or frequent storms may require thicker sheathing to withstand the additional stress and protect against potential damage.

Budget:

While thicker sheathing typically offers greater durability and strength, it may also come at a higher cost. Balancing performance requirements with budget constraints is essential when selecting the right thickness.

When to Replace Your Roof Sheathing
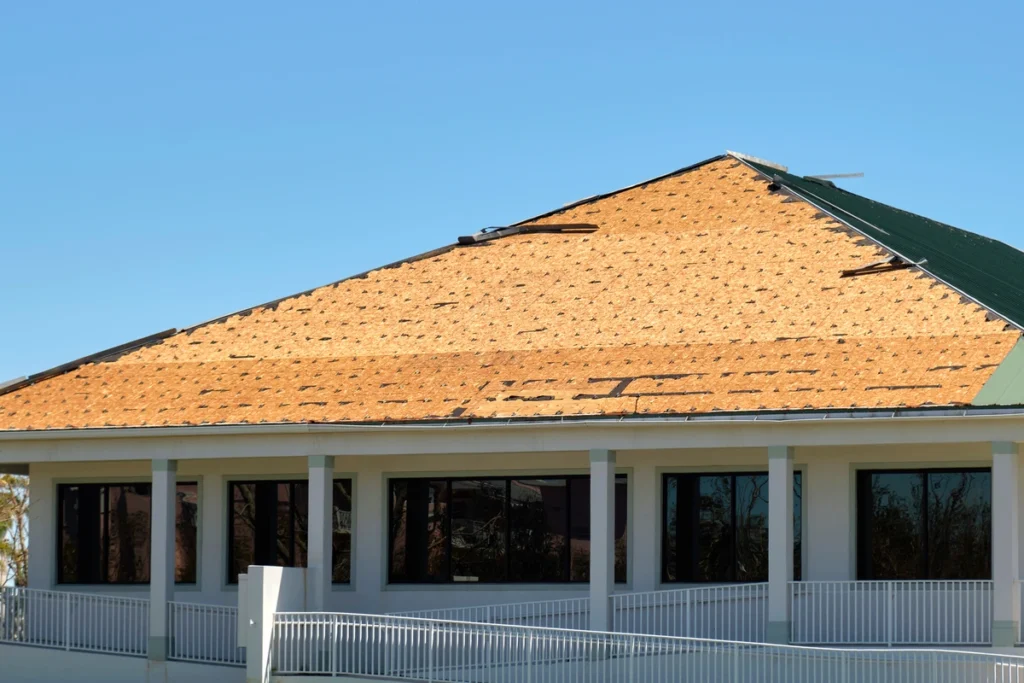
roof deck

Over time, roof sheathing may deteriorate due to factors such as moisture intrusion, pests, or prolonged exposure to the elements. Signs indicating the need for replacement include:

  • Water Damage: Stains, mold, or rot on the underside of the roof decking are signs of water infiltration, indicating compromised sheathing that needs replacement.
  • Sagging or Uneven Roof Surface: A visibly sagging or uneven roof surface may indicate weakened or damaged sheathing unable to support the weight of the roofing materials.
  • Pest Infestation: Termite or carpenter ant damage to the sheathing can compromise its structural integrity, necessitating replacement to prevent further damage.
  • Delamination or Warping: Delamination, where the layers of plywood or OSB separate, or warping of the sheathing boards can diminish their strength and require replacement.
  • Age: As roof sheathing ages, it may become brittle or lose structural integrity, increasing the risk of failure. If your roof is nearing the end of its expected lifespan, it may be time to consider replacement.

Cost of Installing Roof Sheathing

The cost of installing roof sheathing varies depending on factors such as the size of the roof, the chosen thickness and material, accessibility, and labor rates in your area. On average, homeowners can expect to pay between $1.50 to $3.00 per square foot for materials and labor.

For example, for a 1,500 square foot roof, the total cost of sheathing installation may range from $2,250 to $4,500. However, thicker sheathing or specialty materials may increase the cost further.

Get Advice From a Professional Roofing Contractor

Roof sheathing plays a vital role in supporting the roof structure and protecting your home from the elements. Choosing the right thickness is crucial for ensuring durability, stability, and compliance with building codes.Regular inspection and maintenance can help identify signs of damage or deterioration, allowing for timely repairs or replacement. Contact Open Box Roofing today to schedule your roof inspection, and learn whether your sheathing thickness is appropriate!

When it comes to home maintenance, the roof often takes a backseat to other, more visible parts of the house. After all, we spend most of our time indoors, so it’s easy to overlook the vital role that the roof plays in keeping our homes safe and comfortable.

However, neglecting roof maintenance can lead to a host of problems that can be costly and inconvenient to fix. In this blog post, we’ll explore:

  • The importance of roof maintenance
  • What can happen if you don’t maintain your roof
  • A checklist of essential maintenance tasks
  • When it’s time to call in a professional
man on a ladder cleans out gutters

The Importance of Roof Maintenance

Your roof is your home’s first line of defense against the elements. It shields you from rain, snow, wind, and harsh sunlight. A well-maintained roof can extend the lifespan of your home and save you money in the long run. Here are some key reasons why roof maintenance is crucial:

Prevent Leaks and Water Damage

One of the primary functions of a roof is to keep water out of your home. If your roof is damaged or has missing shingles, water can seep in, leading to leaks and water damage inside your house. These leaks can damage your ceiling, walls, insulation, and even your electrical system. Regular roof maintenance can help identify and address potential issues before they become major problems.

Extend the Lifespan of Your Roof

A well-maintained roof can last significantly longer than a neglected one. Regular inspections and repairs can help prevent minor issues from escalating into costly roof replacements. With proper care, many roofs can last 20 years or more.

Maintain Energy Efficiency

Your roof also plays a role in your home’s energy efficiency. A damaged or poorly insulated roof can result in heat loss during the winter and heat gain during the summer, making your heating and cooling systems work harder and increasing your energy bills. By keeping your roof in good condition and ensuring proper insulation, you can save money on energy costs.

Preserve Your Home’s Structural Integrity

A compromised roof can lead to structural problems in your home. When water enters through leaks, it can weaken the underlying structure, including wooden beams and supports. Over time, this can lead to serious structural issues that are costly to repair.

What Happens If You Don’t Maintain Your Roof

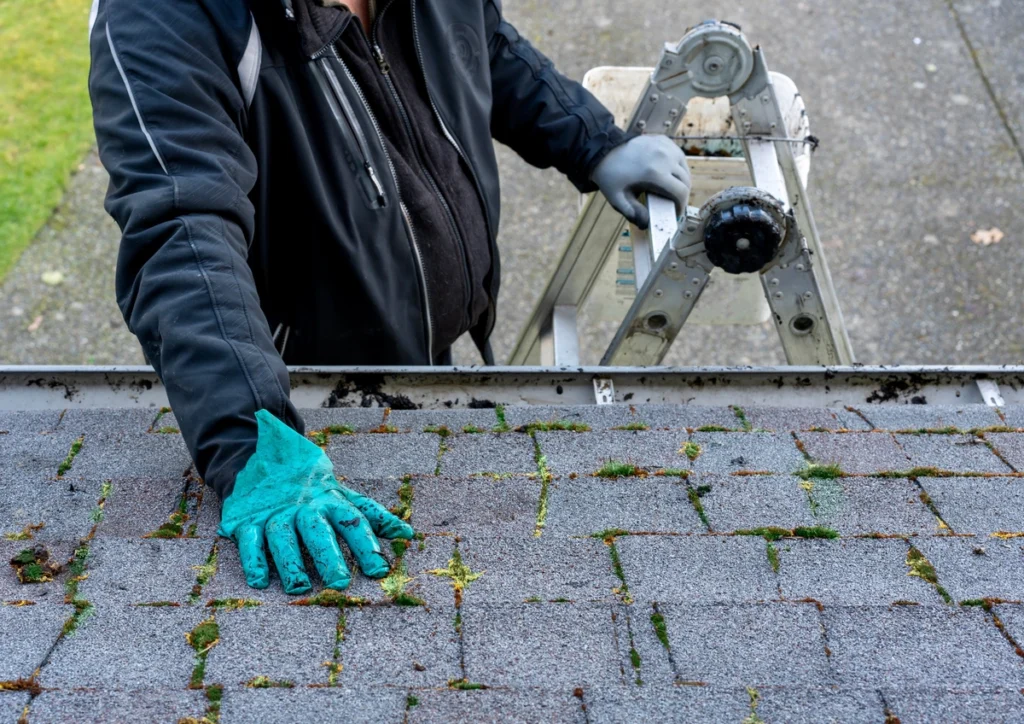
moss growing in between shingles

Neglecting roof maintenance can have serious consequences. Here’s what can happen if you ignore your roof:

  • Roof Leaks and Water Damage: As mentioned earlier, neglecting your roof can lead to leaks and water damage inside your home. This can result in unsightly stains on your ceilings and walls, damaged insulation, and even mold growth, which can pose health risks to your family.
  • Premature Roof Failure: Roofs that aren’t maintained are more likely to fail prematurely. When small issues go unaddressed, they can escalate into major problems that require a full roof replacement, which is a significant expense.
  • Decreased Home Value: A poorly maintained roof can significantly decrease the value of your home. If you decide to sell, potential buyers may be deterred by the prospect of having to invest in a new roof shortly after purchasing the property.
  • Higher Energy Bills: An inefficient roof can lead to higher energy bills as your heating and cooling systems have to work harder to maintain a comfortable temperature inside your home. This can be an ongoing financial burden.

6 Step Roof Maintenance Checklist

Now that we understand why roof maintenance is essential, let’s take a look at a checklist of tasks you can perform to keep your roof in good condition:

1. Regular Inspections ✅

Perform visual inspections of your roof at least twice a year, in the spring and fall. Look for missing or damaged shingles, signs of wear and tear, and any areas where water might be pooling.

2. Clean Gutters ✅

Clogged gutters can lead to water backing up on your roof, causing damage. Clean your gutters regularly to ensure proper drainage.

3. Trim Overhanging Branches ✅

Tree branches that overhang your roof can cause damage during storms or from constant contact with the roof’s surface. Trim back branches to prevent this.

4. Replace Missing Shingles ✅

If you notice missing or damaged shingles during your inspections, replace them promptly to prevent leaks.

5. Check Flashing ✅

Inspect the flashing around chimneys, vents, and skylights for signs of wear or damage. Damaged flashing can allow water to enter your home.

6. Insulate and Ventilate ✅

Ensure your attic is properly insulated and ventilated to prevent ice dams in the winter and excess heat in the summer.

When to Use a Professional

While regular maintenance tasks can often be done by homeowners, there are times when it’s best to call in a professional roofing contractor. Here are some situations when professional help is warranted:

  • Roof Replacement: If your roof is nearing the end of its lifespan or has extensive damage, it’s time to consider a roof replacement. This is a job best left to experienced professionals.
  • Complex Repairs: Some roof repairs, such as fixing flashing or addressing structural issues, require specialized skills and equipment. Don’t attempt these repairs yourself unless you have the necessary expertise.
  • Safety Concerns: Working on a roof can be dangerous, especially for those without proper training and safety equipment. If you have safety concerns or a fear of heights, hire a professional.
  • Warranty Issues: If your roof is under warranty, attempting DIY repairs or maintenance may void the warranty. It’s essential to follow manufacturer guidelines and use qualified professionals when necessary.

Roof Repair Experts For Your Roof

Roof maintenance is a critical aspect of homeownership that should not be overlooked. By regularly inspecting, cleaning, and addressing minor issues, you can protect your home from leaks, water damage, and premature roof failure. Remember that when in doubt or faced with significant roofing problems, it’s best to consult a professional roofing contractor to ensure the safety and integrity of your roof. Taking care of your roof is an investment in the long-term health and value of your home.

At Open Box Roofing, we can provide you with a detailed roof inspection and help you develop a maintenance plan to keep your roof healthy for years. Contact us today to schedule you appointment.

When it comes to maintaining a healthy and functional home, one aspect that is often overlooked is proper roof ventilation. Roof vents may not be the most glamorous part of your home, but they play a crucial role in ensuring your home’s longevity, energy efficiency, and overall comfort.

In this blog post, we will delve into the importance of roof ventilation, exploring:

  • The different types of roof vents
  • How they work
  • Signs of poor roof ventilation
  • The costs associated with adding or improving roof ventilation

Wondering if a roof vent might improve the health of your home? Keep reading to find out!

And when you’re ready to maintain, repair, or replace your roof, reach out!

The Importance of Roof Ventilation

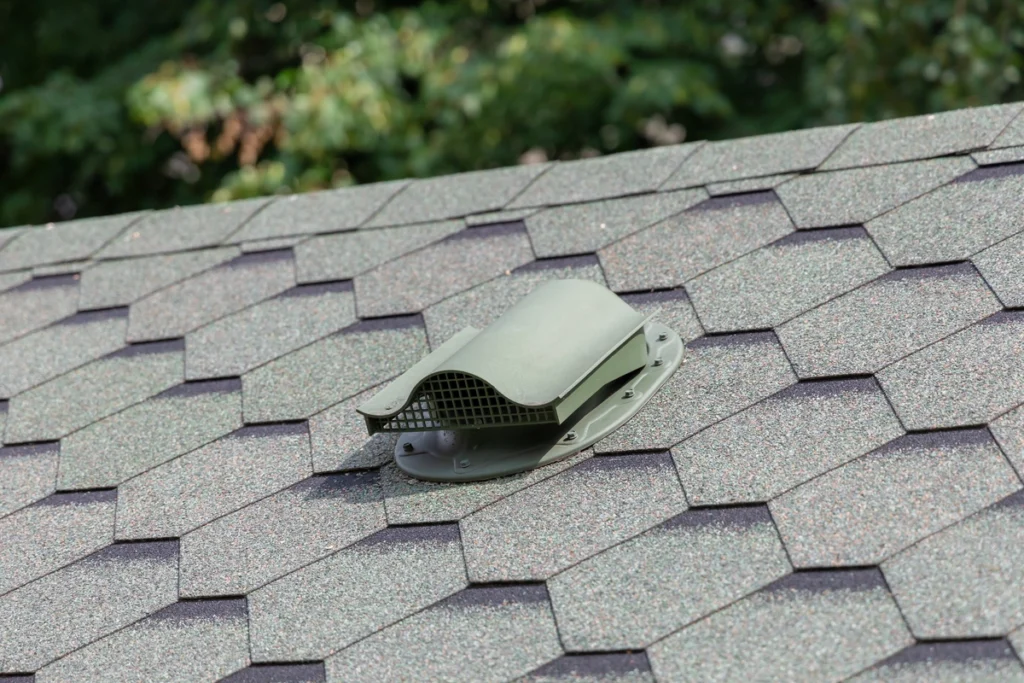
a roof vent on dimensional shingles

A quality roof ventilation system is hugely important when it comes to protecting your home. Here are some of the reasons why:

  • Temperature Regulation: Proper roof ventilation helps regulate the temperature in your attic and home. During hot summer months, it allows hot air to escape, preventing your attic from becoming a sweltering heat trap. In the winter, it helps to prevent condensation and moisture buildup, which can lead to mold and structural damage.
  • Energy Efficiency: An adequately ventilated roof can significantly impact your home’s energy efficiency. By reducing the heat buildup in your attic, your HVAC system doesn’t have to work as hard to cool your home, resulting in lower energy bills.
  • Roof Longevity: Excessive heat and moisture in your attic can accelerate the aging process of your roofing materials, leading to premature deterioration. Proper ventilation extends the lifespan of your roof by preventing damage caused by extreme temperature fluctuations and moisture buildup.
  • Moisture Control: Without proper ventilation, moisture can accumulate in your attic, causing wood rot, mold growth, and damage to insulation. These issues can compromise the structural integrity of your home and lead to costly repairs.

4 Different Types of Roof Vents

There are several types of roof vents, each designed to serve a specific purpose. Understanding these options can help you choose the right ventilation system for your home.

1) Ridge Vents

Close up view of roof ridge vent on shingle roof

Ridge vents are installed along the peak of the roof and provide continuous ventilation. They work by allowing hot air to rise and escape from the attic while drawing in cooler air through soffit vents, creating a natural airflow. Ridge vents are unobtrusive and blend seamlessly with the roofline.

2) Soffit Vents

Soffit vents are installed on the underside of the eaves and allow fresh air to enter the attic. This incoming air replaces the hot, stale air that is expelled through ridge vents or other exhaust vents. Soffit vents are essential for creating a balanced airflow.

3) Gable Vents

Gable vents are placed in the gable end walls of the attic and provide exhaust ventilation. They work by allowing hot air to exit the attic, creating a draft that draws in cooler air from the soffit vents. Gable vents can be aesthetically pleasing and functional.

4) Roof Louvers or Box Vents

Roof louvers, also known as box vents, are static vents that are installed on the roof’s surface. They don’t have moving parts and rely on natural convection to allow hot air to escape. While effective, they may not provide continuous ventilation unless used in conjunction with other vents.

Signs You May Have Poor Roof Ventilation

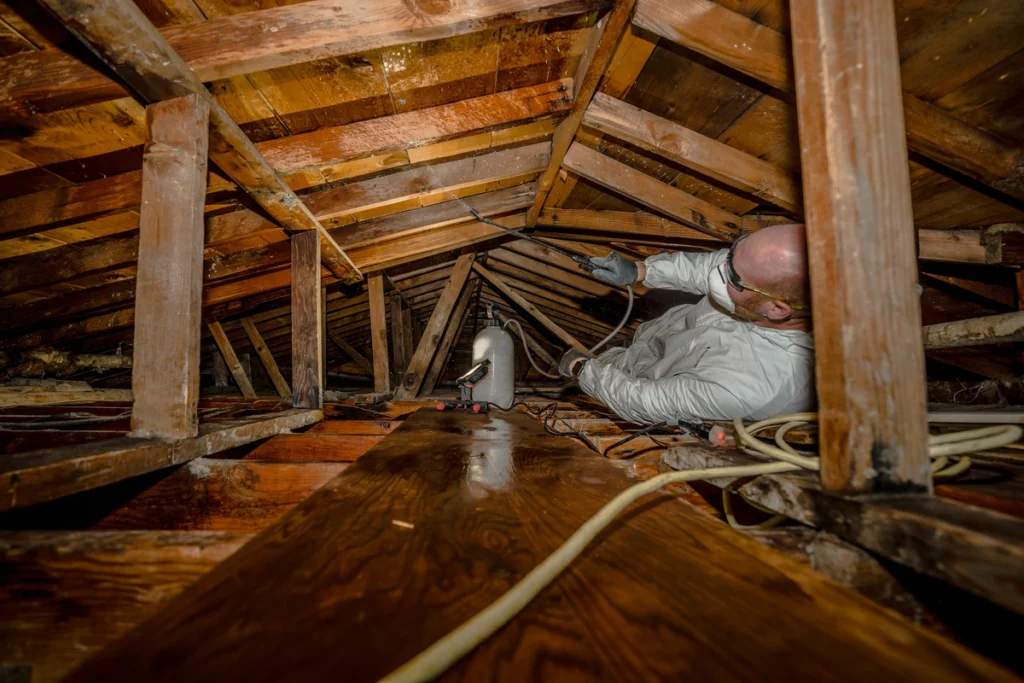
Close up view of roof attic with mold issue due to poor roof ventilation

Recognizing the signs of poor roof ventilation is crucial for addressing the issue before it leads to more significant problems. Here are some common indicators that you need to up your roof vents:

  • High Utility Bills: If your energy bills have been consistently high, inadequate roof ventilation may be to blame. Your HVAC system may be working overtime to compensate for the hot, stagnant air in your attic.
  • Ice Dams: In winter, ice dams can form on the roof’s edge when warm air in the attic melts the snow on the roof, which then refreezes. Proper ventilation can help maintain a consistent roof temperature, reducing the risk of ice dams.
  • Mold or Mildew: The presence of mold or mildew in your attic is a clear sign of excess moisture due to poor ventilation. Mold not only damages your home’s structure but can also pose health risks.
  • Warped Roof Decking: Over time, excessive heat and moisture can cause the roof decking to warp or rot. Inspect your attic for any signs of damage to the wood structure.

How Much It Costs to Add Roof Ventilation

The cost of adding or improving roof ventilation can vary based on several factors, including the type of vents you choose, the size and complexity of your roof, and local labor and material costs. Here’s a rough estimate of what you might expect to pay:

Downward aerial view of shingle roofing system with roof vents
  • Ridge Vent Installation: Installing a ridge vent on an average-sized roof can cost between $500 to $1,500, depending on factors such as the roofing material, roof pitch, and accessibility.
  • Soffit Vent Installation: Adding soffit vents is generally less expensive, with costs ranging from $2 to $10 per linear foot. The total cost will depend on the length of soffit that needs to be vented.
  • Gable Vent Installation: Installing gable vents can range from $150 to $400 each, including labor and materials. Multiple gable vents may be required for larger attics.
  • Roof Louver or Box Vent Installation: The cost of roof louvers or box vents can range from $100 to $300 per vent, including installation. The number of vents needed will depend on the attic’s size and ventilation requirements.

It’s important to note that these are approximate costs, and prices can vary widely based on your specific circumstances and location. It’s advisable to obtain quotes from local roofing contractors to get a more accurate estimate for your project.

Get the Roof Vents You Need

A roof vent is essential to maintaining a healthy and energy-efficient home. Proper ventilation helps regulate temperature, improve energy efficiency, extend the life of your roof, and prevent moisture-related issues.

While there is a cost associated with adding or upgrading roof ventilation, the long-term benefits in terms of energy savings and home maintenance make it a worthwhile investment in the health and longevity of your home. And the cost may be less than you think! Want to learn more?

Contact Open Box Roofing for a quote!

Over time, roofs can accumulate dirt, debris, algae, moss, and other unsightly contaminants. In other words: bad news for your shingles. A dirty roof not only diminishes your home’s curb appeal but can also lead to costly damage if left unaddressed.

In this detailed guide, we’re breaking down all you need to know about roof cleaning:

Keep reading to learn all about the roof cleaning process.

What is Roof Cleaning?

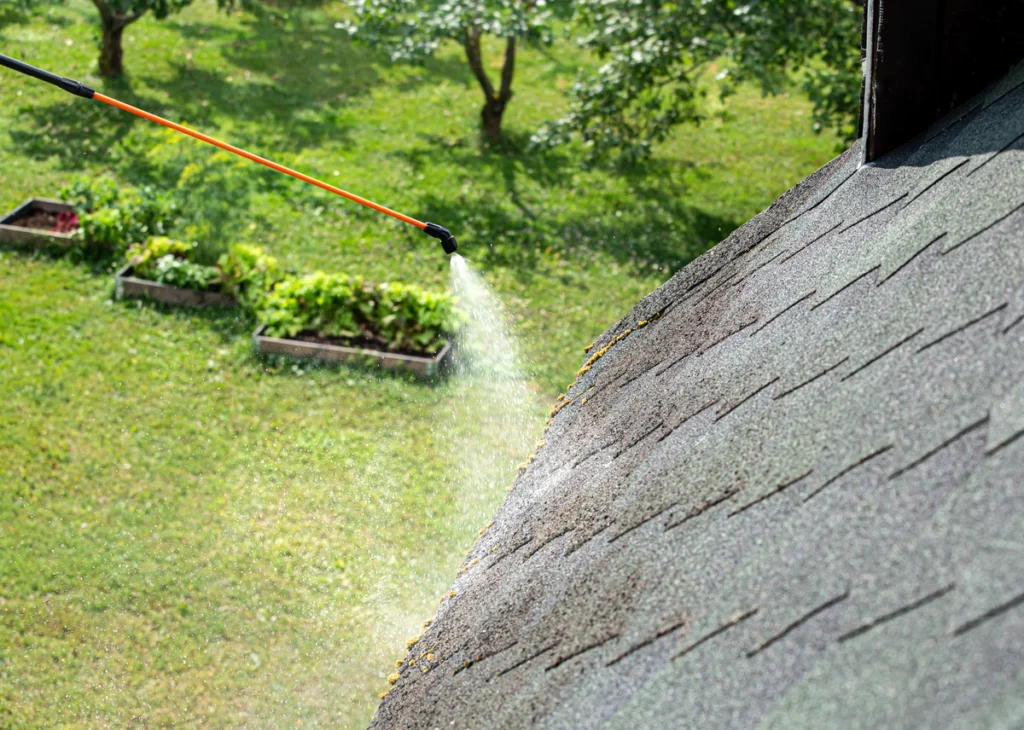
A hose spraying onto a roof

Roof cleaning is the process of removing dirt, moss, algae, lichen, and other contaminants from your roof’s surface. It’s a critical aspect of home maintenance that can help extend your roof’s lifespan, improve its appearance, and prevent potential structural issues.

There are various methods for cleaning roofs, depending on the type of roof and the contaminants present. Common methods include pressure washing, soft washing, and manual cleaning.

Benefits of Roof Cleaning

  • Extend Roof Lifespan: Regular roof cleaning can extend the life of your roof. Contaminants like moss and algae can cause shingle deterioration and weaken the structure, leading to costly repairs or replacements.
  • Enhance Curb Appeal: A clean roof dramatically improves your home’s curb appeal. It can make your house look newer and well-maintained, increasing its resale value.
  • Prevent Structural Damage: Algae and moss growth can trap moisture, leading to rot and damage to your roof’s wooden components. By cleaning your roof, you can prevent these issues from developing.
  • Lower Energy Costs: A clean roof reflects more sunlight and heat, reducing the amount of heat absorbed into your home. This can lead to lower energy bills, especially during hot summer months.
  • Maintain Warranty: Many roofing warranties require regular maintenance and cleaning to remain valid. Neglecting roof maintenance can void your warranty.

How to Clean Your Roof: 8 Steps

Cleaning your roof involves several steps, and it’s essential to take the right precautions to ensure safety and effectiveness:

Materials Needed:

  • Safety gear (harness, helmet, gloves, and non-slip shoes)
  • Garden hose with a spray nozzle
  • Roof cleaner solution (biodegradable and eco-friendly)
  • Scrub brush or broom with soft bristles
  • Pressure washer (optional)
  • Ladder

Step 1: Safety First

Before you begin, ensure you have all the necessary safety equipment. Never attempt to clean your roof without the proper gear, including a harness and helmet. Safety should always be your top priority.

Step 2: Remove Debris

Start by clearing any loose debris like leaves, branches, and twigs from your roof. Use a roof rake or a broom with soft bristles to gently sweep the surface. Be careful not to damage the shingles or tiles.

Step 3: Pre-wet the Roof

Using a garden hose with a spray nozzle, wet the entire roof surface. This helps to loosen dirt and contaminants and prevents the cleaning solution from drying too quickly.

Step 4: Apply Cleaning Solution

Apply a biodegradable and eco-friendly roof cleaning solution to the roof’s surface. Be sure to follow the manufacturer’s instructions for the specific product you’re using. Allow the solution to sit for the recommended time to break down contaminants.

Step 5: Gently Scrub

Using a soft-bristle scrub brush or broom, gently scrub the roof’s surface to agitate the cleaning solution and loosen dirt, moss, and algae. Be cautious not to damage the roofing material while scrubbing.

Step 6: Rinse Thoroughly

After scrubbing, thoroughly rinse the roof with a garden hose or, if necessary, a low-pressure setting on a pressure washer. Start from the top and work your way down to ensure all cleaning solution and contaminants are washed away.

Step 7: Prevent Future Growth

Consider applying a preventive treatment, like zinc or copper strips, to inhibit the regrowth of moss and algae. These metals release ions that deter these organisms from taking hold on your roof.

Step 8: Final Inspection

Inspect your roof for any remaining debris or damage. Make any necessary repairs or replacements promptly to avoid further issues.

How Often Should You Clean Your Roof?

The frequency of roof cleaning depends on various factors, including your location, the type of roof, and the presence of contaminants. As a general guideline:

  • Annual Inspections: It’s a good idea to inspect your roof at least once a year to identify any potential issues.
  • Regular Cleaning: Depending on your location and the level of contamination, you may need to clean your roof every 2 to 5 years. Areas with high humidity or frequent rain may require more frequent cleaning.
  • Preventive Maintenance: Consider installing zinc or copper strips on your roof to prevent the growth of moss and algae, reducing the need for frequent cleaning.
  • Immediate Attention: If you notice significant moss or algae growth or damage to your roof, address it immediately to prevent further deterioration.

Other Roof Maintenance Tips

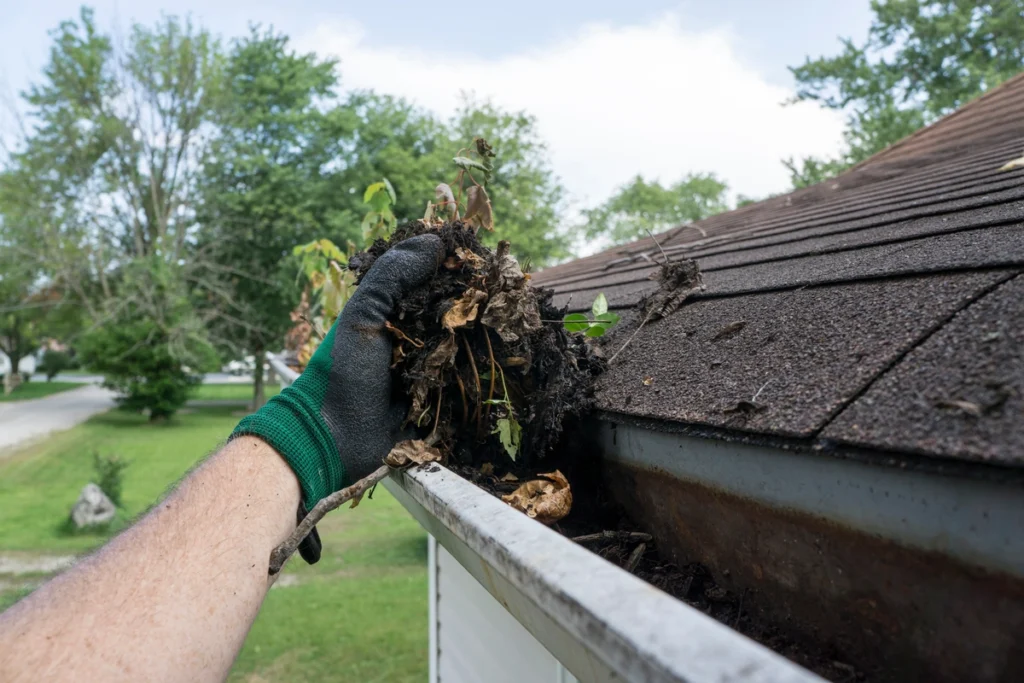
A hand pulling out leaves and dirt from a gutter

Roof cleaning not cutting it? Here are some other roof maintenance tips that you should consider!

  • Trim Overhanging Trees: Overhanging branches can deposit leaves, twigs, and debris onto your roof. Trim them to prevent this and reduce the risk of falling branches.
  • Gutter Maintenance: Keep your gutters clean and free of debris. Clogged gutters can lead to water pooling on your roof, causing damage.
  • Regular Inspections: Periodically inspect your attic for signs of leaks or moisture. Catching problems early can prevent extensive damage.
  • Professional Inspection: Consider hiring a professional roofing contractor for thorough inspection and maintenance services.
  • Warranty Compliance: If you have a roofing warranty, make sure to comply with its maintenance requirements to preserve the warranty’s validity.

Work With a Reputable Roof Cleaning Company

Roof cleaning is crucial to maintaining your home’s appearance and structural integrity. By following the steps outlined in this guide, you can extend the life of your roof, enhance your home’s curb appeal, and prevent costly repairs. Remember that safety should always be a priority when working on your roof, and if you’re unsure or uncomfortable with the process, it’s best to hire a professional to do the job. Open Box Roofing is proud to be your partner in crime when it comes to maintaining your roofing materials! Contact us today to learn more about our roof maintenance services.

Your home’s roof is your home’s #1 defender, and it takes the brunt of Mother Nature’s fury. Among the various weather-related threats, high winds can cause significant damage to your roof.

Understanding the potential risks, signs of damage, and how to address wind damage is crucial for maintaining the integrity of your home. We’re here to help, by explaining the various aspects of wind damage to your roof, including:

Wind speeds that can cause damage

  • Signs of wind damage
  • How to repair it
  • Insurance coverage
  • Finding a reputable roofing contractor

Wind Speeds That Can Damage Your Roof

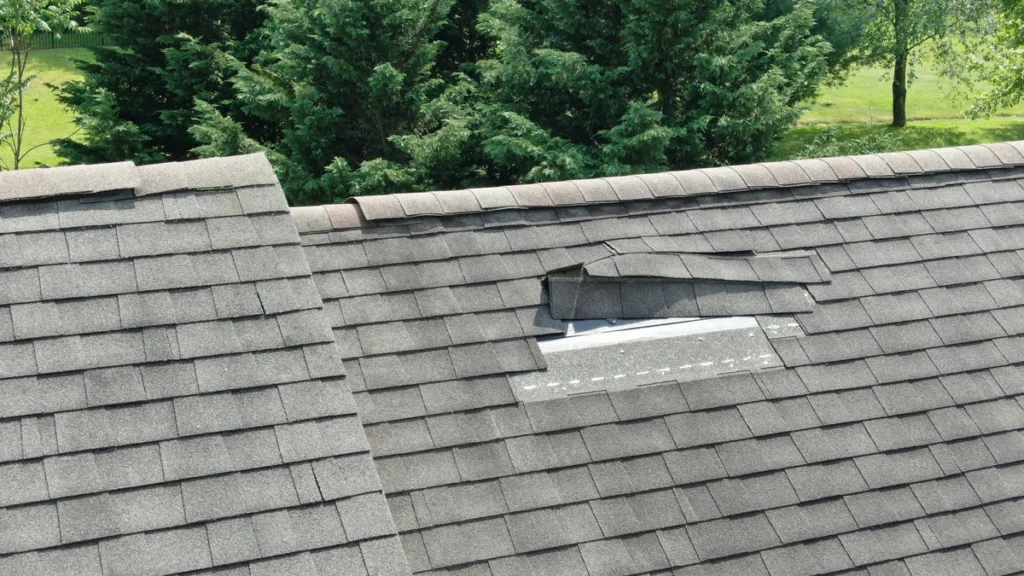
missing shingles

One of the first things to consider when discussing wind damage to your roof is the speed of the wind. Different roofs are designed to withstand different wind speeds, and exceeding these limits can lead to damage. Here are some general guidelines:

  • Light Winds (0-30 mph): Roofs are typically designed to withstand light winds without much trouble. However, even in these conditions, it’s important to ensure that your roof’s shingles, flashing, and fasteners are in good condition.
  • Moderate Winds (30-50 mph): Moderate winds can start to lift shingles and expose the underlying roofing materials. Ensure your roof is well-maintained to prevent damage during these conditions.
  • High Winds (50-70 mph): High winds pose a significant risk to your roof. Shingles may become loose or fly off, leading to potential water infiltration. Regular roof inspections become crucial in high-wind areas.
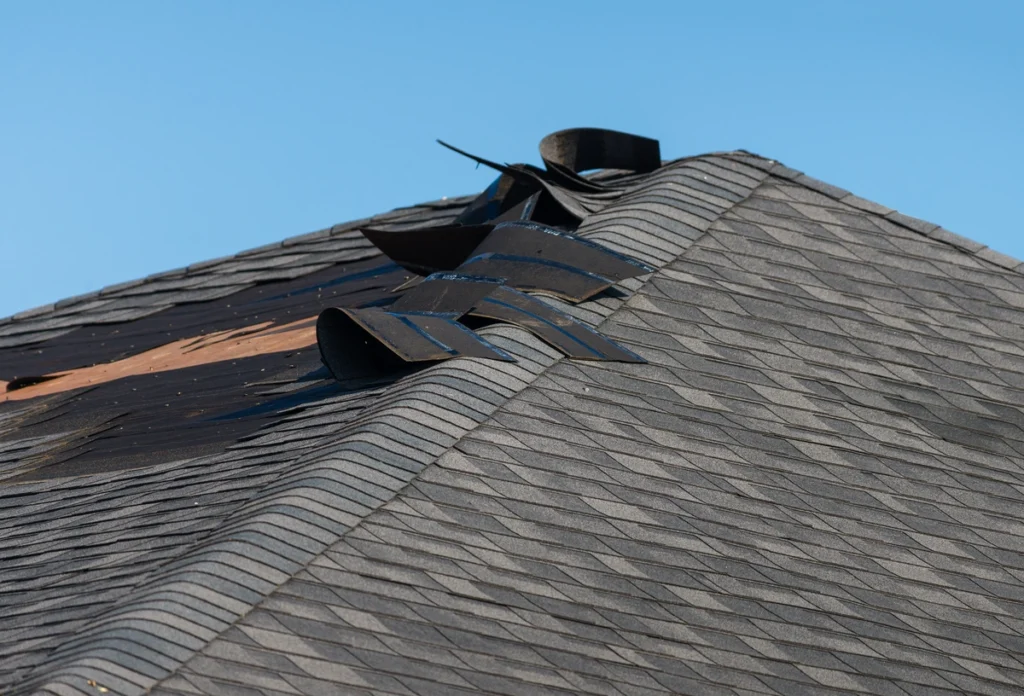
  • Severe Winds (70+ mph): Severe winds can cause extensive damage to your roof. Entire sections of shingles can be ripped away, and structural damage may occur. Homes in hurricane-prone areas should have reinforced roofs.

Signs of Wind Damage to Your Roof

Detecting wind damage early is key to preventing further issues. Here are some common signs to look for:

  • Missing or Lifted Shingles: After a windstorm, inspect your roof for any missing or lifted shingles. These can allow water to infiltrate and cause interior damage.
  • Damaged Flashing: Check for damaged or loose flashing around roof penetrations like vents, chimneys, and skylights. Damaged flashing can lead to leaks.
  • Curling or Cracked Shingles: Wind can cause shingles to curl or crack, making them less effective at protecting your roof.
  • Water Stains on Ceilings: If you notice water stains on your ceilings or walls, it may be a sign of a roof leak caused by wind damage.
  • Debris Accumulation: After a storm, look for debris on your roof, such as branches or leaves. Accumulated debris can cause water to pool and lead to damage over time.

How to Repair Wind Damage in 4 Steps

Addressing wind damage promptly is essential to prevent further deterioration. Depending on the extent of the damage, you may need to take different steps:

1) Temporary Repairs:

If you notice minor damage, such as a few missing shingles, you can perform temporary repairs using roofing cement or sealant. This will prevent immediate leaks.

2) Partial Roof Replacement:

If the damage is more extensive but confined to a specific area, consider a partial roof replacement. This involves replacing damaged shingles and underlayment.

3) Full Roof Replacement:

In severe cases, a full roof replacement may be necessary. This is common if a significant portion of the roof is damaged or if the roof is nearing the end of its lifespan.

4) Professional Inspection:

Always have a professional roofing contractor inspect your roof after a windstorm. They can assess the extent of the damage and recommend the appropriate repairs.

Insurance Coverage for Wind Damage

blown off shingles

Whether or not your homeowner’s insurance covers wind damage depends on your policy and the specific circumstances. Here are some key points to consider:

  • Policy Coverage: Review your homeowner’s insurance policy to understand what types of wind damage are covered. Most policies cover damage caused by windstorms, tornadoes, and hurricanes.
  • Deductibles: Be aware of your policy’s deductible for wind-related claims. You’ll need to pay this amount out of pocket before your insurance kicks in.
  • Document the Damage: After a windstorm, document the damage with photographs and detailed notes. This will be crucial when filing a claim.
  • File a Claim: Contact your insurance company as soon as possible to initiate the claims process. Provide them with all the necessary documentation.
  • Roof Inspection: Your insurance company may send an adjuster to inspect the damage. Be present during this inspection and provide any additional information needed.

Tips for Finding a Reputable Roofing Contractor

When it comes to repairing wind damage to your roof, finding a trustworthy roofing contractor is essential. Follow these steps to ensure you make the right choice:

  • Research: Start by researching local roofing contractors. Check online reviews, ask for recommendations from friends or neighbors, and verify their credentials and licenses.
  • Get Multiple Quotes: Contact several contractors to get quotes for the repair or replacement. This will help you compare prices and services.
  • Ask for References: Request references from the contractors and follow up with past clients to gauge their satisfaction with the work.
  • Check Insurance and Licenses: Ensure that the contractor is properly insured and licensed. This protects both you and the contractor in case of accidents or issues during the project.
  • Written Contract: Always have a detailed written contract that outlines the scope of work, materials to be used, project timeline, and payment schedule.
  • Warranty: Inquire about the warranty offered on the workmanship and materials. A reputable contractor should provide a warranty for their services.

Get Help With Your Insurance Claim

Wind damage to your roof is a common issue that homeowners may face, especially in regions prone to strong winds and storms. By understanding the potential risks, recognizing the signs of damage, knowing how to repair it, and being aware of insurance coverage, you can effectively protect your home from further harm. Remember that finding a reputable roofing contractor is crucial in ensuring your roof is restored to its optimal condition, providing you with peace of mind for years to come.

If you’re looking for a contractor who is ready to help you deal with whatever roof damage comes your way, then Open Box is the clear choice! Contact us today to get help with your wind damage!

When it comes to the components that make up a roofing system, roof flashing is often overlooked. Still, despite that, it plays a crucial role in:

  • Protecting your home from water damage
  • Preventing leaks
  • Maintaining the integrity of your roof

In this comprehensive guide, we’ll explore what roof flashing is, its functions, various types of roof flashing, signs that indicate the need for replacement, and the costs associated with installing new roof flashing.

Need your roof repaired? Get a roof inspection today!

flashing on a brick wall or roof

What Is Roof Flashing?

Roof flashing is a critical element of a roofing system designed to prevent water from infiltrating vulnerable areas of your roof and home. It consists of thin strips or sheets of water-resistant material, typically made of metal (such as aluminum, copper, or galvanized steel) or roofing felt, strategically placed in areas where water is most likely to penetrate.

The primary purpose of roof flashing is to create a watertight barrier and direct water away from sensitive areas, ensuring that your home remains dry and protected.

What Does Roof Flashing Do?

Roof flashing serves several vital functions, all of which contribute to maintaining the longevity and structural integrity of your home:

  • Water Diversion: One of the main functions of roof flashing is to redirect water away from potential entry points. Flashing channels rainwater, melting snow, or other forms of moisture away from vulnerable areas like roof valleys, chimneys, vents, skylights, and intersections between roof slopes.
  • Leak Prevention: By sealing gaps and joints, flashing prevents water from seeping into the underlying roofing materials or the interior of your home. It acts as a barrier that keeps water out, reducing the risk of leaks and water damage.
  • Structural Integrity: Flashing reinforces and protects critical areas of your roof where roofing materials meet other surfaces. This prevents wear and tear at these junctions, preserving the roof’s structural integrity over time.

6 Different Roof Flashing Types to Consider for Your Home

Roof flashing comes in various types, each designed for specific areas of your roof and home. Understanding these types can help you choose the right flashing for your roofing needs:

1) Step Flashing

Typically used for roofing slopes and walls, step flashing consists of L-shaped metal pieces that overlap each other, creating a stepped pattern. These pieces are installed at angles to ensure water is directed away from vulnerable areas.

Remember, step flashing should always interlock with each successive piece as you work your way up the wall. This ensures a continuous barrier against water intrusion.

2) Continuous Flashing (Counter Flashing)

Commonly seen around chimneys, continuous flashing is installed to protect against water infiltration at the base of vertical structures. It covers the top of step flashing and provides additional protection.

Like most flashing, the preferred material for continuous roof flashing is a form of metal such as aluminum, coffer, or galvanized steel.

3) Valley Flashing

Valley flashing is used in roof valleys, where two roof slopes meet.

This type of roof flashing prevents water from pooling and allows it to follow the natural downward slop of your roof’s valley until it either falls off of the roof or enters your home drainage system. It’s important that your gutters aren’t clogged so that water that flow freely, otherwise you may still result in a water damage problem for your roof.

If you notice your roof leaking, reach out to a professional and get your roof’s gutters, flashing, or surface checked immediately.

4) Drip Edge Flashing

Installed along the edge of the roof, drip edge flashing prevents water from seeping under the roofing materials.

Drip edge flashing typically has an “L” shape, fitting to the edge of the roof with one leg connected to the fascia and the other extending over the edge of the roof. The extended leg features a small lip or overhang, and like any good flashing, it should direct water into your home’s gutters, protecting the roof’s edges and fascia.

5) Vent Pipe Flashing

As the name suggests, vent pipe flashing is used around vent pipes and other roof penetrations. It seals the area where the pipe protrudes through the roof, preventing water from entering.

6) Skylight Flashing

Skylight flashing is specifically designed for skylights and sun tunnels. It forms a watertight seal around these openings, ensuring no leaks occur.

Signs That You Need to Replace Your Roof Flashing

A roofer installs chimney flashing

Over time, roof flashing can deteriorate or become damaged, compromising its effectiveness. Here are some common signs that indicate it’s time to replace your roof flashing:

  • Water Leaks: If you notice water stains or signs of moisture on your ceilings or walls, it could be a sign that your flashing is failing and allowing water to infiltrate your home.
  • Rust or Corrosion: Metal flashing can rust or corrode, weakening its protective properties. Inspect your flashing for signs of rust, especially if it’s older or has been exposed to harsh weather conditions.
  • Visible Damage: Damage to the flashing, such as cracks, dents, or missing pieces, can render it ineffective. Regular inspections can help identify any visible issues.
  • Loose or Lifted Flashing: Flashing that has become detached or lifted from its intended position can no longer provide proper protection. It needs to be resecured or replaced.
  • Roof Material Wear: As your roofing materials age, the flashing may deteriorate alongside them. If you’re re-roofing or replacing your roofing materials, it’s a good time to inspect and replace the flashing as well.

How Much Does It Cost to Install New Roof Flashing?

The cost of installing new roof flashing can vary widely depending on several factors, including the type of flashing, the size and complexity of your roof, and your location. On average, you can expect to pay anywhere from $200 to $600 for a professional installation.

Here are some cost considerations to keep in mind:

Type of Flashing

The type of flashing you need will impact the cost. Step flashing and valley flashing are generally less expensive than more complex flashing types like skylight flashing or continuous flashing.

‍♂️ Labor Costs

Labor costs can vary depending on the complexity of the installation and the skill level of the roofing contractor. Labor costs often account for a significant portion of the total expense.

Roof Size and Pitch

Larger roofs or roofs with steep pitches may require more flashing material and labor, increasing the overall cost.

️ Geographic Location

Prices for roofing materials and labor can vary by region, so your location can also influence the total cost.

Additional Repairs

If your roof has underlying issues or needs additional repairs, such as damaged decking or rotten fascia, these costs will add to the overall project expenses.

It’s essential to obtain multiple quotes from reputable roofing contractors in your area to get a more accurate estimate for your specific needs. Additionally, consider the long-term benefits of investing in high-quality flashing to protect your home from potential water damage and costly repairs in the future.

Get Help Caring For Your Roof Flashing Materials

Roof flashing may be a small, often overlooked component of your roofing system, but it plays a critical role in safeguarding your home from water damage and leaks. Understanding the different types of roof flashing, recognizing signs of wear and damage, and knowing the factors that influence installation costs can help you make informed decisions about maintaining and protecting your roof. Regular inspections and timely replacement of damaged flashing will not only extend the life of your roof but also ensure your home stays dry and secure for years to come. Open Box Roofing can help! Contact us today to set up a consultation for your roof system!

Asset 500
Asset 60
Don’t Think, Just Call Pink!
Request a Free Quote

Ready to get started? Contact OpenBox Roofing today to schedule your free inspection and discover how our residential roofing services can protect your home.

Name
Asset 5 2