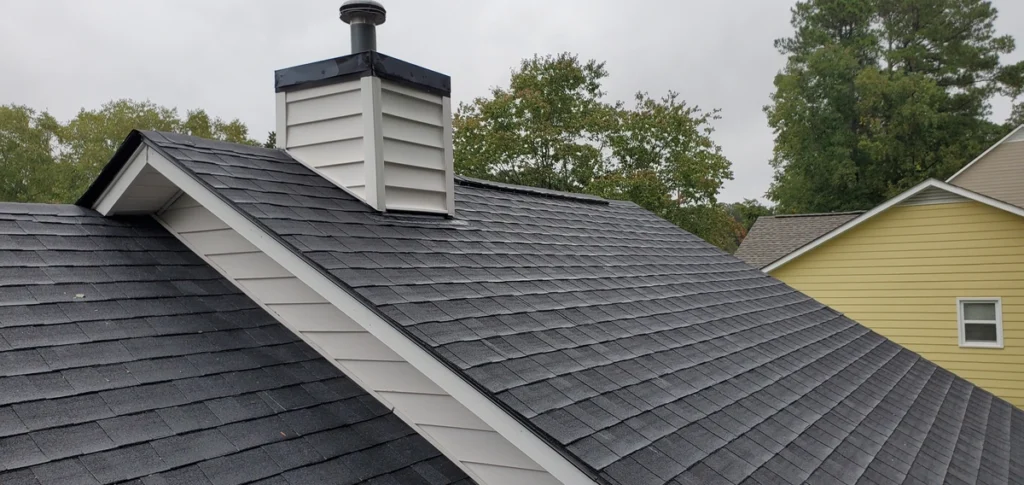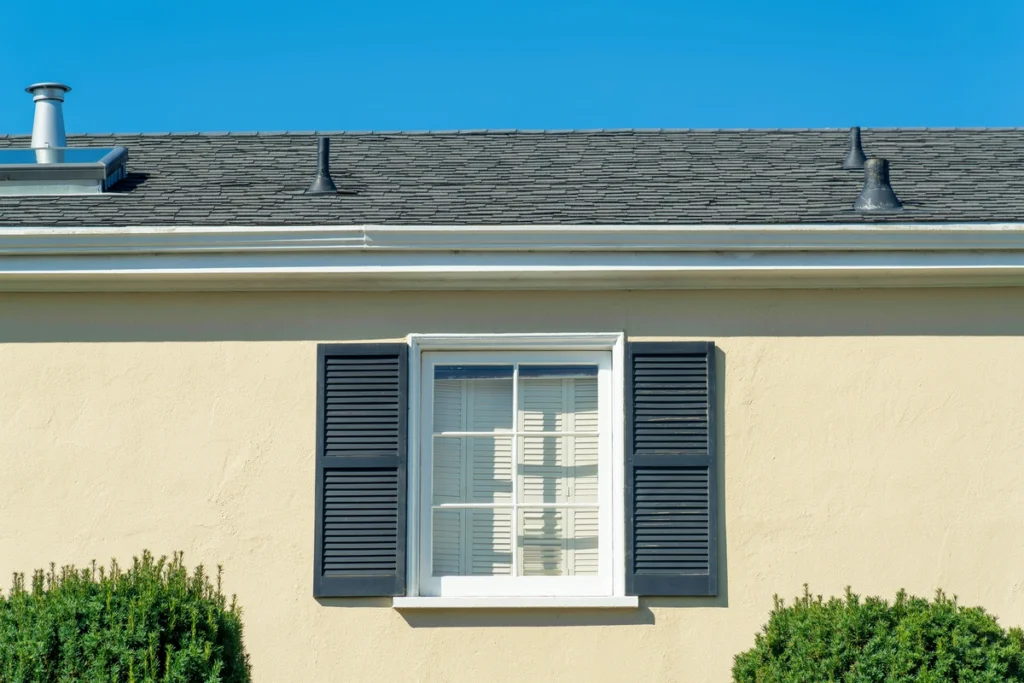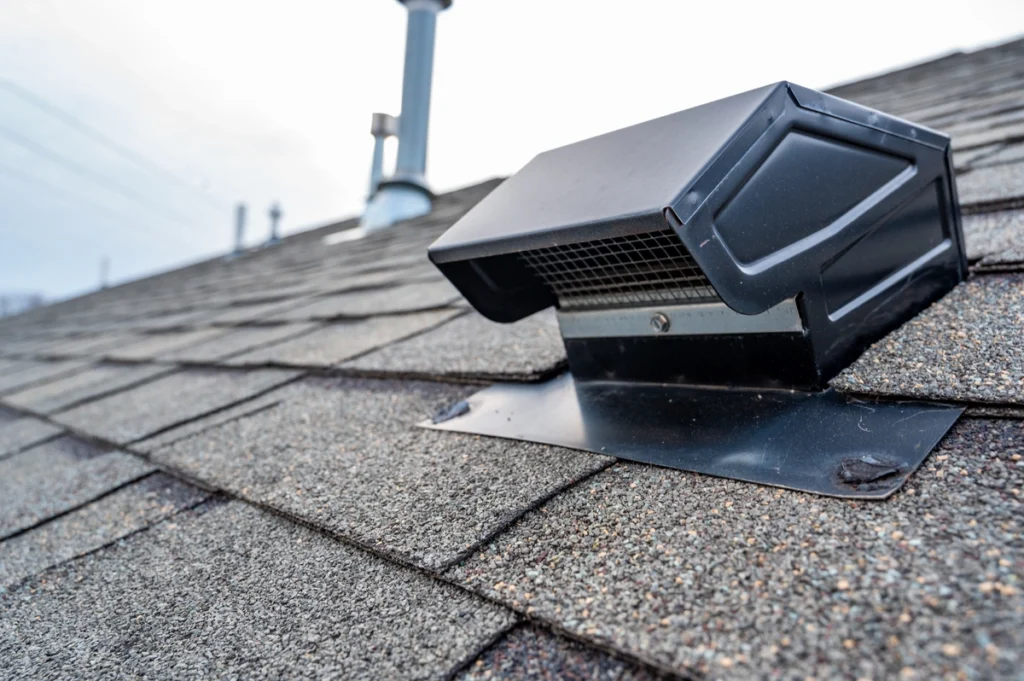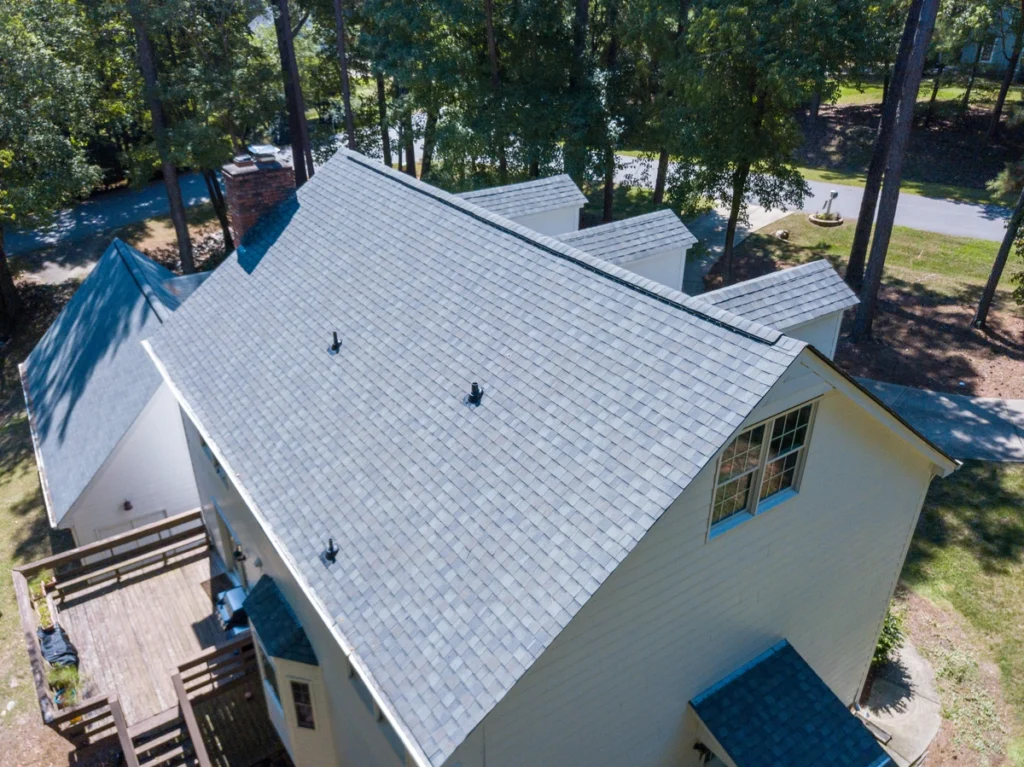
Our Roofing Blog

Stay up to date on the latest roofing tips, trends, and insights from the experts at OpenBox Roofing. Our blog covers everything from seasonal maintenance to choosing the right materials for your home.

Whether you’re researching a new roof, learning about repairs, or exploring sustainability options, our articles make roofing information easy to understand.

Asset 1 7
Featured Article

3 Qualities to Look for When Hiring a James Hardie Siding Contractor

about us hoodie 150x150 1
Posted By: Openbox Roofing
Here at Open Box Roofing, we strongly believe that our customers deserve nothing less than the best. That’s why we’re proud to be a part of the James Hardie Contractor Alliance Program. James Hardie siding is on more than 8 million homes across North America because it’s the best fiber cement siding product on the market, […]
Asset 17

Your roof is one of the most critical components of your home, protecting you and your belongings from the elements. Among the various roofing materials available, asphalt shingles stand out as a popular choice due to their affordability, durability, and ease of installation.

Ready to replace your shingle roof?

But not sure where to start?

In today’s blog post, we’ll walk you through everything you need to know about how to shingle a roof, including:

  • Recognizing signs of roof deterioration
  • Selecting the right type of shingles
  • DIY installation tips
  • Maintenance practices that can extend the lifespan of your roof

Ready for a roof replacement? Keep reading for all the details.

Signs That You Need to Replace Your Shingle Roof

Before diving into the process of shingling your roof, it’s essential to assess whether your current roof needs replacement. Here are some signs that indicate it might be time for a new shingle roof:

  • Missing, cracked, or curled shingles: Inspect your roof for any shingles that are damaged, warped, or missing altogether. These issues can compromise the integrity of your roof and lead to leaks.
  • Age of the roof: Asphalt shingle roofs typically last between 20 to 30 years. If your roof is approaching or has surpassed this lifespan, it’s prudent to consider replacement, even if it appears to be in good condition.
  • Water leaks: Water stains on your ceiling or walls, as well as dampness in your attic, are clear indicators of roof leaks. Promptly address these issues to prevent further damage to your home’s interior and structure.
  • Granule loss: Check your gutters and downspouts for an accumulation of granules from the shingles. Excessive granule loss can signify shingle deterioration and the need for replacement.
  • Sagging roof deck: A sagging roof deck is a severe structural issue that requires immediate attention. It could indicate widespread roof damage and necessitate a complete roof replacement.

Different Types of Asphalt Shingles to Choose From

asphalt shingle installation

When it comes to asphalt shingles, homeowners have several options to choose from, each offering unique features and benefits. Here are the main types of asphalt shingles:

Three-Tab Shingles:

These are the most basic and economical option. Three-tab shingles consist of a single layer with cutouts that create three separate tabs. While they offer affordability, they typically have a shorter lifespan compared to other types.

Architectural Shingles:

Also known as dimensional or laminate shingles, architectural shingles are thicker and more durable than three-tab shingles. They have a multi-dimensional appearance that adds depth and texture to the roof, resembling wood or slate.

Luxury Shingles:

Luxury shingles are premium asphalt shingles designed to mimic the appearance of high-end roofing materials such as cedar shakes or natural slate. They offer superior durability, aesthetic appeal, and often come with extended warranties.

Impact-Resistant Shingles:

These shingles are specially engineered to withstand hail, wind, and other forms of impact. They are an excellent choice for homeowners in regions prone to severe weather conditions.

Cool Roof Shingles:

Cool roof shingles are designed to reflect more sunlight and absorb less heat, helping to reduce energy consumption and lower cooling costs during hot weather.

How to Shingle a Roof in 7 Steps

Shingling a roof is a labor-intensive process that requires careful planning, attention to detail, and the right tools and materials. Here’s a step-by-step guide to shingling your roof:

1) Prepare the Roof

Start by removing the old shingles, flashing, and any damaged or rotted decking. Inspect the roof deck for any structural issues and make necessary repairs.

2) Install Underlayment

Lay down a layer of roofing felt or synthetic underlayment to provide an additional barrier against moisture and improve the roof’s durability.

3) Start at the Bottom:

Begin installing the shingles at the eaves, working your way up the roof in horizontal rows. Overlap each row of shingles according to the manufacturer’s instructions, typically by 4 to 6 inches.

4) Nail the Shingles:

Use roofing nails to secure the shingles to the roof deck, ensuring they are properly aligned and spaced according to the manufacturer’s guidelines.

5) Cut and Trim:

Use a utility knife or roofing scissors to trim shingles as needed to fit around vents, chimneys, and other protrusions on the roof.

6) Install Flashing:

Install metal flashing around roof penetrations and along valleys to direct water away from vulnerable areas and prevent leaks.

7) Finish the Ridge:

Install ridge caps or shingle tabs along the ridge of the roof to provide a finished appearance and further protect against water infiltration.

When You Should Leave It to Professional Roofers
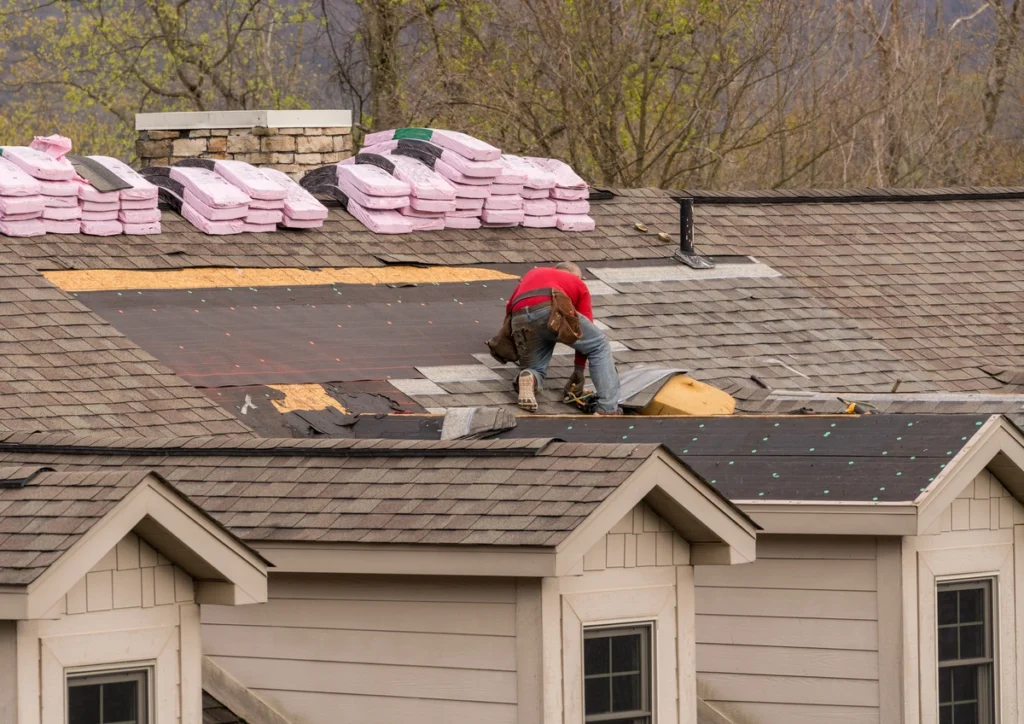
shingling a roof

While shingling a roof is a feasible DIY project for experienced homeowners, there are instances where it’s best to leave the job to a professional roofing contractor. Consider hiring a professional if:

  • The roof is steep or has a complex design: Working on steeply pitched roofs or roofs with multiple angles and features can be dangerous and challenging for inexperienced individuals.
  • You lack the necessary skills and equipment: Properly installing shingles requires specific techniques, tools, and safety gear that may not be readily available to DIYers.
  • Time constraints: Shingling a roof is a time-consuming task that can take several days to complete, depending on the size and complexity of the roof. If you’re short on time or facing inclement weather, hiring a professional can expedite the process and ensure quality results.
  • Warranty considerations: Many roofing manufacturers require professional installation to maintain the warranty coverage on their products. Hiring a certified contractor can help protect your investment and ensure compliance with warranty requirements.

The Cost of Installing a New Shingle Roof

The cost of installing a new shingle roof can vary significantly depending on factors such as the size and pitch of the roof, the type of shingles selected, the complexity of the installation, and the geographic location. On average, homeowners can expect to pay between $5,000 to $10,000 for a standard asphalt shingle roof replacement. However, luxury shingles or specialty installations can drive the cost higher, while factors like roof accessibility and local labor rates can also influence pricing.

It’s essential to obtain multiple quotes from reputable roofing contractors and carefully review the scope of work and materials included in each estimate. While cost is a significant consideration, prioritize quality and reliability when selecting a roofing contractor to ensure the longevity and performance of your new roof.

How to Maintain Your Shingle Roof

Proper maintenance is key to prolonging the lifespan of your shingle roof and preventing costly repairs. Here are some essential maintenance tips to keep your roof in top condition:

  • Regular inspections: Conduct visual inspections of your roof at least twice a year, preferably in the spring and fall, to check for signs of damage, wear, or debris buildup.
  • Clean gutters and downspouts: Clear debris, leaves, and other obstructions from your gutters and downspouts to ensure proper drainage and prevent water from backing up onto the roof.
  • Trim overhanging branches: Trim trees and branches that overhang your roof to prevent them from rubbing against the shingles or causing damage during high winds or storms.
  • Repair leaks promptly: If you notice signs of a roof leak, such as water stains or dampness indoors, address the issue promptly to prevent further damage to your home’s interior and structure.
  • Remove moss and algae: Use a mixture of water and bleach or a commercial roof cleaner to remove moss, algae, and mildew growth from your shingles. Avoid pressure washing, as it can damage the shingles and void the warranty.

Professional Roof Replacement for Your Roof

Shingling a roof is a significant investment that can enhance the curb appeal, durability, and value of your home. By understanding the signs that indicate the need for roof replacement, selecting the right type of shingles, following proper installation techniques, and implementing routine maintenance practices, you can ensure the longevity and performance of your shingle roof for years to come.

Whether you choose to tackle the project yourself or enlist the help of a professional roofing contractor, prioritize quality, safety, and adherence to manufacturer guidelines to achieve optimal results. Contact Open Box Roofing for help installing asphalt shingles for your roof.
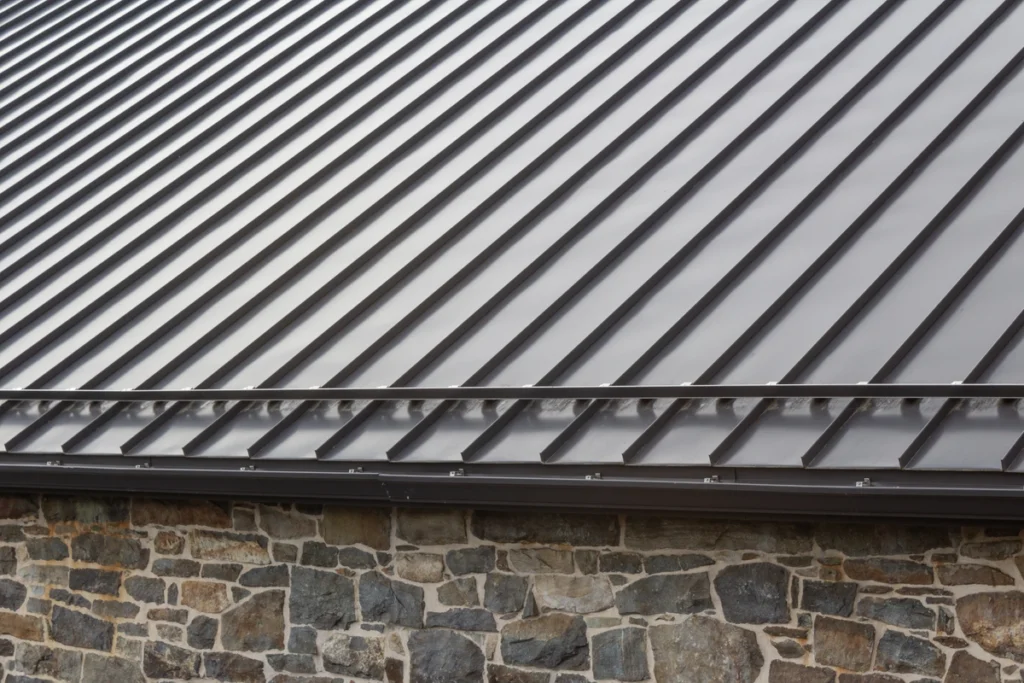
In the realm of roofing materials, standing seam metal roofs have been gaining popularity for their durability, energy efficiency, and modern aesthetic.

However, before diving into the decision to install one, it’s crucial to understand the various aspects associated with standing seam metal roofs, including:

  • Their cost
  • Benefits
  • Maintenance requirements
  • Lifespan

In this comprehensive guide, we’ll explore everything you need to know about your standing seam metal roof cost to help you make an informed decision for your home.

What is a Standing Seam Metal Roof?

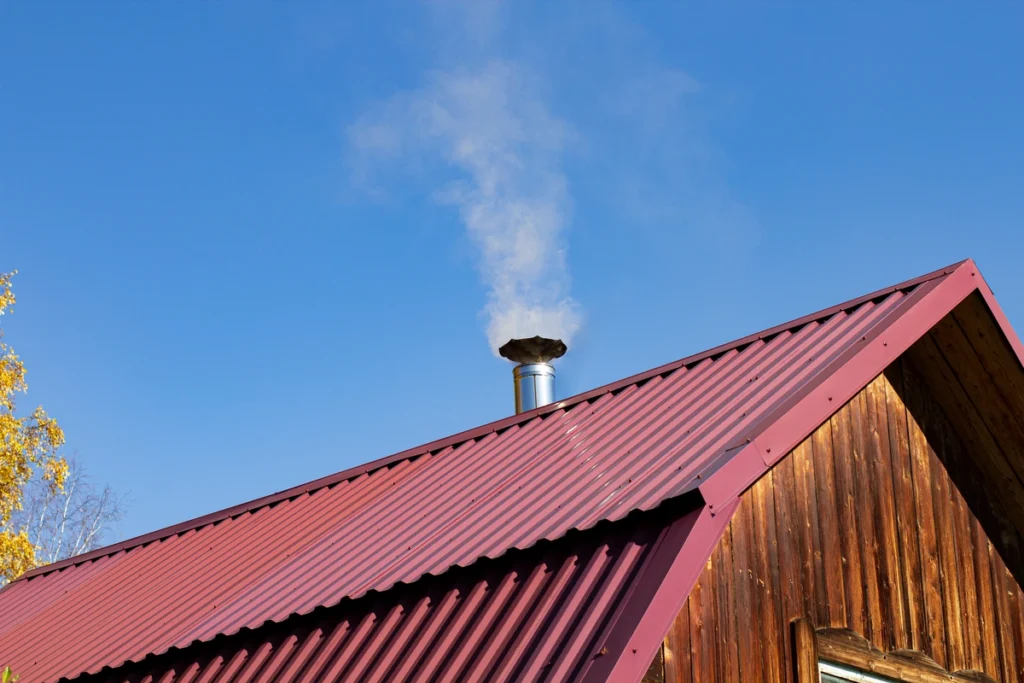
red metal roof

Standing seam metal roofs are a type of roofing system characterized by raised seams that interlock to create a distinctive vertical profile. These seams are typically raised above the level of the roofing panel, providing superior protection against water infiltration and weather damage. Made from materials such as steel, aluminum, or copper, standing seam metal roofs offer exceptional longevity and resistance to corrosion, making them a popular choice for residential and commercial properties alike.

Benefits of Standing Seam Metal Roofs

Considering installing a standing seam metal roof? Here are some of the benefits you can look forward to:

  • Durability: Standing seam metal roofs are known for their exceptional durability, capable of withstanding harsh weather conditions, including high winds, heavy rain, and hail. Their interlocking design also minimizes the risk of leaks and water damage, ensuring long-term protection for your home.
  • Energy Efficiency: Metal roofs are highly reflective, meaning they can effectively reflect solar heat away from the building, reducing the need for air conditioning and lowering energy costs. Additionally, many standing seam metal roofs are available with cool roof coatings, further enhancing their energy-saving properties.
  • Longevity: Compared to traditional roofing materials like asphalt shingles, standing seam metal roofs have a significantly longer lifespan. With proper maintenance, these roofs can last 50 years or more, providing long-term value and peace of mind for homeowners.
  • Aesthetic Appeal: Standing seam metal roofs offer a modern and sophisticated aesthetic that can enhance the curb appeal of any home. Available in a variety of colors and finishes, they can be customized to complement the architectural style and design preferences of the homeowner.

How Much Does a Standing Seam Metal Roof Cost?

The cost of a standing seam metal roof can vary depending on several factors, including the size and complexity of the roof, the type of metal used, and the location of the property. On average, homeowners can expect to pay between $10 and $25 per square foot for materials and installation. For a typical 2,000 square foot roof, this translates to a total cost of $20,000 to $50,000.

Factors Affecting Cost

Metal roofs are more expensive than many other roofing materials. However, many factors can change your overall cost, including:

  • Metal Type: The type of metal used for the roof will have a significant impact on the overall cost. While steel is often the most affordable option, premium metals like copper can be considerably more expensive.
  • Roof Size and Complexity: Larger roofs or those with complex architectural features will require more materials and labor, leading to higher costs.
  • Installation Method: The method of installation can also affect the cost, with options such as mechanical seam or snap-lock systems varying in price.
  • Geographic Location: Labor and material costs can vary depending on the region, so homeowners should consider local market conditions when budgeting for a standing seam metal roof.

When to Replace Your Metal Roof

Despite their exceptional durability, standing seam metal roofs may eventually require replacement due to age, damage, or deterioration. Signs that it may be time to replace your metal roof include:

Excessive Rust or Corrosion:

Over time, exposure to the elements can cause metal roofs to rust or corrode, compromising their structural integrity and waterproofing capabilities.

Leaks or Water Damage:

If you notice signs of water infiltration, such as stains on the ceiling or walls, it may indicate that your metal roof is no longer providing adequate protection against the elements.

Missing or Damaged Panels:

Missing or damaged metal panels can leave your roof vulnerable to leaks and other forms of damage, necessitating replacement to maintain the structural integrity of the roof.

End of Lifespan:

While standing seam metal roofs are known for their longevity, eventually, even the most durable roofs will reach the end of their lifespan and require replacement.

How to Maintain a Standing Seam Metal Roof: 4 Tips

Proper maintenance is essential for maximizing the lifespan and performance of a standing seam metal roof. Here are some tips for maintaining your metal roof:

1) Regular Inspections:

Conduct periodic inspections of your roof to check for signs of damage, such as loose or missing panels, rust or corrosion, and debris buildup.

2) Clean Gutters and Downspouts:

Keep gutters and downspouts clear of leaves, twigs, and other debris to prevent water from backing up and causing damage to the roof.

3) Trim Overhanging Branches:

Trim any overhanging branches that could potentially damage the roof during high winds or storms.

4) Address Repairs Promptly:

If you notice any signs of damage or deterioration, such as rust spots or loose panels, address them promptly to prevent further issues from developing.

5) Schedule Professional Maintenance:

Consider hiring a professional roofing contractor to perform regular maintenance and inspections, especially if you’re not comfortable working at heights or navigating the intricacies of a metal roof.

How Long Does a Standing Seam Metal Roof Last?

standing seam metal roof with stone siding

One of the primary advantages of standing seam metal roofs is their exceptional longevity. With proper maintenance, these roofs can last 50 years or more, outperforming traditional roofing materials like asphalt shingles by a wide margin. Factors that can affect the lifespan of a metal roof include the quality of materials, installation techniques, and environmental factors such as exposure to salt air or industrial pollutants.

Standing Seam Metal Roofing Solutions

Standing seam metal roofs offer a durable, energy-efficient, and aesthetically pleasing roofing solution for homeowners seeking long-term value and protection for their homes. While the initial cost of installation may be higher than traditional roofing materials, the benefits of metal roofs, including their longevity and low maintenance requirements, make them a worthwhile investment in the long run.

How much will your standing seam metal roof cost? Contact Open Box Roofing today to get an estimate.

When it comes to roofing materials, black shingles have become a popular choice for homeowners and builders alike. They offer a classic and timeless look that can complement a wide range of architectural styles.

Ready to upgrade your roof?

But not sure where to start?

In this comprehensive guide, we will delve into the world of black shingles, discussing:

  • Their pros and cons
  • Different styles
  • Installation costs
  • Maintenance tips

The Pros and Cons of Black Shingles

black asphalt shingles roof

Black shingles are pretty commonplace, but are they the best choice for your home? Here are the pros and cons to consider.

✅ The Pros of Black Shingles

  • Aesthetic Appeal: Black shingles exude elegance and sophistication. They provide a striking contrast against light-colored exteriors, making your home stand out in the neighborhood. Whether your house has a traditional or modern design, black shingles can enhance its curb appeal.
  • Heat Absorption: Black shingles are known for their ability to absorb heat efficiently. This can be advantageous in colder climates as it helps in melting snow and ice faster, reducing the risk of ice dams and associated water damage. Additionally, the heat-absorbing properties can lead to energy savings during the winter months.
  • Versatile Compatibility: Black shingles can complement a wide range of architectural styles, from colonial and Victorian to contemporary and minimalist designs. They can adapt to various color schemes and exterior finishes, making them a versatile choice for homeowners.
  • Camouflaging Dirt and Debris: One of the practical benefits of black shingles is their ability to hide dirt and debris, making maintenance easier compared to lighter-colored shingles. This can be especially helpful in areas prone to environmental dust or tree debris.

❌ The Cons of Black Shingles

  • Heat Retention: While black shingles are excellent at absorbing heat, they can also retain it. This can result in higher indoor temperatures during hot summer months, potentially increasing cooling costs. Homeowners in warmer climates should consider this factor when choosing black shingles.
  • Fading: Over time, exposure to sunlight can cause black shingles to fade. The once-rich black color may gradually turn to a dull gray. To mitigate this issue, consider high-quality shingles with UV-resistant coatings.
  • Limited Energy Efficiency: As mentioned earlier, black shingles can lead to increased cooling costs in warm climates. To counter this, homeowners can invest in reflective roofing materials or proper attic insulation to minimize heat transfer.

5 Different Styles of Black Shingles

Black shingles come in various styles, each offering a distinct appearance and benefits. Here are some popular options:

1. Asphalt Shingles

Asphalt shingles are the most common choice for residential roofing. They are cost-effective and come in a wide range of styles, including traditional three-tab, architectural, and designer shingles. Black asphalt shingles are readily available and offer a classic look.

2. Wood Shakes

Wood shakes provide a rustic and natural appearance. Black wood shakes can add a touch of elegance to your home. However, they require more maintenance compared to asphalt shingles, as they may need periodic staining or sealing.

3. Slate Shingles

Slate shingles are known for their durability and timeless beauty. Black slate shingles create a stunning contrast with white or light-colored exteriors. While they are on the expensive side, their longevity can make them a worthwhile investment.

4. Metal Shingles

Metal shingles, such as those made from steel or aluminum, are becoming increasingly popular. They are lightweight, durable, and available in various profiles and colors, including black. Metal shingles can provide a modern and sleek appearance.

Installation Costs of Black Shingles

worker installing black shingles 1

The cost of installing black shingles can vary depending on several factors:

  • Roof Size and Complexity: The larger and more complex your roof, the higher the installation cost. Roofs with multiple angles, dormers, and intricate features require more labor and materials.
  • Choice of Shingle Material: Different shingle materials come at different price points. Asphalt shingles are generally the most affordable, while slate and metal shingles tend to be more expensive.
  • Location and Labor Costs: Labor costs can vary significantly by location. Areas with higher living costs often have higher labor rates. It’s essential to obtain quotes from local roofing contractors to get an accurate estimate.
  • Roof Preparation: If your existing roof needs repairs or removal before installing new shingles, this can add to the overall cost. It’s crucial to assess the condition of your roof’s substrate before installation.

As a rough estimate, installing black asphalt shingles on an average-sized roof can cost between $5,000 to $10,000. However, this cost can increase for premium materials or complex installations.

Maintaining Your Shingle Roof

Proper maintenance is essential to ensure the longevity of your black shingle roof. Here are some tips to keep your roof in excellent condition:

Regular Inspections

Schedule annual inspections to check for loose or damaged shingles, leaks, and signs of wear. Promptly address any issues to prevent further damage.

Clean Gutters and Downspouts

Keep your gutters and downspouts clear of debris to ensure proper drainage. Clogged gutters can lead to water damage to your roof and home.

Trim Overhanging Branches

Trees with branches hanging over your roof can drop leaves, twigs, and debris, which can damage shingles. Trim these branches to prevent potential problems.

Moss and Algae Control

Black shingles are prone to moss and algae growth in humid climates. Use moss and algae-resistant shingles or apply specialized treatments to prevent infestations.

Snow Removal ❄️

In snowy areas, remove excessive snow from your roof to prevent ice dams, which can damage shingles and cause leaks.

Professional Maintenance ‍♂️

Consider hiring professional roofers for periodic maintenance and repairs. They can identify and address issues that may not be visible to the untrained eye.

Get the Roof Shingles Your Home Deserves!

Black shingles offer a range of benefits, including aesthetic appeal and heat absorption, while also presenting some challenges like heat retention and fading. The choice of shingle style and the costs associated with installation depend on various factors, including your preferences and location. Proper maintenance is crucial to ensuring the longevity of your black shingle roof, and regular inspections can help identify and address issues before they become major problems.

If you think black roof shingles are right for your home, contact Open Box Roofing today to schedule your new roof installation! 

When it comes to maintaining a healthy roof and home environment, few elements are as crucial yet often overlooked as proper roof ventilation.

Your roof isn’t just a protective barrier against the elements; it’s a dynamic system that requires adequate airflow to function optimally. But what is a roof vent, and which style is right for you? In this guide, we’ll delve into the world of roof vents:

  • What they are
  • Why they matter
  • How to recognize signs of poor ventilation
  • The various styles available
  • Tips for choosing the right one for your home
  • The costs associated with roof vent installation

Keep reading to learn how to protect your home with roof vent installation!

What is a Roof Vent?

house with roof vents

A roof vent is a vital component of your home’s roofing system designed to facilitate proper air circulation within the attic space. It allows warm, moist air to escape from the attic while drawing in cooler, drier air from the outside. This exchange helps regulate temperature and humidity levels, preventing issues like moisture buildup, mold growth, and excessive heat accumulation, which can damage roofing materials and compromise indoor air quality.

Why Roof Ventilation Matters

Proper roof ventilation offers a plethora of benefits that extend beyond preserving the structural integrity of your home. Here are a few compelling reasons why it’s essential:

  • Moisture Control: Effective ventilation helps prevent moisture buildup in the attic, reducing the risk of mold, mildew, and rot.
  • Energy Efficiency: By regulating attic temperature, roof vents can lower the demand on your HVAC system, leading to energy savings and reduced utility bills.
  • Extended Roof Lifespan: Adequate airflow helps prevent shingle damage and premature deterioration by minimizing temperature fluctuations and moisture-related issues.
  • Enhanced Indoor Comfort: Balanced ventilation promotes a more comfortable indoor environment by preventing hot spots and improving overall air quality.

Signs of Poorly Ventilated Roof

Identifying signs of inadequate roof ventilation is crucial for addressing potential issues before they escalate. Keep an eye out for the following red flags:

  • Excessive Heat in Attic: If your attic feels excessively hot, especially during warmer months, it’s a clear indication of insufficient ventilation.
  • Condensation or Frost Buildup: Moisture accumulation on attic surfaces or frost formation during colder seasons signals poor airflow and potential moisture-related problems.
  • Mold or Mildew Growth: The presence of mold or mildew in the attic indicates excess moisture, often caused by inadequate ventilation.
  • Roof Damage: Shingle curling, warping, or premature deterioration can result from prolonged exposure to heat and moisture due to poor ventilation.

5 Different Styles of Roof Vents

several types of roof vents

Roof vents come in various styles, each offering unique features and installation requirements. Here are some common types:

1) Ridge Vents:

Installed along the peak of the roof, ridge vents provide continuous airflow across the entire attic space, making them highly efficient and aesthetically pleasing.

2) Static Vents:

These non-mechanical vents come in different shapes, such as box, slant-back, or turbine, and rely on natural convection to expel hot air from the attic.

3) Powered Vents:

Equipped with electric fans, powered vents actively draw air out of the attic, making them ideal for homes with limited natural ventilation or specific airflow challenges.

4) Gable Vents:

Positioned near the roof’s gables, these vents facilitate air exchange but may be less effective than other options, particularly in windy conditions.

5) Soffit Vents:

Installed under the eaves, soffit vents allow fresh air to enter the attic, creating a balanced airflow system when combined with exhaust vents like ridge or gable vents.

Choosing the Right Roof Vent for Your Home

Selecting the appropriate roof vent involves considering various factors, including your roof’s design, climate, attic size, and ventilation requirements. Here’s a step-by-step guide to help you make an informed decision:

  • Assess Your Attic: Start by evaluating your attic space to determine its size, layout, and existing ventilation components. Consider factors such as insulation levels and potential obstructions that may impact airflow.
  • Research Ventilation Options: Familiarize yourself with the different types of roof vents available, their features, and installation requirements. Take into account your roof’s pitch, material, and architectural style when selecting a suitable vent style.
  • Calculate Ventilation Requirements: Use industry guidelines or consult with a roofing professional to calculate the optimal ventilation capacity for your attic based on its square footage and the climate zone you reside in.
  • Consider Additional Features: Depending on your preferences and budget, explore additional features such as integrated screens for pest prevention, weather-resistant materials, or energy-efficient designs.
  • Consult with Experts: If you’re uncertain about which roof vent is best suited for your home, seek advice from experienced roofing contractors or ventilation specialists who can provide personalized recommendations based on your specific needs.

Installing a Roof Vent: A 7 Step Guide

While installing roof vents is typically a job best left to experienced professionals, understanding the basic process can help you appreciate the intricacies involved and ensure that the installation is done correctly. Here’s a simplified guide to installing a roof vent:

1) Choose the Right Location:

Determine the optimal placement for your roof vent based on attic size, roof pitch, and ventilation requirements. Ideally, vents should be installed near the roof’s peak to facilitate efficient airflow.

2) Prepare the Roof Surface:

Clear any debris or obstructions from the area where the vent will be installed. If necessary, remove shingles or roofing material to create a flat, stable surface for mounting the vent.

3) Mark and Cut an Opening:

Using appropriate measurements and guidelines provided with the vent, mark the outline of the vent’s opening on the roof surface. Carefully cut out the marked area using a saw or rotary tool, taking care to avoid damaging surrounding roofing materials.

4) Install the Vent:

Position the vent over the opening and secure it in place using roofing nails or screws, ensuring a snug fit and proper alignment with the roof surface. Apply roofing sealant around the edges of the vent to create a watertight seal and prevent leaks.

5) Connect and Seal:

If your vent requires additional components such as flashing or ductwork, follow manufacturer instructions to securely attach and seal these elements to ensure proper functionality and weather resistance.

6) Test and Inspect:

Once the vent is installed, conduct a visual inspection to ensure it is securely fastened and sealed. Test the vent by running a smoke or airflow test to verify proper ventilation and address any issues promptly.

7) Finalize Roofing:

Replace any removed shingles or roofing material around the vent opening, ensuring that they are properly aligned and secured to maintain the integrity of the roof’s protective barrier.

While DIY installation may be feasible for some homeowners, it’s essential to prioritize safety and quality to avoid potential damage or improper ventilation. When in doubt, consult with roofing professionals or ventilation experts who can provide guidance and ensure that your roof vent is installed correctly for optimal performance and longevity.

Cost of Roof Vent Installation

The cost of installing roof vents varies depending on several factors, including the type of vent selected, the complexity of the installation, and labor costs in your area. Here’s a breakdown of potential expenses:

Ventilation Products:

The price of roof vents can range from $10 to $200 or more per unit, depending on the style, material, and brand. Higher-quality vents may come with a higher upfront cost but offer better durability and performance.

Labor Costs:

Professional installation typically incurs labor fees ranging from $300 to $1,500 or more, depending on the number of vents, roof complexity, and accessibility. Complex installations or roof modifications may require additional labor and incur higher costs.

Additional Materials:

In some cases, additional materials such as flashing, sealants, or ventilation baffles may be necessary to ensure proper installation and functionality, adding to the overall project cost.

Permitting and Inspection Fees:

Depending on local building codes and regulations, you may need to obtain permits for roof vent installation, which can incur additional fees. Factor in any inspection costs required to ensure compliance with safety and building standards.

Proper Roof Vent Installation For Your Home

Investing in proper roof ventilation is a proactive measure that can safeguard your home against a myriad of issues while promoting a healthier, more comfortable living environment. By understanding the importance of roof vents, recognizing signs of poor ventilation, exploring different styles, and making informed decisions based on your home’s unique needs and budget, you can ensure optimal airflow and long-term protection for your roof and attic space.

Whether you’re considering a simple upgrade or a comprehensive ventilation overhaul, consulting with roofing professionals and adhering to best practices will help you achieve optimal results and maximize the benefits of a well-ventilated roof. Contact Open Box Roofing to install a roof vent in your home.

Asphalt shingle roofs stand out as one of the most popular choices for homeowners across the United States when it comes to roofing options. They offer a balance of:

  • Affordability
  • Durability
  • Aesthetics

This makes them a preferred roofing material for many. In this comprehensive guide, we will delve into shingle roof cost averages, exploring its pros and cons, pricing factors, lifespan, maintenance requirements, and the telltale signs that it’s time to replace your shingle roof.

Keep reading to learn how much!

brick house with a gray asphalt shingle roof

✅ Pros of an Asphalt Shingle Roof

If you’re wondering if asphalt shingles are right for you, you need to check out our list of benefits!

  • Affordability: Asphalt shingle roofs are known for their cost-effectiveness. They are significantly cheaper to install compared to many other roofing materials, making them an attractive option for budget-conscious homeowners.
  • Variety of Styles: Asphalt shingles come in a wide range of styles, colors, and textures. This versatility allows homeowners to choose a design that complements the aesthetics of their homes, from traditional to modern.
  • Ease of Installation: Roofing contractors find asphalt shingle installation relatively straightforward, which can lead to quicker and less costly installations. This can be especially beneficial when you need to replace your roof in a hurry due to weather damage or other issues.
  • Weather Resistance: Asphalt shingles are designed to withstand various weather conditions, including rain, wind, and hail. High-quality shingles can provide excellent protection against the elements for many years.
  • Repairs are Manageable: In the event of damage, repairing asphalt shingles is generally more straightforward and cost-effective than repairing other roofing materials. Individual damaged shingles can be replaced without the need for a full roof replacement.

❌ Cons of an Asphalt Shingle Roof

A new shingle roof may work for some people, but for others, the following downsides are a reason to pass:

  • Lifespan: While asphalt shingle roofs are durable, they have a shorter lifespan compared to some other roofing materials like metal or tile. On average, asphalt shingle roofs can last anywhere from 15 to 30 years, depending on the quality of the shingles and environmental factors.
  • Maintenance Required: Although they are relatively low-maintenance, asphalt shingle roofs do require some care. Periodic inspections, cleaning of debris, and maintenance to prevent moss and algae growth are essential to prolong their lifespan.
  • Environmental Impact: Asphalt shingles are petroleum-based products, and their production has environmental implications. Some homeowners may prefer more eco-friendly roofing options, such as metal or wood, to reduce their environmental footprint.

How Much Does an Asphalt Shingle Roof Cost?

The cost of installing an asphalt shingle roof can vary widely depending on several factors:

  • Roof Size: The larger your roof, the more materials and labor will be required, increasing the overall cost.
  • Roof Pitch and Complexity: Steeper roofs or those with complex designs may require more time and labor, adding to the cost.
  • Quality of Shingles: The type and quality of asphalt shingles you choose will impact the cost. Basic three-tab shingles are more affordable than architectural or premium shingles.
  • Location: Regional factors such as labor costs, climate, and local building codes can affect pricing.
  • Tear-off and Disposal: If your existing roof needs to be removed before installation, this will add to the cost.

As a rough estimate, the cost of installing an asphalt shingle roof on an average-sized home can range from $5,000 to $12,000 or more. It’s essential to obtain quotes from reputable roofing contractors to get an accurate estimate tailored to your specific project.

How Long Does an Asphalt Shingle Roof Last?

The lifespan of an asphalt shingle roof depends on several factors:

  • Quality of Shingles: High-quality asphalt shingles can last longer than lower-grade options. Premium shingles can have a lifespan of 25 to 30 years or more, while basic three-tab shingles may last 15 to 20 years.
  • Installation: Proper installation by experienced professionals can significantly impact the longevity of your roof. Poor installation can lead to premature shingle failure.
  • Climate: Roof longevity can be affected by the local climate. Extremes in temperature, humidity, and exposure to severe weather can shorten the lifespan of asphalt shingles.
  • Maintenance: Regular maintenance, such as inspections, cleaning, and minor repairs, can extend the life of your asphalt shingle roof.

How to Maintain Your Asphalt Shingle Roof: 6 Steps

Proper maintenance is crucial to maximize the lifespan of your asphalt shingle roof and ensure it continues to protect your home effectively. Here are some maintenance tasks to consider:

1) Regular Inspections:

Conduct visual inspections of your roof at least once a year. Look for signs of damage, loose or missing shingles, and areas where moss or algae may be growing.

2) Clean Gutters and Downspouts:

Keep your gutters and downspouts clean and free of debris to prevent water backup and ice dam formation, which can damage your shingles.

3) Remove Debris:

Clear leaves, branches, and other debris from your roof’s surface to prevent moisture buildup and potential damage.

4) Prevent Moss and Algae:

If you notice moss or algae growth on your shingles, consider applying zinc or copper strips to prevent further growth. Do not pressure wash your shingles, as this can cause damage.

5) Repair Promptly:

Address any damaged or missing shingles promptly to prevent water infiltration and further deterioration of your roof.

6) Professional Inspection:

Every few years, consider hiring a professional roofing contractor to conduct a comprehensive inspection and maintenance check.

5 Signs That You Need to Replace Your Shingle Roof

birds eye view of a gray shingle roof

Even with proper maintenance, asphalt shingle roofs have a finite lifespan, and there will come a time when replacement is necessary. Here are some signs that indicate it’s time to replace your shingle roof:

1) Widespread Shingle Damage:

If a significant portion of your shingles is damaged, missing, or curling, it may be more cost-effective to replace the entire roof rather than continually repairing individual shingles.

2) Frequent Leaks:

Persistent roof leaks, especially after heavy rain or snow, are a clear indication that your shingles are no longer providing adequate protection.

3) Visible Sagging or Drooping:

An uneven or sagging roofline can be a sign of structural issues or water damage in the underlying layers, necessitating a roof replacement.

4) Excessive Granule Loss:

Asphalt shingles have protective granules that can wear off over time. If you notice a significant amount of granule loss in your gutters or on the ground, your shingles may be nearing the end of their life.

5) Old Age:

If your roof is approaching the end of its expected lifespan (typically 20-30 years), it’s a good idea to start considering a replacement, even if there are no visible signs of damage.

Learn More About Your Roof Replacement Costs

Asphalt shingle roofs offer a cost-effective and versatile roofing solution for homeowners. When the time does come for a replacement, consider investing in high-quality materials and professional installation to maximize the lifespan and performance of your roof.Want to learn more about your shingle roof costs? Open Box Roofing can help. Contact us today to get an estimate for your roof replacement.

When nature unleashes its fury, roofs often bear the brunt of the assault. From fierce winds to pounding hail and relentless rain, storms can wreak havoc on even the sturdiest of roofs.

In the aftermath, it is crucial to understand:

In this guide, we’ll delve into the realm of storm damage roof repair, equipping homeowners with the knowledge needed to navigate the restoration journey seamlessly.

Types of Storm Damage

Storm damage can come in all sorts of forms, including:

  • Wind Damage: High winds can cause shingles to lift, curl, or even detach entirely. Additionally, strong gusts may lead to debris impact, resulting in dents, cracks, or punctures on the roof surface.
  • Hail Damage: Hailstones can range from small pellets to large chunks of ice, leaving behind an array of destruction. Dents, dings, and granule loss on shingles are common signs of hail damage.
  • Water Damage: Persistent rain and flooding can compromise the integrity of the roof, leading to leaks, rot, and mold growth. Poorly sealed or damaged flashing exacerbates water infiltration issues.
  • Fallen Debris: Branches, tree limbs, or even entire trees can fall onto roofs during storms, causing structural damage, punctures, and dislodged shingles.

Recognizing Storm Damage on Your Roof

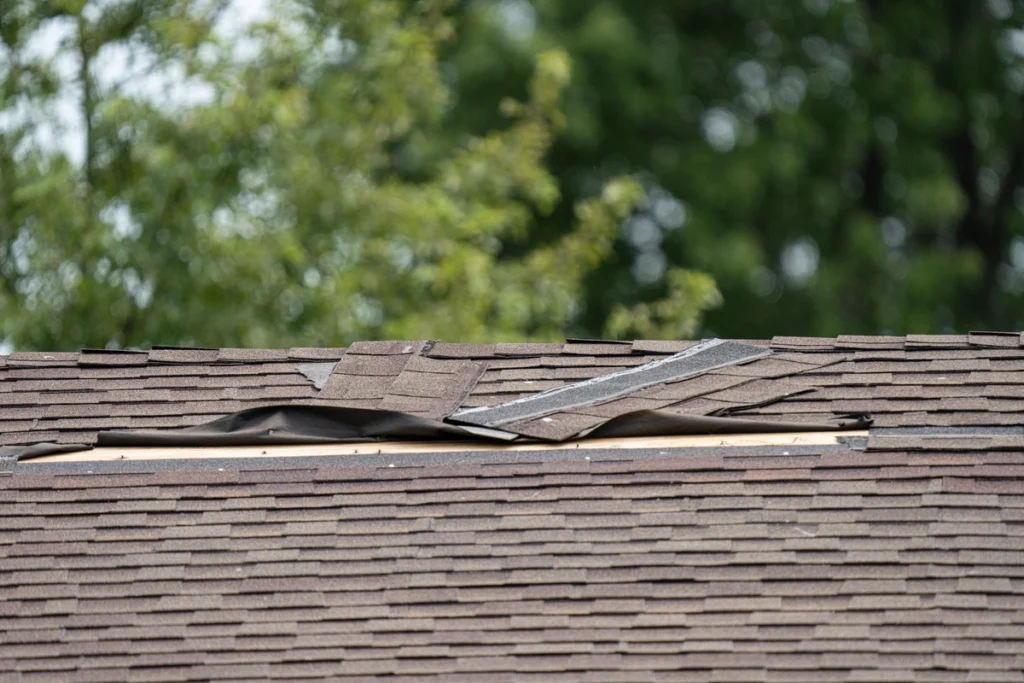
blown off shingles

Inspecting your roof post-storm is imperative to identify any signs of damage promptly. Look for:

  • Missing, cracked, or curled shingles
  • Dents, dimples, or cracks on shingle surfaces
  • Water stains or dampness on ceilings and walls
  • Loose or damaged flashing around vents, chimneys, and skylights
  • Debris accumulation or visible structural damage

Repairing Roof Damage in 6 Steps

While minor repairs such as replacing a few shingles or sealing small leaks can be DIY endeavors, extensive damage warrants professional intervention. Steps for roof repair may include:

1) Assessment

A thorough inspection by a qualified roofing contractor to assess the extent of damage and determine the most suitable repair approach.

2) Temporary Fixes

Immediate measures like tarping or patching to prevent further water infiltration and protect the interior of the home.

3) Shingle Replacement

Removal and replacement of damaged or missing shingles, ensuring proper alignment and sealing to prevent future leaks.

4) Flashing Repair ⚒️

Repair or replacement of damaged flashing to prevent water intrusion at vulnerable areas.

5) Structural Repairs ️

Addressing any underlying structural damage, such as warped decking or compromised support beams.

6) Waterproofing

Application of waterproofing materials or coatings to enhance the roof’s resilience against future storms.

Why You Should Hire a Professional Roofing Contractor

roof repair

While the temptation to undertake roof repairs independently may arise, entrusting the task to professionals offers several benefits:

  • Expertise: Qualified roofing contractors possess the knowledge, skills, and experience necessary to accurately assess damage and execute repairs effectively.
  • Safety: Roof work can be hazardous, especially in the aftermath of a storm. Professionals are equipped with the proper safety gear and adhere to stringent safety protocols.
  • Quality Assurance: Professional repairs ensure that issues are addressed comprehensively, minimizing the risk of future problems and prolonging the roof’s lifespan.
  • Warranty Protection: Many roofing contractors offer warranties on their workmanship, providing added peace of mind and recourse in the event of post-repair issues.

Should You File An Insurance Claim?

Whether or not your insurance company will cover storm damage repairs depends on various factors, including your policy coverage, the cause and extent of damage, and deductible considerations.

Generally, homeowners’ insurance policies may cover storm-related damage, including roof repairs, if the cause is deemed sudden and accidental, such as wind or hail. However, coverage exclusions, limitations, and deductibles may apply, so it’s essential to review your policy details and consult with your insurance provider to understand your coverage fully.

Cost of Repairs

The cost of storm damage roof repairs varies depending on factors such as the extent of damage, roof type, materials required, and labor costs. Minor repairs, such as replacing a few shingles, may cost a few hundred dollars, while more extensive repairs or roof replacements can range from several thousand to tens of thousands of dollars.

Factors such as the need for structural repairs, material upgrades, and additional services like waterproofing or flashing replacement can influence overall costs. Obtaining multiple quotes from reputable roofing contractors and discussing financing options or insurance coverage can help homeowners navigate the financial aspect of roof repair effectively.

A Trusted Roofing Company for Your Home

Storm damage to your roof can be daunting, but with proactive inspection, prompt repairs, and the guidance of professional roofing contractors, the road to restoration becomes more manageable. By understanding the types of damage, recognizing warning signs, and investing in expert repairs, homeowners can safeguard their homes against the elements and ensure a sturdy, weather-resistant roof for years to come. Remember, when it comes to storm damage roof repair, swift action and professional expertise are key to weathering the storm successfully. That’s where Open Box Roofing comes in!

Contact us today to learn how we can help you handle roof storm damage.

Asset 500
Asset 60
Don’t Think, Just Call Pink!
Request a Free Quote

Ready to get started? Contact OpenBox Roofing today to schedule your free inspection and discover how our residential roofing services can protect your home.

Name
Asset 5 2